Pages

Showing posts with label no social life. Show all posts

Thursday, April 29, 2010

Nail Board things......


 I really, really wish I could have found something like this made already. I know nail wheels are awesome, but I like color swatches lined up in a row much better.

hot glue gun glue is hot 


♥ That should be name for one of my franken polish's.....just be careful whenever you use it ♥

Also if you decide to do this, and buy dollar store nails, make sure they are okay to polish, some cheap dollar store nails are NOT GOOD and will wrinkle and pucker when you apply polish to them ( why they even sell them.................... I don't know )

 When I painted these, I made sure to make an excel spreadsheet with the names of the polish and how many coats.  Eventually I plan to print them out on sticker paper and affix it to the back of each nail board thing.

I hope I sorta explained this properly I need to whip up a few more when i get more nails....I plan on doing a better job explaining with better photos....

So I would say, that this was a time consuming project. I glued 600 false nails to 1 1/2 inch by 8 inch pieces of foam board. My reason for doing things this way, was so when I open my top drawer of my Helmer or Melmer ( which I don't have....yet) these will be standing upright and I will easily be able to see all my polishes swatched. I wish I took pictures of the process = but I will be doing this again soon I just need to hop over to the Dollarama and grab more nails, though.

I also find that it will be much easier to photograph these swatches, if I add polish to these before I actually wear the polish.... by propping them up in my light box, or just a sheet of poster-board that I sometimes use.

Essentially, I cut up a piece of this lightweight foam board to the sizes I wanted and glued the nails on with a glue gun and hot glue. It was very easy but time consuming. In the evening I would just pop a movie on and go to town glue-ing. I laid the piece of foam board on a flat surface, and butted up another piece against it, so that when i applied a blob of hot glue to it and affixed the nail to the board it would stay I will work on a visual for that and when I hit the dollar store on the weekend, I may try to produce a video.

In total for 600 nails, it probably took 4 hours......however I actually enjoy these types of menial crafts and tasks, so it wasn't so bad.

I really just eyeballed where their placement was, but I suppose marking off where they should be would help to keep them spaced evenly..... as long as they stayed "straight'' to the actual board and lined up properly I am happy

Some of these nails had sharp edges, and that little bit of plastic left over from snapping them out of the mold at the factory. So I had to file most of them after they were glued down.


 below, the smaller piece of foam board I used to keep my false nails straight and prevent them from dropping off the edge of the foam board.
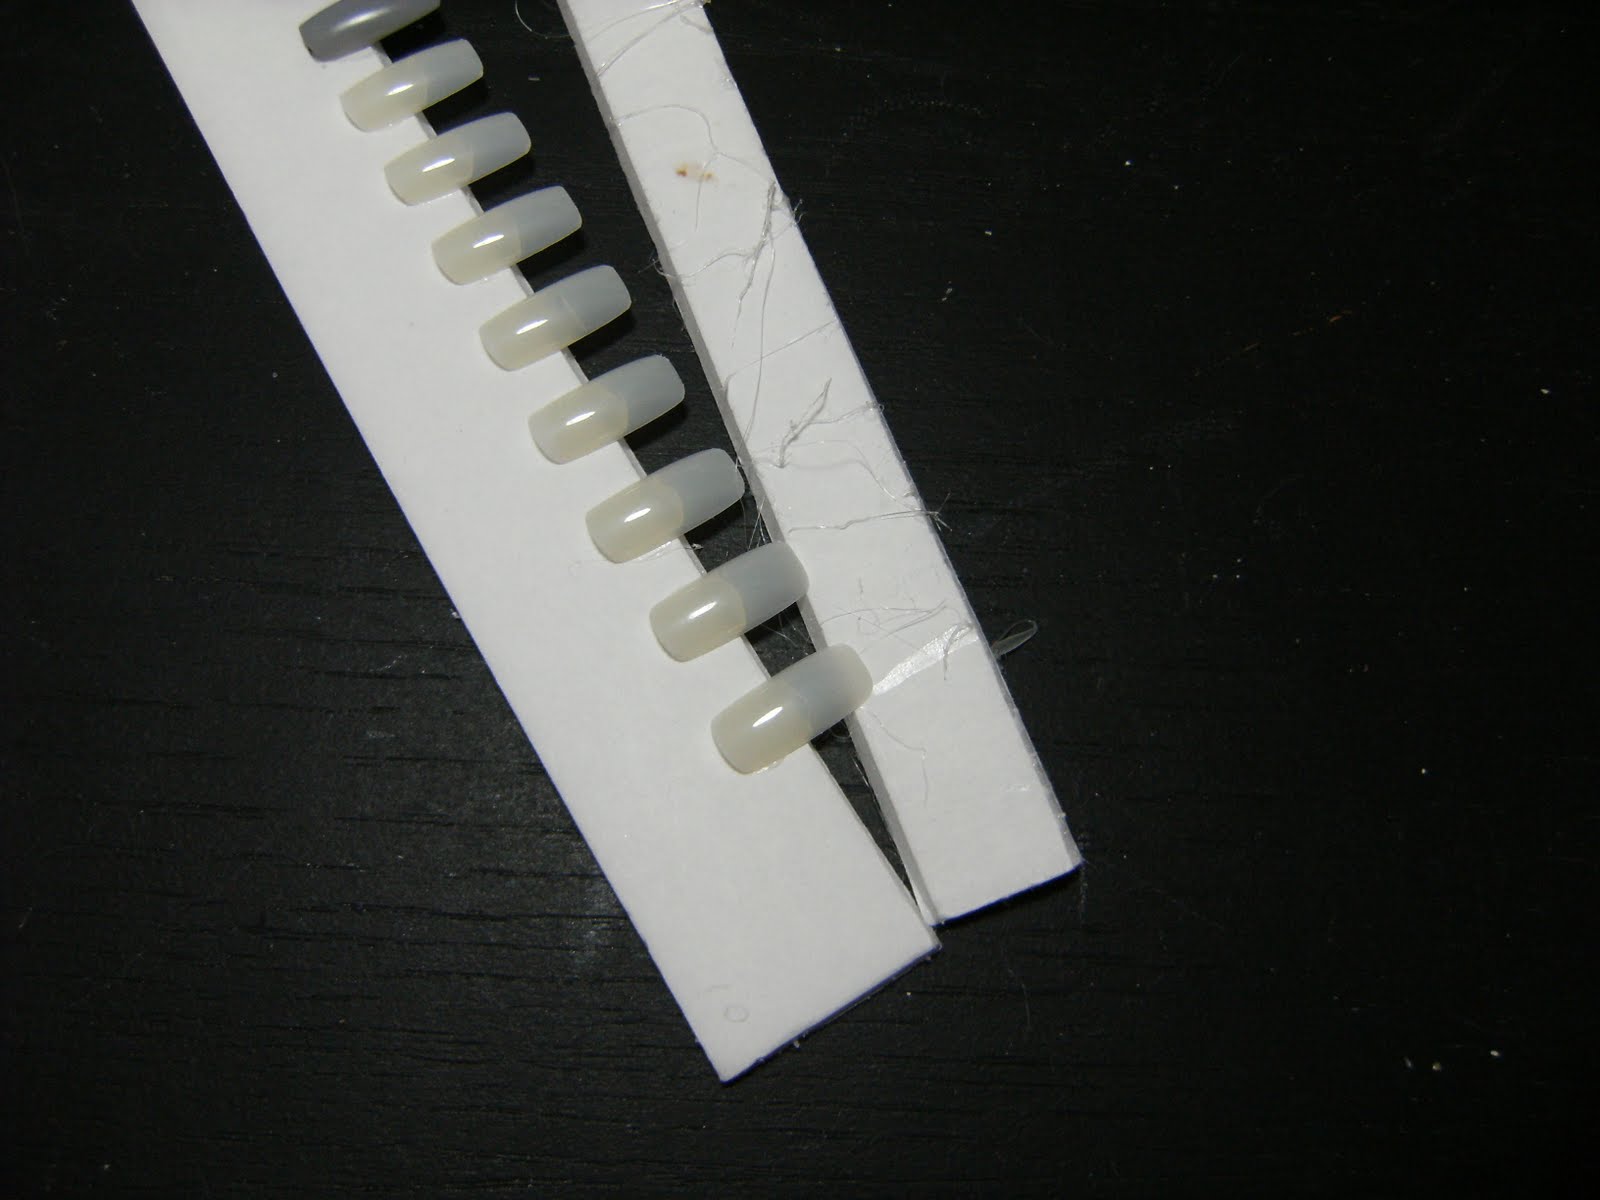

I butted the edges up like this, otherwise the hot glue would just make the nail dip and they would be all crooked ( dang this is hard to explain.... does any of this make sense? )


so..... see what I mean? If I hadn't used the other board to make sure the nails stayed in line, they would have 'dipped' down and been all wonky.....
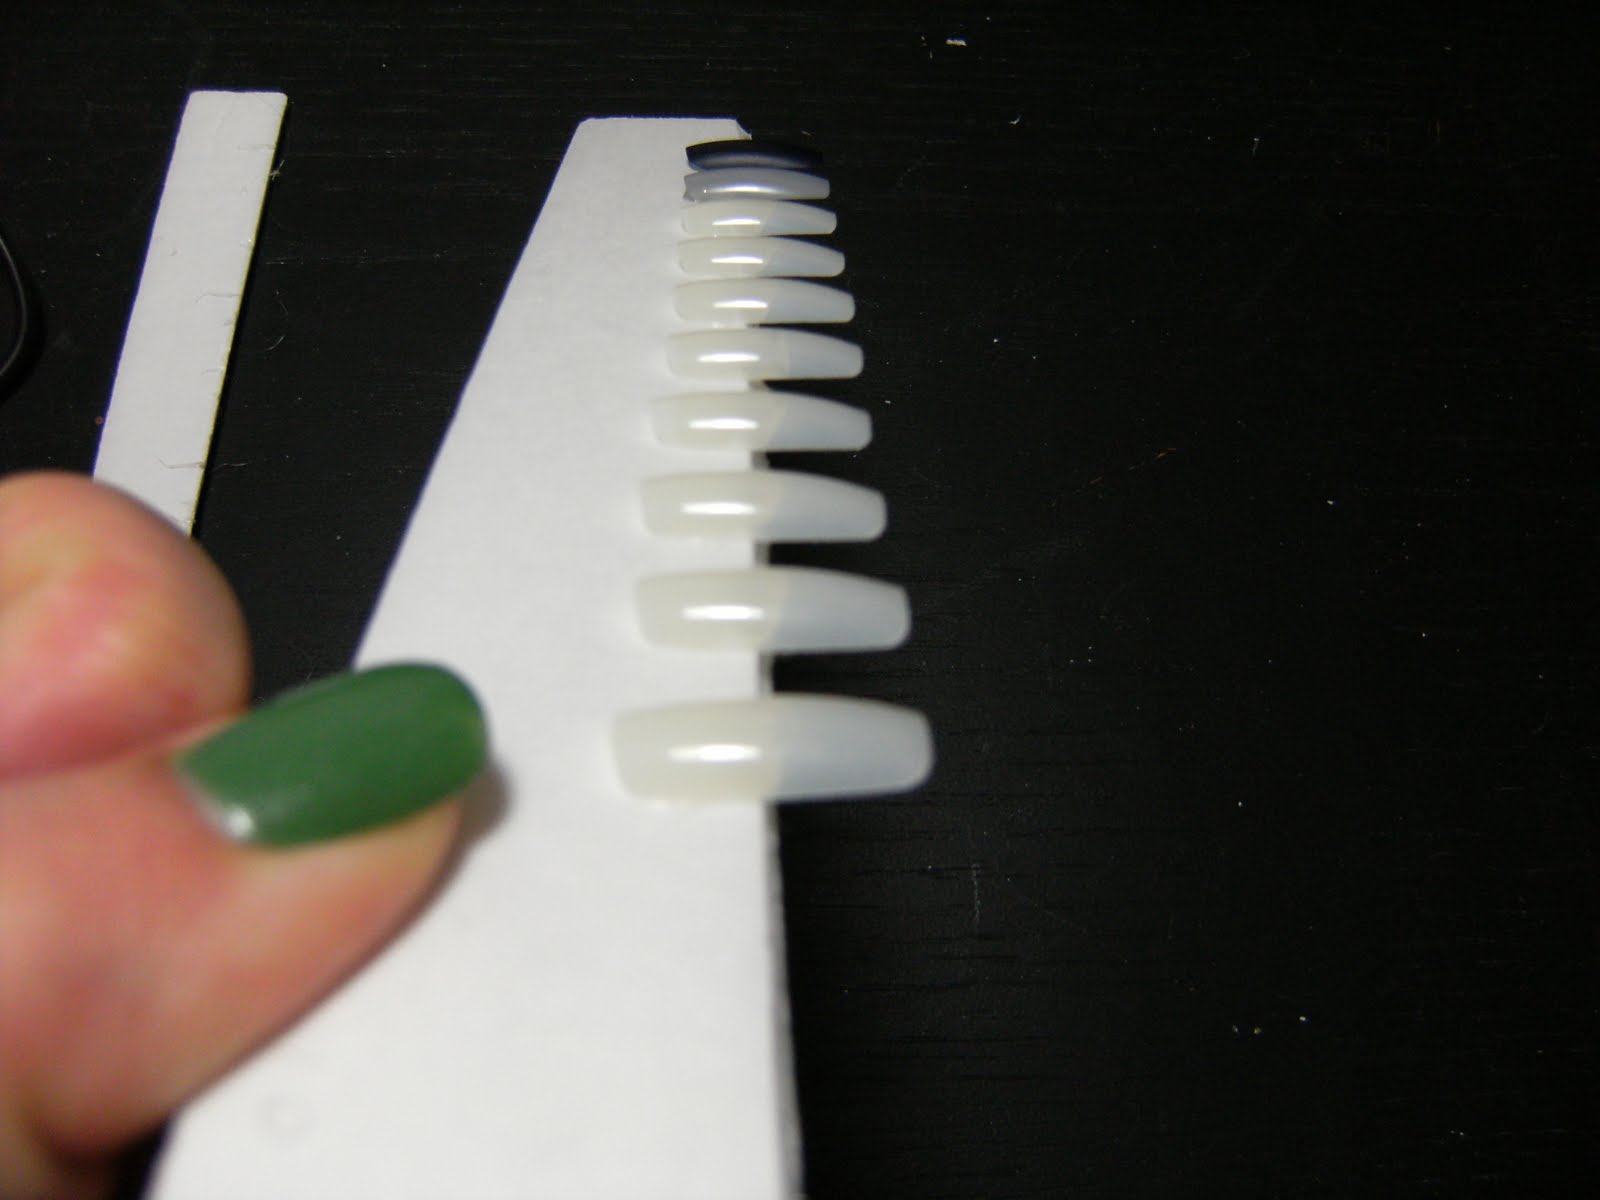

My latest batch of Frankens..... ( the 'uglyies' get their own section )


oops, I should have straightened my camera out.....
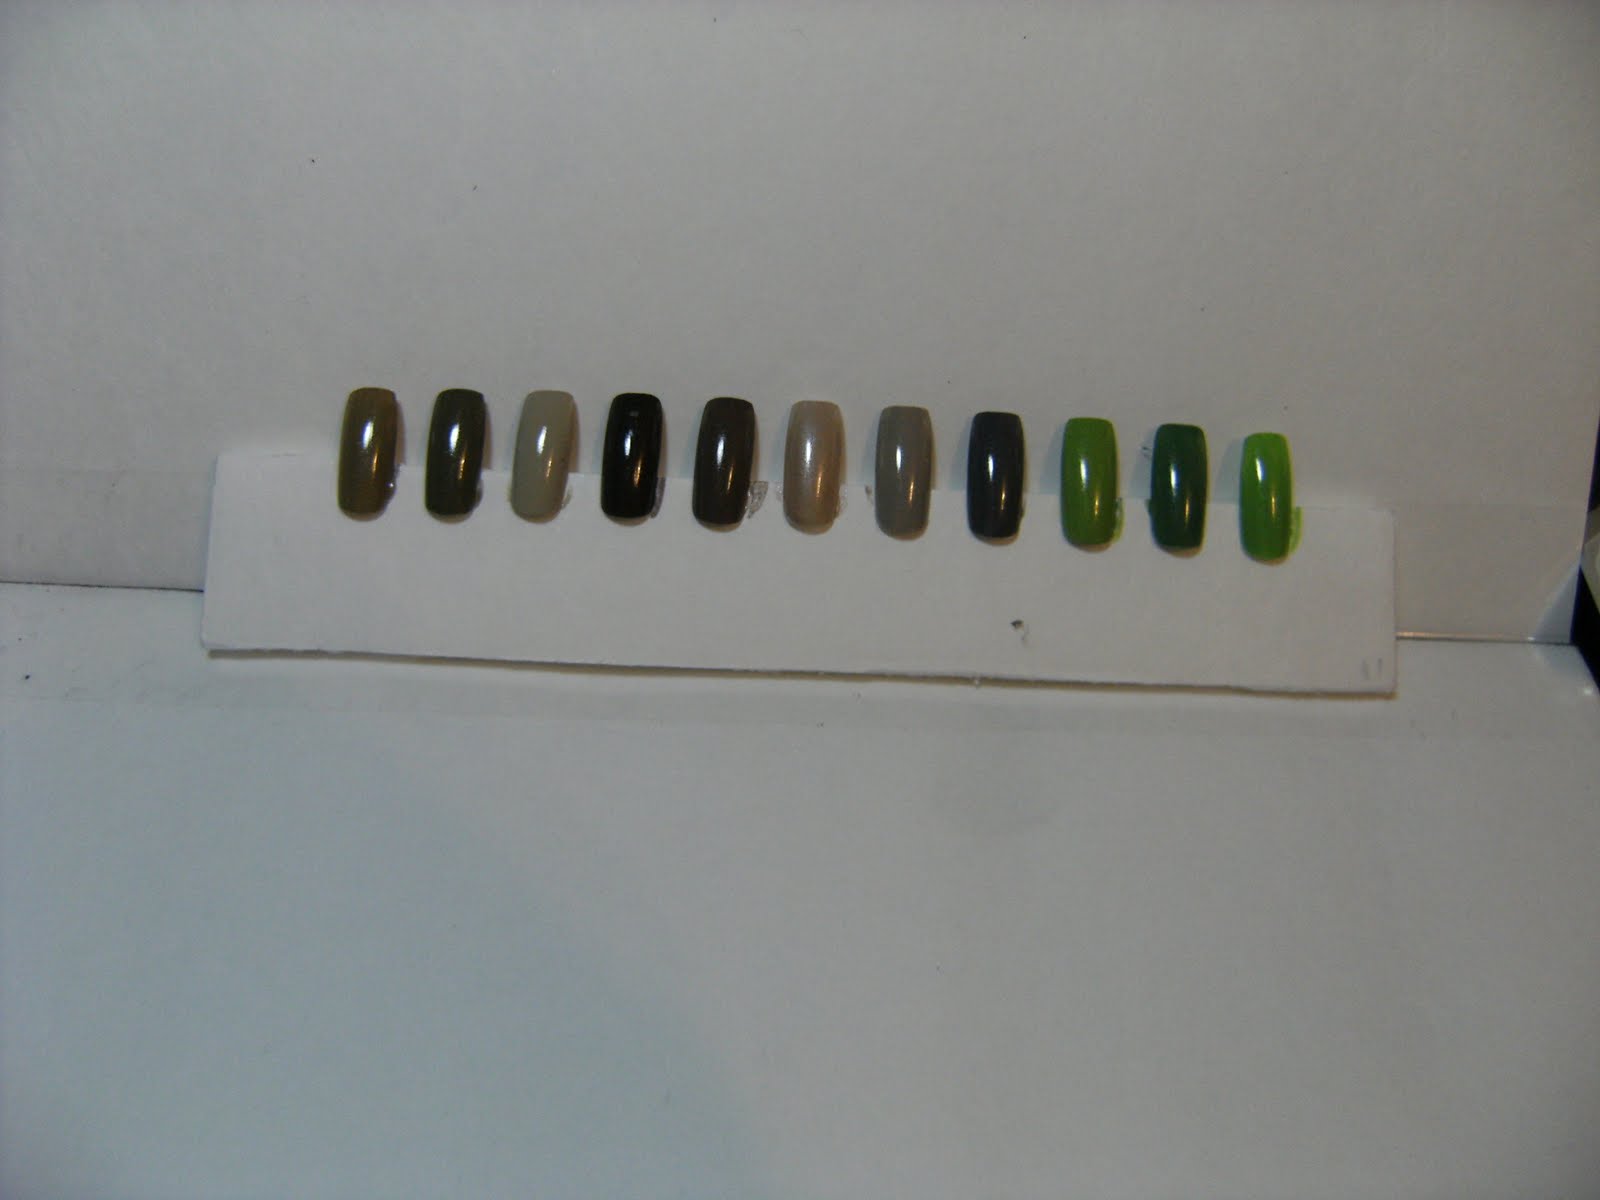
These are the nails I used, I found these at Dollarama, I grabbed 6 boxes. ( I need more)

foam board from dollarrama - this comes in different colours and you can also get it at Walmart and craft stores, like Micheal's and Hobby Lobby..... 24x 28 each little piece I cut was 1 1/2 inch by 8 inches.
♥


Wednesday, April 28, 2010

From Cuticle Crisis to Cuticle Care

 These are ( 1/2 of ) my nail board things.....
They were super fun to make & took a long time ~  I'm very happy with them
 I couldn't have a post with out a photo - I will do a post on these soon
♥

I have read a few blogs recently with people in cuticle crisis, and have been wanting to do a post about it.


Here are a few things I do and some thoughts on the subject.


Here is the gist of this long *ss post........


♥ NO Cuticle Remover - apply blob of lotion to soften this area ( keep reading for more info on this )
♥ NO Cuticle cutting
♥ Lotion Lotion Lotion
♥ barrier cream to cuticle area AFTER lotion
♥ Use a non-dryng soap  (♥♥♥ or try to ♥♥♥)
♥ Dry hands thoroughly after washing
♥ Apply moisturizer to hands, BEFORE polish Removal
♥ Apply a good barrier cream or moisturizer to cuticle area before painting
♥ Do the lotion and glove thing overnight - you cont need fancy gloves, $1 store gloves are fine
♥ Look in the mirror every morning, and hold your hands out in front of you, with your nails facing the mirror, and say 3 times, "You're beautiful, You're amazing.... You're a Star"


Okay ~ I don't do all these things all the time, ( except the last one, that I do EVERY DAY ) but I definitely never ever use cuticle remover, and I never cut anything. I get a hangnail on my ring fingers ( BOTH!) in fall time, when that happens I just add a dab of nail glue to it, and if I have to i snip it off I do with a sharp pair of nail scissors then add a dab nail glue to it( seriously ). I have enough cuts on my hands due to my activities and clumsiness, the dread and memory of that kind of pain of cut cuticles and hangnails keeps me in line!


Firstly, cuticle remover..... what does this stuff do exactly? I know I bought some a long, long time ago, but I did not find that it did anything amazing, how is it removing your cuticles? these are questions you need to ask yourself if you use this product.


If you apply a blob of moisturizer along your nail bed, cuticles and the sides of your nails and leave it there for five minutes, the tough skin that is attached to your actual nail, will become pliable and moveable, you will be able to scrape and push away any skin with an orangewood stick or any other impliment.


I personally have not used cuticle remover creams or gels in a long time. If it is necessary, I will just slap on a  blob of any type of lotion, and allow it to sit on my nail bed and cuticles to soften the skin in this area, then gently push and move the dried layer of skin. I hardle ever do this, though. I think i lucked out by having healthy cuticles. But more than luck is I take time to take care of my cuticle everyday


 I think that with all the cooties and germs out there in the world, cuticle cutting would just be a big NO. If you have a painful hangnail, maybe snipping it off with a tiny sharp pair of manicure scissors would be ideal, then slapping on either nail glue or any another water resistant glue ( i do this all the time for small surface scratches = which i have alot of ) Cutting your cuticle will create way more problems then it will solve. I cant say I have seen any pair of hands that were so hideous I would  recommend cuticle cutting -  I think devoting time to applying good moisturizer or barrier creme to the cuticle area, will be much better in the long run then cutting the cuticle area.


If you feel that your cuticles are unruly and a horrific sight - you will likely not do any one thing today, and devote 5 minutes to it and then wake up tomorrow with super-model cuticles, sorry - it will take a while and bit more effort than that.


I am extremely interested to hear what ratio of people who use cuticle remover creams or gels, who also have alot of hang nails and cuticle problems. My belief is that these creams and gels are a mild acid, eating away at your skin, nothing good will come of that, and I would strongly encourage anyone using these products to find other ways to deal with their cuticles.


I would label myself with sensitive / dry skin, I have used some soaps that are sooooo drying, I have to wonder what is in them. If you wash your hands a thousand times a day, like me; then it's a good idea to invest in a good quality of soap. I also very rarely let my hands air dry, I try to dry them properly, and apply lotion if possible and when necessary.


I use a plain lotion from the grocery store - St Ives... something something. Nothing fancy. I think the fact that I use it often, and not the type it is =  is what is important.

Before I remove my polish I try to apply moistureizer to my hands and nail area, it makes removal a little more goo-ey-er, but this helps to prevent the drying out of my fingertips and cuticles. I sometimes where a latex glove on the other hand ( the one i am not removing polish from )


Before I apply polish, I make sure to apply Avon Moisture Therapy hand creme with a tiny brush, to the skin surrounding my nails, and take time to get it along my cuticles and under my nail tips along the free edge - a little overkill~ but I usually do an acetone clean up before I take photos, this helps me get rid of any polish mistakes alot easier, and the Avon Moisture Therapy hand creme acts as a protective barrier so the acetone doesn't sink in and dry out my cuticles and the skin around my nails.


When I apply lotion to my hands, I make sure to pack the lotion into my cuticle area, along the sides of my nail bed and try to do this often. Sometimes, I apply lotion and wear gloves over night~ Just cheap gloves from the dollarama, I have a few pairs and don't think there is anything magical about those 'moisturizing ' gloves I have seen around.

 Whew - I think thats it for now, I am sure I have a few more things to add.......

Sunday, October 25, 2009

♥ A Real Bloody Manicure ♥


~ "A Bloody Manicure" = various reds & a solid black polish ~

 Alright - my internet has been out all evening, I finished up this newest version of 'A Bloody Manicure' right after my last post.... I have included photos of the little 'sticker guides' I cut out; and step-by-step photos of this process....

So now the 'blood' is dripping from the tips of my nails... like it should. This is grossing me out immensely, but it looks really cool! I am happy with the brand of mailing labels I use for 'sticker-guides' when I do nail art like this. I think when I have enough ideas, I will draw them on the computer & then print them onto sticky paper or mailing label sheets, so that I can cut them out without having to draw them by hand.This brand very rarely leaves any residue behind.

 I have used different colors of red creme nail polish  for each of my nails. I think this nail art will look great with any color combo- and am working on my next one as I type this.

So here are the color I used.....
THUMB = Mavala  '70 Salerno'
INDEX = Billie 'Claret'
MIDDLE = Billie 'Chianti'
RING = Billie 'Bordeaux'
PINKY = Billie 'Zinfandel'

I picked up these "boozy' Billie nail polish's a while ago and have never worn them .. so skittle time!
All were two coats with the exception of my PINKY, 'Zinfandel', I totally thought that these 5 polish's were all cremes, but the 'Zinfandel' was a jelly'. After applying the polish, I used 1 coat of China Glaze Fast Forward, and waited for it to dry, I applied the 'sticker-guides' I cut out, and then painted on Sally Hansen 'Raven' 2 coats. when I was sure it was totally dry ( 15 min ) I carefully peeled off the 'sticker-guides' from the tip of my nails to the base -  then gently buffed out any raised areas. I made sure to wash off any dust or possible residue, then applied 1 coat of China Glaze Fast Forward.

Cutting out this shape was a little tricky, I made sure to draw the 'Blood-dripping' in the shape I wanted it, and used a very small pair of manicure scissors. I purposely made the drips different on each nail, I think it looks more realistic. Like I had to fight off a werewolf..... well, depends on which werewolf.

I hope I gave good directions ~  your imagination is the limit when it comes to nail art... any art really. I am cook'in up some other neat art ideas and I am having tonnes of fun. Anyhoo- onto the photos ♥


~ I drew an outline of the 'dripping bloooooooooooooood, before cutting~


  ~ Sorry this is so fuzzy - I made sure that the little 'sticker-guides' would be large enough for each nail~


- be sure to press down all areas of the sticker to prevent your other color from seeping beneath it.~


~ After applying Sally Hansen 'Raven' - 2 thin coats ~


 ~ Thumb  = Mavala 'Salerno'
 

~ INDEX = Billie 'Claret'~
 

~ MIDDLE = Billie 'Chianti' ~
 

~ RING = Billie 'Bordeaux' ~
 

~ PINKY = Billie 'Zinfandel' ~


~ Shade - Flash ~


~ Shade - Flash ~


~ Shade ~

 ~ Shade - Flash ~


♥ 
Top =  Sally Hansen 'Raven' a true deep black polish & ChG Fast Forward
L to R - Billie 'Zinfandel', 'Bordeaux', 'Chianti', 'Claret', Mavala 'Salerno'


Tuesday, May 5, 2009

~♥~ Indulge Beauty - 'Red' ~♥~'


~♥~
MIDDLE finger = 1 coat of deep black polish & 1 coat of Indulge red, the rest are 2 coats of Indulge red with a shiny top coat. The nail decals came with my nailene fake toenails (can't remember which specific product )


~♥~

Since I will be skipping my usual evening activities to nurse my painful windburn, I am going to try to and post all these folders of photos I have hogging up space on my desktop. I had originally worn this polish a few weeks ago, I put a shiny top-coat on, all excited and ready for my photo-shoot, then I dinged and gouged it up - severely. I tried to salvage it with some nail stickers that I had. In the end, I had to take it off because it was just too beat up for a 20 minute old polish job. I totally should have skipped the Top-Coat, I usually do not add one, as I like to use a glitter the next day of my mani !!!!!!

I am sure to wear it again, as it dried very fast. It is very shiny on it's own and I am sorry that I added the top coat which was totally unnecessary and ruined my manicure (* tears *). This polish is a cheerful red with gold shimmer. The gold, red and chocolate polishes came together in a package, they are the 'Fudge Trio", while the pink, fuchsia, and purple came in a package together = the 'Berry Trio'. Along with these polishes, there was and Orange/Peach trio , and a french Manicure trio, ( white, pink, and clear ). I picked these ones and wish I bought them all......Really, really cute.


~ Please continue reading after the photo's for some super-exciting math and commentary!!!!!! ~


So a while ago, I wanted to practice some nail art, but I really suck at it and have given up, I am happy with nail stickers and glitter and such, so I have always been curious as to how many uses you can get from products, how many sandwiches can you make with a jar or mayonnaise, lip-gloss, Windex, whatever it may be. So I did a little experiment which you can further read about here,


~ I have used both of these mini polishes 3 times each, using 2 to 3 coats & swatching in my "home-made" nail swatches and a few drops for franken experiments ~

~♥~

If you use 2 coats of polish, which I feel should be all that is needed to achieve 'bottle color' or whatever effect = otherwise it will be a time consuming polish, for me that means including drying time, application and clean up, that specific polish just takes too much time to use, so I do not keep these around { and try not to buy them either } . Common volume's of polish seems to be 12 to 15 ml, so I used 13ml in my little experiment. A 13ml bottle of nail polish, applying 2 coats, and being moderately sloppy in application on your fingernails, will give approx. 40 applications. These Indulge minis are 5ml each, which means that I will get at least 15 applications from it, very likely more.When I am bored of them... FRANKEN, it's a win/win situation.

~ Ummmmmm, close, but this is a little too small ~

{ image from a miniature hobby site forum via goolge images }

~♥~


So depending on the quality of polish= ie; if it is very opaque, very thin and sheer etc. If it is 'two coat' coverage, you will likely get at least 40 applications from a 13 ml bottle . I personally have worn a specific nail polish 40 times, and so volume is not a baaaad thing , but I would rather see smaller quantities more accessible to me, in a quality polish so I can have more variety. That is why I am obsessed / in love with mini polishes. They take up less space,( which is really important for me right now), if I do not like it it is not a great loss, I can always franken or giveaway,


~♥~

Sheer polish can be very pretty, but I am not a fan of using just a sheer polish alone, I use sheers for layering. So I am mainly referring to two coat polishes which are likely to be opaque (/// I guess ??//// )


{ Just in case anyone is curious, in my town it is $10.00 to $14.00 for full sized O.P.I's. SH's are like $6.00- $9.00 Essie's are 13.00, Revlon, Rimmels.... are like $6.00.... To order things and get them here, is sometimes ridiculous.... But I am elated that I have my .99 cent store and other bargain-type shops close by where I have gotten extremely lucky..... SO IN NO WAY AM I COMPLAINING AT ALL! }


It really is rare for me to use up an entire bottle of nail polish (I would be more likely to give them away, or start chucking them before I finish them off...... ) I am happy that I have access to Sally Girl polishes now, they seem to have some unique colors that I would not buy a full bottle of. ( YELLOW ! ) The last three Claire's mini's I found were not that great, but I did make some nice frankens with them.I did notice though, that they seem to separate quickly..... so I will have to see what their shelf-life is......... Most mini nail polishes that are readily available to me at this moment are not that impressive.


In conclusion, I wish that we had a products like 'depend' cosmetics here in Canada.... they have beautiful current and unique colors in a perfect mini bottle! Mavala also has beautiful colors( Google it ) but I have only seen them in discount/ outlet stores, and only in deep reds and sheers....... Soooooooooooooo jealous of those!
~♥~