Pages

Showing posts with label Hoarding/Collection. Show all posts

Sunday, July 11, 2010

♥ HAUL!!!! EXCITING NEWS FOR CANADIANS..New Goodies and False Nail Removal ♥

above- Ardene Rockin Purple, AppleTini, and Matte about Blue

 First; this is a loooooong post. I hope that if I have not explained things thoughtfully and thoroughly in regard to safe false nail removal and that people do comment. I really want to be sure I have written good instructions. So please don't be shy - if you have any questions please ask♥♥♥


Ardene is a Canadian store with jewelery, hair accessories, clothes and makeup....I am not sure what American store to compare it to. I found these for 50% off as the store in my town is moving..... not sure why they are half price, but I have always wanted to try this polish, so I grabbed htese three as they seem to be a good spectrum of what is available. . I really need to start a support group for those who HATE stubby huge polish handles. I am hesitant to buy polish's with handles like this becuase I really, really don't like them. 

Anyhoo- I have only seen 1 other blogger do a post on an Ardene polish, and that was in September, so I thought I should do some 'invest-i-ga-tory' polish blogging a trial on this Arden polish. Their scent is similar to most drugstore polish's, they are made in Taiwan for Ardene Stores, and the brushes look full, with a few wonky bristles. I just picked these up yesterday so I haven't had a chance to swatch them or take great colour accurate photos. If anyone happens to have any of these polish's what are your feelings about them in regards to application, colour etc....

These polish's range in price for $3.50 to $4.99 CAD but are always 'on sale' for 2 for $6.00 CAD,so they are 3 bucks each. The 3 I picked were reg. $3.50 and at 1/2 price ended up being all 3 for under $6.00. These are at the top of my 'to swatch' list and I will have a report as soon as I can.

HERE IS THE EXCITING NEWS - Chatters is a Canadian beauty store in my town  that really only has OPI polish... which I skip on if possible, they also sell like shampoo and hair accessories and other beauty products - - BUT the one of the girls that works at the one  in my town said;

" WE WILL BE GETTING THE FULL LINE OF CHINA GLAZE POLISH IN SEPTEMBER!!!!!!


yippee -  now I can just run over to Chatters and buy whatever China Glaze polish I want...= Fabulous! I don't understand why they did not have the whole line before, as they had the Khrome collection as well as Up and Away collection, I suppose they were just testing how well ChG would sell. .

Also I mentioned that Icing stores now have a few new 5 pack 12ml 'LE' collections in store as well as 2 new summery 3 pack sets of full size 15ml polish in really beautiful polish colours. I am out of the loop on Make-up Alley so maybe someone else has covered it already but it looks as through they have similar colours in their regular collection....these polish's may just be grouped together and boxed for summer. Are there any photos of them floating around on the interwebz?

The rest of the photos below are a few sets of polish I have picked up at Claire's and Icing stores over the last few months. I have not seen the Icing Alice in Wonderland knock off set swatched or blogged anywhere. Is everyone boycotting it? Its a pretty close rendition of what OPI had released for their Alice in Wonderland themed collection.

Following all these lovely haul photos - {which I looooove to see haul's on other people blogs and MUA} is my cuticle safe and cuticle love false nail removal methods. I tried to get video of this in action - but it was very, very hard. I will be doing another 'tutorial' on safe false nail removal in a week or so.

 a fabulous fruity mini polish set♥
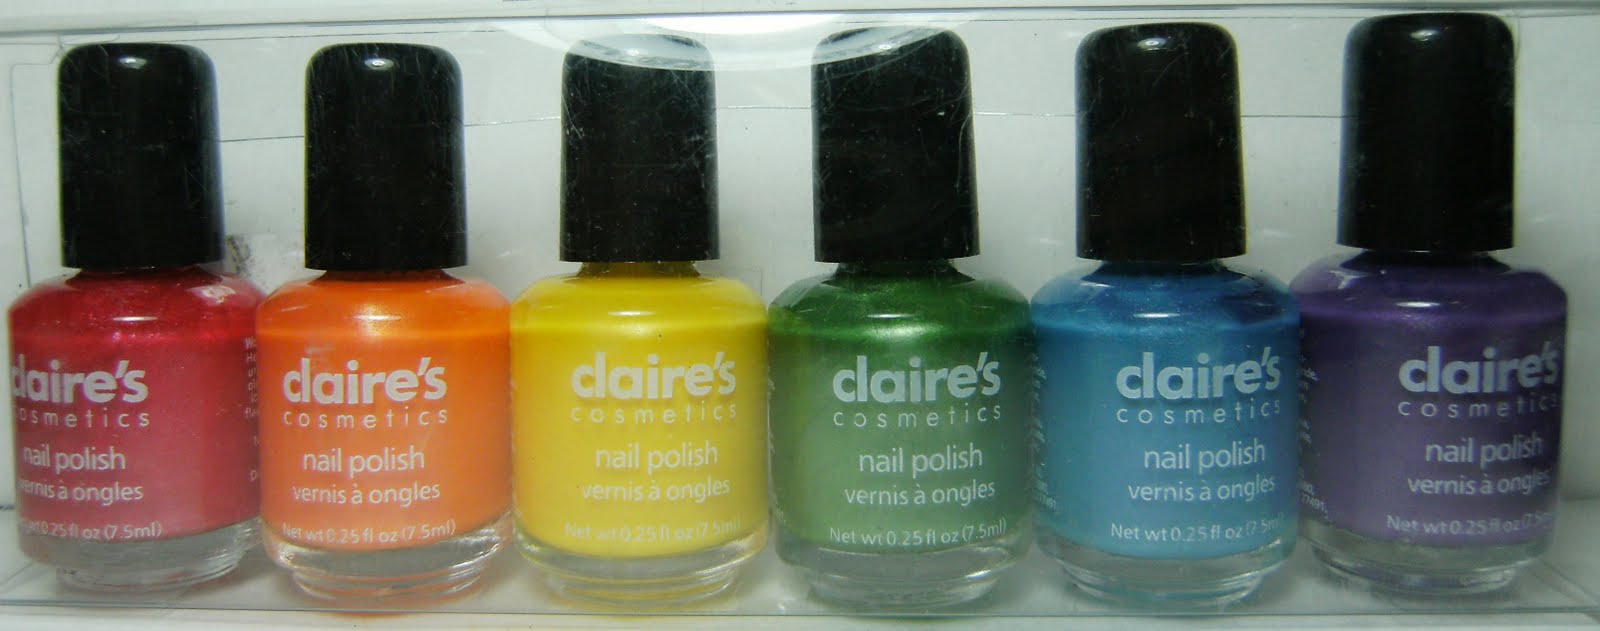
Claire's mini foils and one blue frost....  WHERE IS MY BLUE FOIL CLAIRE'S????

for weddings?
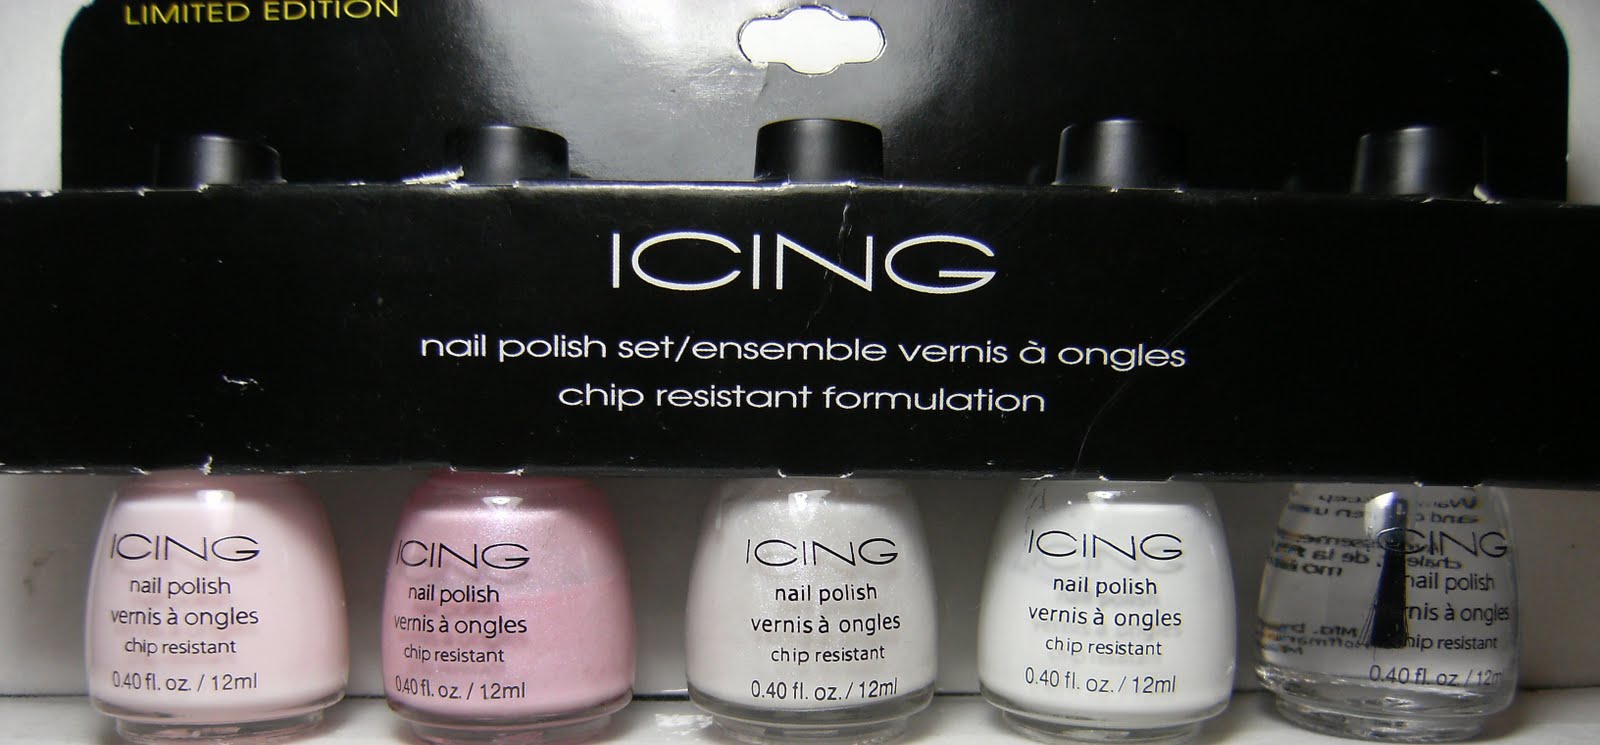
Alice in Wonderland?

Acetone Drip method
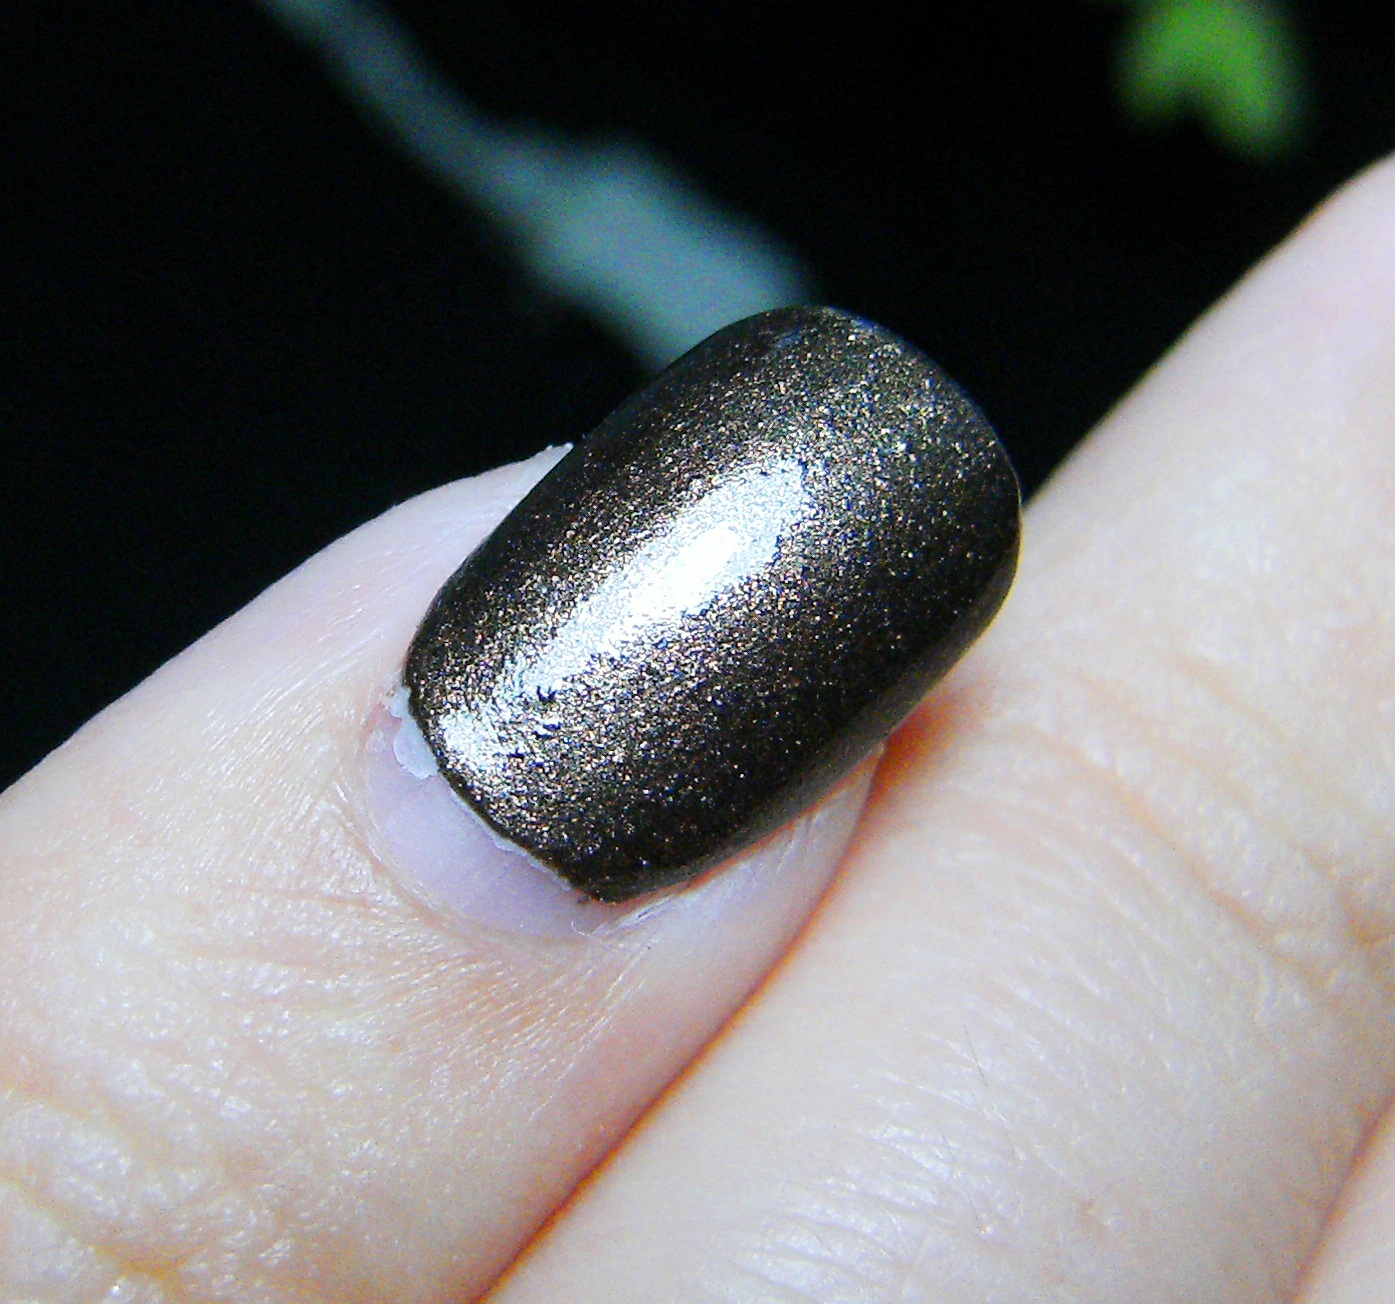

Below; This lil' pinky nail popped right off after I gently stuck my manicure tool in between the false nail and my real nail. So I had to use my thumb for this 'tutorial'.

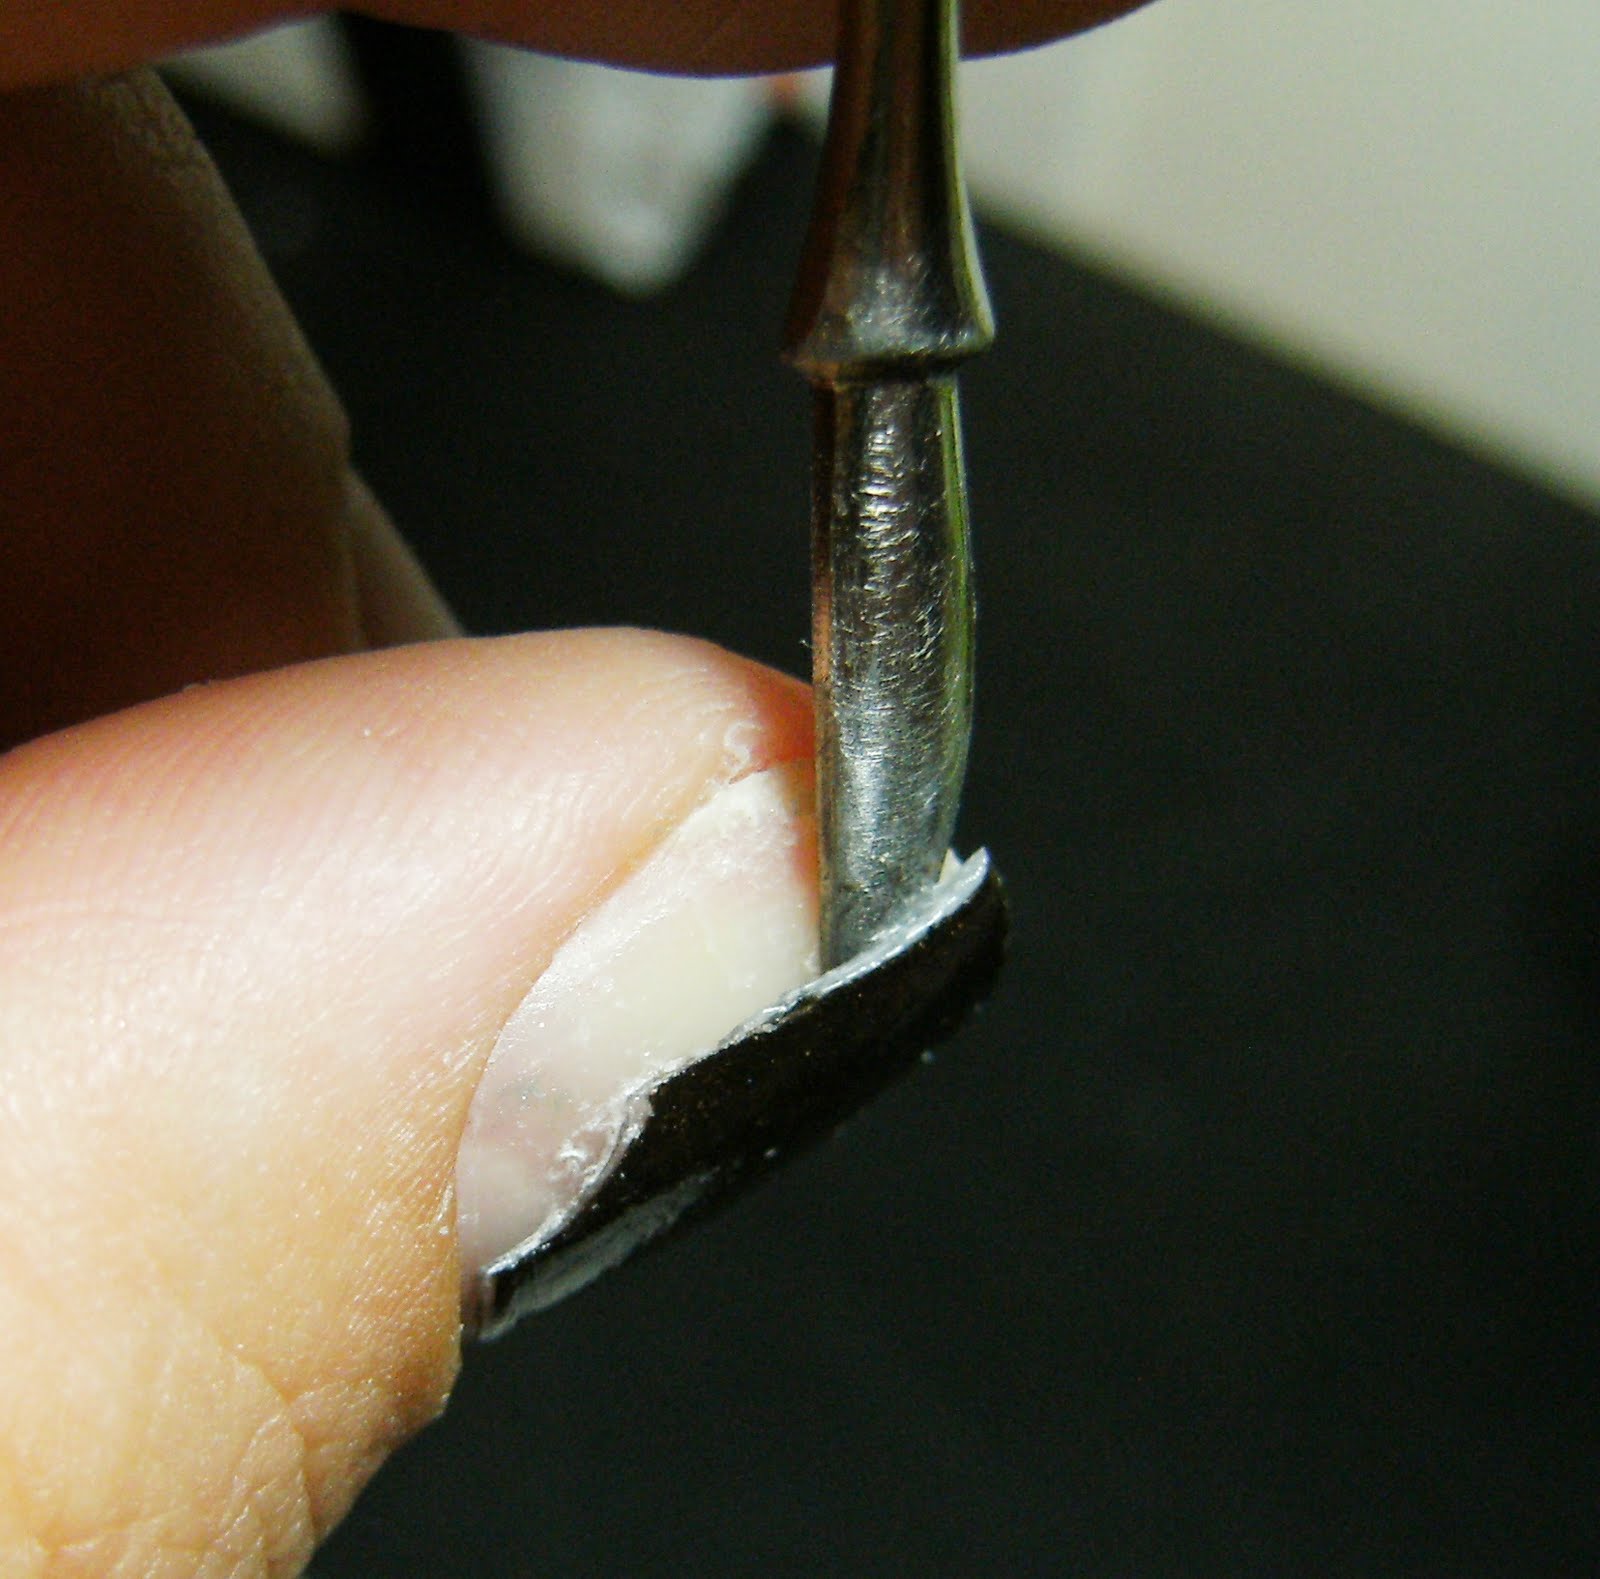
Here is the beginning shot on how I remove my false nails using a small manicure brush and pure Acetone that you can buy at any drug store, department store or beauty store.. Here I am gently prying the false nail away from my real nail.

In the photo above you can see there is some significant growth as I have been wearing these false nails for almost 11 days. Instead of cutting my false nails down as short as possible and SOAKING MY WHOLE FINGERTIP in a little GLASS bowl of acetone, I try to find an area of the nail where there is some separation between my false nail and my natural nail. I 'drip' acetone into this crevice so that the acetone will dissolve the glue, and parts of the false nail as well, and aid in the removal of the false nail. I left the polish from my previous manicure on so I could take better photos = = but I will be doing this again soon with a french manicure =  where you will be able to see through the false nail.


Below are the supplies I use. Acetone, a manicure brush I made with a cheap dollar store brush that I cut the bristles on an angle, a manicure tool I call 'the poker', tin foil to protect my work surface, and paper towels, just in case I spill any of the acetone, and to wipe off the glue from my angled brush. I also got some gun-cloths, these are a textured woven cloth.... with very little fluff or lint.


I pour a little acetone into the cap of the acetone bottle.... one day I will buy a pretty 'dappen dish' for this purpose.... but for now this is working perfectly.


I totally could have used an extra hand for these photos. Here I am using a manicure tool called..... called.... I don't know the real name but I call it the 'poker'. I am gently prying the false nails away from my natural nail, in order to drip the acetone in the area between. The acetone will loosen the glue and I will be able to remove the false nail easily. While I was holding the camera in one hand, and balancing the poker between my fingers  and the false nail cracked and fell off - which made my job much easier♥


A photo of the angled brush I use, this is just a random makeup brush that I had, I CUT the bristle so it would be at an angle like this.  I use this brush dipped in acetone to clean up nail polish around my cuticles after I polish my nails. Here - it is the perfect brush to try to 'drip' the acetone in between my false nails and my natural nails to loosed the glue.


My angled clean up brush, wet with Acetone before I try to get the acetone in the crevice between the false nail and my real nail.


Here is after dripping the acetone in the crevice between the false nail and my real nail just 3 times. I pried the remaining nail up, and took this photo of the glue strings..... Its kinda like when Spider-Man was trying to get off the 'Bad' Spider-Man mask in Spider-Man 3 - - - ewwwwwwwwwwwe!
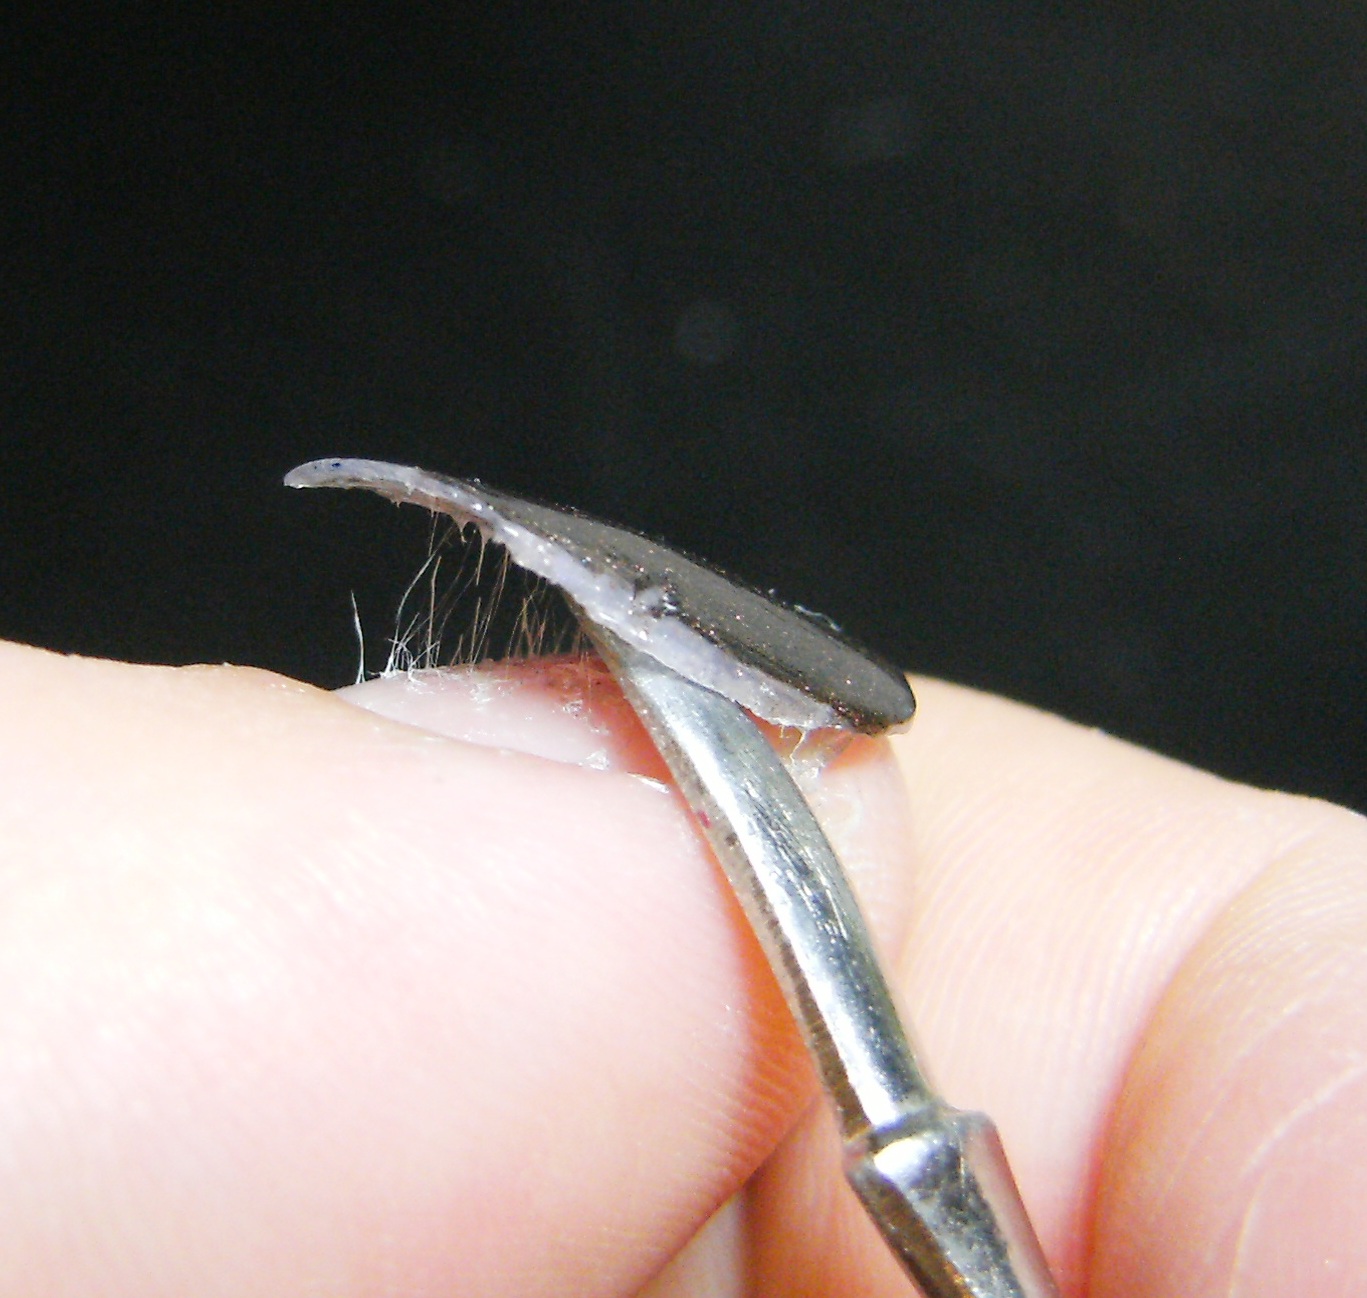

After all the false nail is removed from my nail, I take the angled brush and dip it into the Acetone and then swipe it over my nail, then swipe the brush on my paper towel. There may still be some glue on your nail, but this can be buffed out with a fine buffer.


The water soak method

I try to time doing dishes and scrubbing and cleaning and various household duties with my false nail removal. I very rarely remove my false nails for no reason. I cant remeber the last time I applied a full set of false nails and removed them in less than 5 days. I think that if you want to try wearing false nails but you have never worn them before - just glue 1 to your pinky nails and keep it on and be mindful of it for a day or two. However if you do apply a set f false nails and want to take them of immediately I recommend the acetone drip, or even the acetone soak method. The water soak method I find works best when I have been wearing my nails for at least 1 week, as when I apply my false nails.... I put alot of effort into making sure they stay on!

I am very clutzy and clumsy and every set of false nails I wear there is often an incident where I loose 1 or 2 a few days in =  I take my time and apply my false nails ( Nailene Nails) carefully, and put alot of effort into making sure I have applied them properly. I will be covering this in my next post, where I apply some awesome Nailene Couture Nails ( that I bought - cuz there cool ) Occasionally someone will mention ' drugstore nails are bad, and blah, blah, blah - but still after all these years my nails are healthy and have not turned black, so I am not doing any serious damage. I do have some photos of my naked nails, as well as a few manicures posted with my real nails..... They are terribly thin due to GENETICS and I am sorry that all the things I have bought, and all the vitamins I have taken did not work for me.


The surface of my nails IS ROUGH that is a fact.

here is one of my posts with my naked nails

and here is a post with all my false nail APPLICATION TIPS
{ oops I cant find that post right now }

But - they are healthy, they grow, and can be used as a deadly weapon as they are razor thin and can do some serious damage.... does anyone want to see some carnage created by these wolverine-esque stabby nails?  My nails buff out perfectly and look lovely painted.

Anyhoo - here is the 'warm water soak off method' it can be time consuming, that is a fact - but I love my nails and cuticles so I prefer this over the acetone soak method.


Below I am gently lifting my false nail to see if it will pop off, sometimes after I have been wearing my false nails for a few days, and have done alot of housework ( like alot of housework) then they do easily come off.... Not today though, they were extra thought to remove with the water soak method - the reason why is that I applied them carefully, used glue beneath the tips of the nails, and applied clear polish to the free edge of my natural nail while wearing these false nails. When I do a cleanup on my nails, the acetone I use helps to adhere the false nails to my natural nails even better.
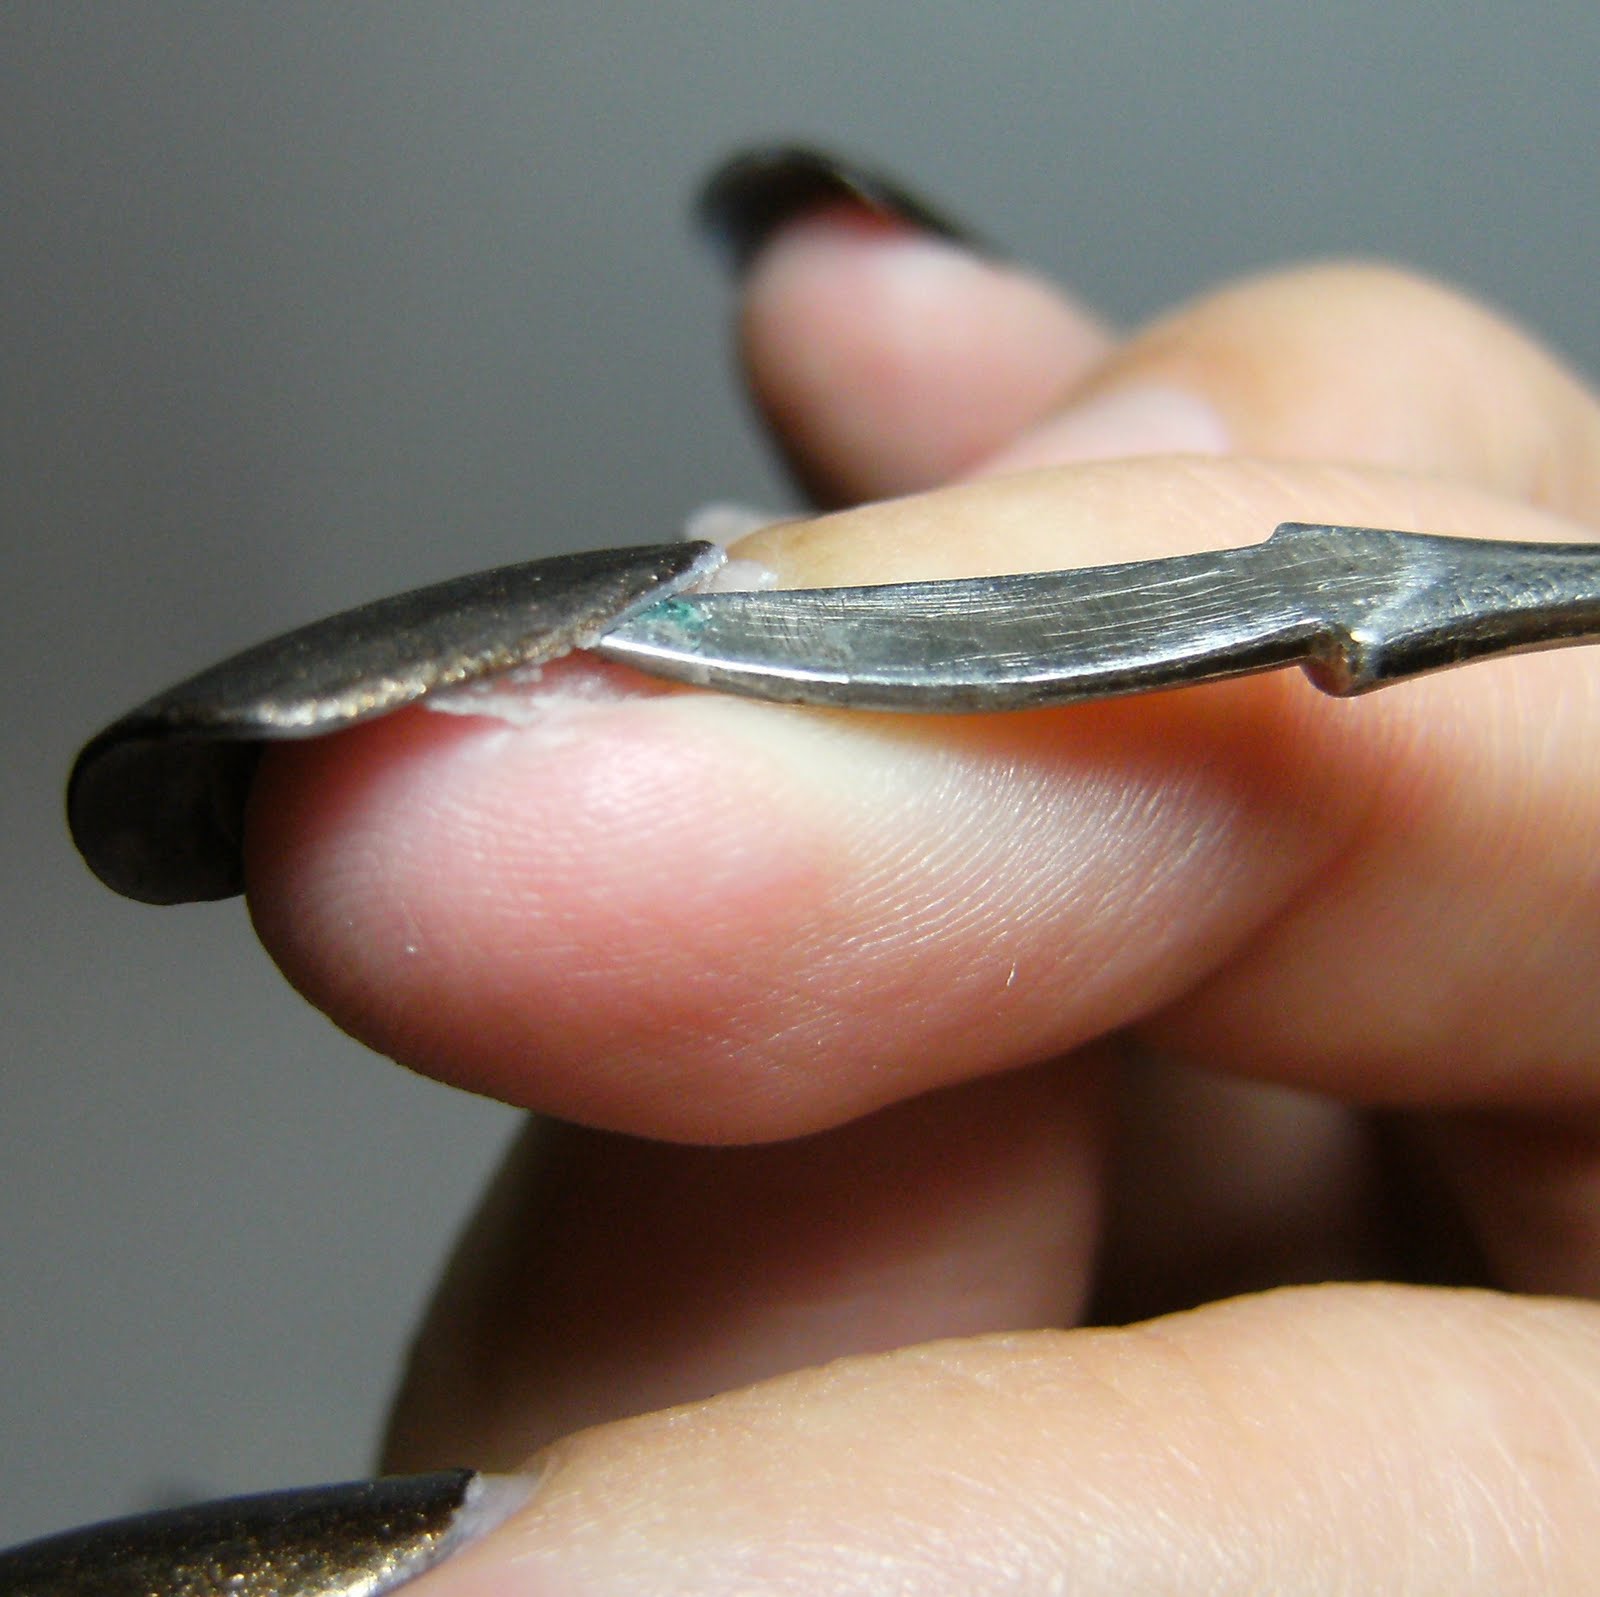
Another shot of my Ring nail before soaking


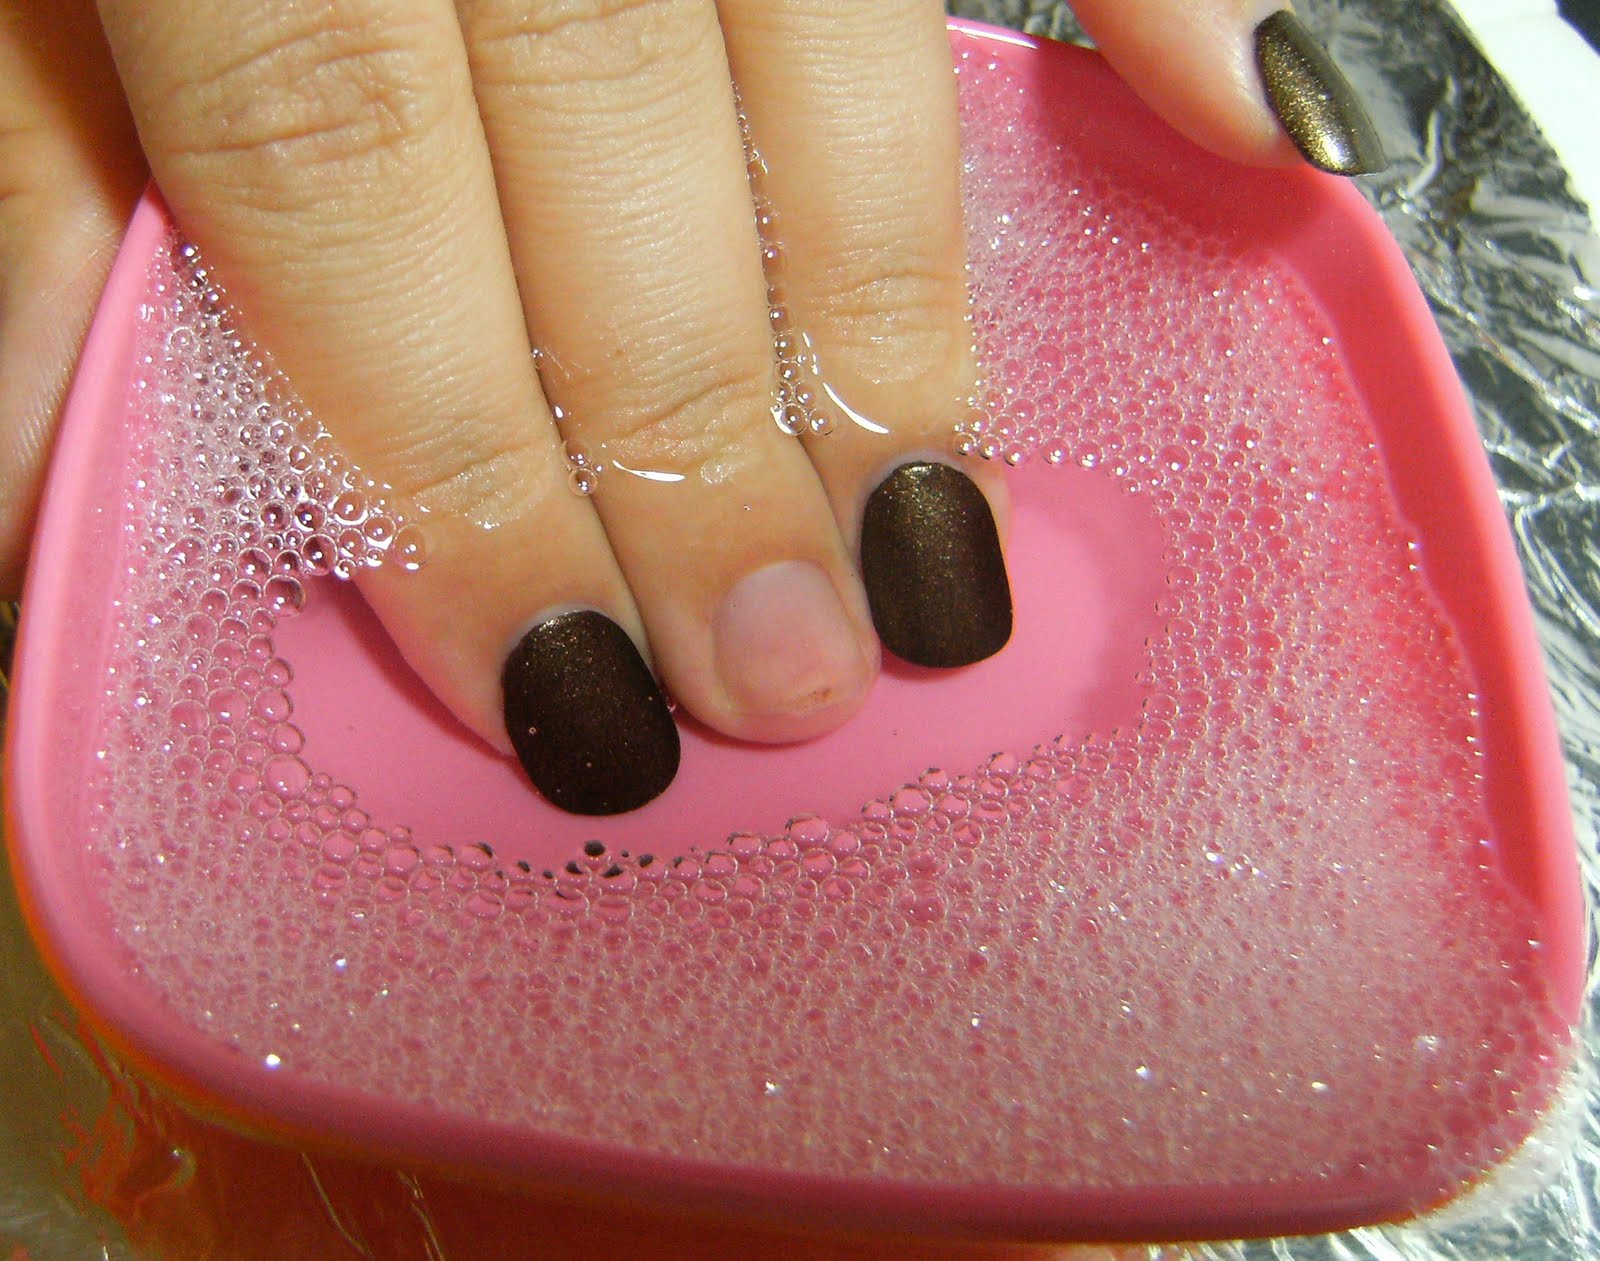
So here I am soaking my nails in a small bowl of warm water with a little soap.... this can take anywhere form 2 minutes to 20 minutes... just rememebr to apply a thick moisturizer or a good barrier cream or Vaseline to your cuticles.
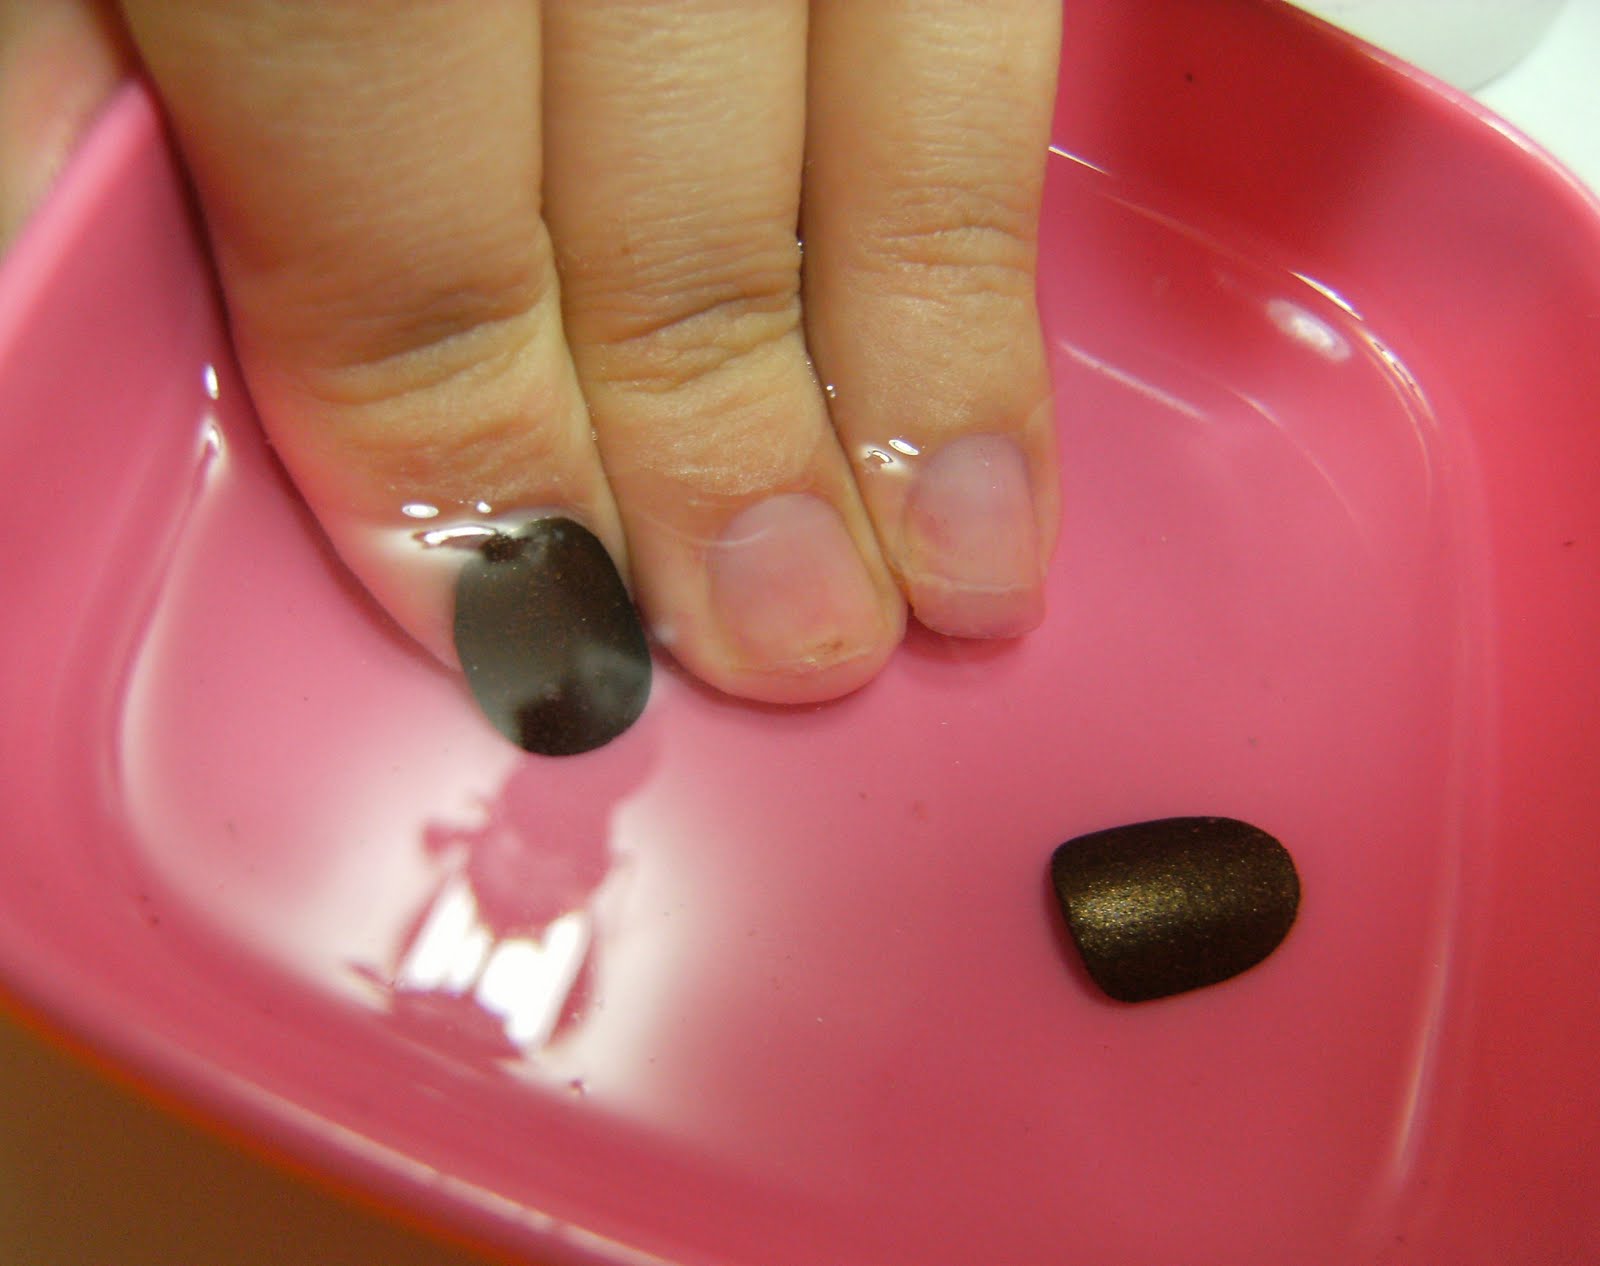
and here is my Ring nail.... sunk at the bottom of this little bowl after 15-ish minutes I did have to get in there and do a little prying. =  just gentle prying.

The glue remaining on my nails will be easily removed with pure acetone that I buy at Walmart. Its super duper cheap and lasts a long time. Any weird lumps or dents I will buff out with a fine sanding block ( THIS  I will cover in a  future post)


My left hand ring fingernail... hang'in on.....

...and here is another lovely picture of  Marbles.

Friday, September 4, 2009

♥Bargain Haul - Remember these? ♥


~ Above Shade ~

Left to Right
= Cotton Candy -( smells more like marshmellows)
= Strawberry Kiss ( smells like cheap gum)
= Latte Fun ( again marshmellows)
= Golden Honey ( time has not been kind to this scent but it looks great frankend)
= Cinnamon Sugar (YUM- still smells like cinnimon { i had this a long, long time ago })


Yippee- more materials for frankens found locally! Hope these pretty girl-ey colors hold up well when I mix them up. I found these at a local discount store in my town for $0.50 cents each Canadian, and will incorporate them into some frankeing in the near future.


I am not too concerned with their scent and more interested in their franken-ability....... however how come their is no cinnamon scented nail polish yet? I think that would be a nice one. I bought two of the "Cinnamon" scented pigments, I need to jazz up some really ridiculously dark polish I have and think this will do the trick..


Onto the bargains......Seriously I should just become a professional bargain make-up/nail polish hunter already..... I am beyond pleased at all my 'luck' at finding cheap-cheap-cheap goodies. The Bonne Bell " SWEET SCENTED POWDERS' say they are for face and body. The GLIMMER LIGHTS ILLUMINATING SHIMMER POWDER is a shimmery body powder, the purple-ey one, 'Lilac Dream' has flecks of, flecks of...... flecks of something similar in shape to the glass flecked polish of C.G., while the 'Iridescence Innocence is just a plain shimmery body powder, both are lightly scented.

I have included some swatches, just for funz and a neat video of the shimmery-ness. I love all the videos on Polish or Perish posted by "Flinty" of the glitter polish being modeled. So while I don't want to be a total copy cat, I do hope to make my own glittery nail polish video the next time I wear glittery nail polish. I think that those mini-videos of glittery goodness on Polish or Perish is posting are sooo neat!


Any hoo- I also must mention that there were price stickers on the backs of some of these from a drug store in the U.S.A. for a store called "Meijers" for $3.99... I am not sure how these ended up in Canada.... but hey - for fifty cents I shouldn't ask those questions and just enjoy my super-duper cheap franken polish materials..... I hope to get posts up of whatever I make as soon as possible.

~ Below - In the shade with Flash ~


Iridescent Innocence
Lilac Dream
Cotton Candy
Strawberry Kiss
Latte Fun
Golden Honey
Cinnamon Sugar


~ Yeaaaaaah =====Fiddy cents each!!!!!!!!!!!!!!!!!!!!!!~


Whaaaaat 4 fifty? ( these were 'expensive' in Canada in the olden days...... and they were really grainy/ rough) I wonder how they ended all the way up here......
Also - I have to add...... that I excel more at nails & nail polish modeling than swatching pigments & make-up..... but I wanted to try and get a video of this... I think it looks pretty cool! There is some setting on my camera that takes better video = but I am not sure yet what that is.... I have just recently gotten the hang of different photo taking techniques, and hopefully this video comes across okay.♥

Wednesday, June 3, 2009

♥ Maybelline - 'Bronze Aluminum' ♥


Maybelline Bronze Aluminum, 2 coats
&
Top Coat - Fast Forward by China Glaze 1 coat

~♥~

Well, I went back to that rad bargain store to see what was left..... i had already bought like 15 polishes for $2.00 and $1.00 each, and so I figured there would be a few polishes that were picked over and lonely, waiting for me to rescue them... and they got a new shipment.... I am trying to not buy polish for a while, I have like 20 in my untried ... and now I added a few more. A quick post with swatches is coming up. I am obsessed with antique polishes right now. I am getting such a kick off of finding all these old Maybelline and Sally Hansen's'.

So in order to justify my falling off the wagon, -Ima-gonna-get-to-paintbox-&-post'n- Seriously, I think I have to stop going into those bargain stores, because I cannot resist these polish's. It took soooo much will power to not buy all the ones I wanted, and I am proud to say that I only walked out of there with 5 polish's. I found a bottle of Matte Maker, the top-coat that makes polish's matte. When I am 'over' the matte look, this will come in handy where I would use a clear top coat around the house for things like loose-threads, jewelery etc. It dried super-fast too.


Anyhoo- onto the photo's. This is an antique polish that i found in a rad bargain store in my town that I am totally staying away from........ It is a very pretty bronze foil. the color is leaning towards the rose-ey-bronze side outdoors in the sun, but shows a beautiful deep bronze indoors and in the shade. It took on alot of colors in various conditions, all were beautiful.

On my RING finger, I have used the Maybelline Matte Maker, the rest of my digits are 2 coats of CG Fast Forward. I had a hard time getting a good photo of the matte finish in the sun, ( of course ). Matte is pretty cool, does anyone remember when Maybelline came out with this Matte Maker?


Here is a montage of all my maybelline foil/aluminum and metallic polish's I have recently acquired and have posted on recently.


Top L - R = Violet Aluminum, Bronze Aluminum
Bottom L - R = Dee-Wine, Blue Aluminum


On my RING finger I have used 2 coats of the Matte Maker, In the sun it is not so noticeable, but in indoor lighting and in the shade you can really see the matte....


~♥~

Saturday, May 16, 2009

~♥~ -Storage- ~♥~


I know this is not for everyone, but I am outgrowing my previous storage solution, even though I have been giving away polish's I do not use / need. I will be picking up one of those awesome Ikea HELMER Drawer unit's on casters, in the future..... but until then, I want to be able to grab my little box of goodies and do my nails / toenails, anywhere in my home or outside. I have used Tomato boxes that the grocery store gets... they are very very strong, I have fallen & landed on one with minimal damage. Unless there is squished tomato in them, they are great for storage and last alot longer than legal boxes.


I am calling this sort of thing I do " Marge's home made Pepsi ", when Lisa Simpson,(of The Simpson's ) goes to a school dance, Marge makes her some home-made Pepsi... I think that it too funny! And so the relevance of that is yeah, I could buy something like this, but I could totally do it myself, too. and it's not just because I am a bargain hunter, and yeah, I am a little on the cheap side, but I really want = what I want. It turned out functional and has been great so far. I just have to not buy any more goodies or I will have to put those in another spot. but by the time I run out of space I will have a Helmer already.


Also, how would you even go about making 'Home made Pepsi'?


I have found Tomato boxes, form the grocery store.. (no squished tomatoes please ) Using just a glue gun, I covered them with a durable fabric, then lined the inside with poster paper from the dollar store in hot fuchsia, then covered the seams with a black ribbon using a glue gun.


Then I made 2 separate removable boxes, one for polishes, and one for tools- like nail files, buffers, and whatever. I used a pretty heavy duty cardboard, and again with the glue gun just fabricated a simple square and rectangle box.
Later I covered these two boxes with black poster board from the dollar store, and used clear packing tape around the seams. The larger of the box's I was clever and created a handle and glued it to the bottom of the 'mini' box so I could easily remove it to get to the other polishes / goodies below. They are resting on brackets I made by gluing several pieces of foam board together then gluing the 'bracket' to the sides of my tomato box.


I have glued a piece of heavy duty cardboard
covered in the pretty fuchsia paper, to the middle of my box to create a permanent compartment =and= for the upper box with the handle to rest on just in case the 'brackets' i made give way. This has held up exceptionally well..... so far.

Where all my polish's are lined up in the compartments, I covered a piece
foam-core board the length of the compartment with the same hot fuchsia poster paper, wrapping the fuchsia paper around the foam board, and then gluing it to the foam board. These are not fixed in place, because I am sure to change their spacing as I get new polish, or give away ones I no longer use. I have made them long enough so that they stay put, by just wedging them in place. That bugged me about Caboodle's, and Sassiby's (memba those? I think that is what their name was. ) those cosmetic and nail polish storage things, the nail polishes always jiggled around in there.


I made sure to leave a space between the two 'upper' boxes for tall nail polish removers to fit in. I have yet to cover the inside of the lid with the pretty pink paper, and will be trading out my purple false-nail storage boxes for the black boxes that i have found that come with screws and nails and such = because the purple boxes have a space between the lid and each compartment, and my false-nails are getting all mixed up.....

This box fits perfectly under my bed and while it is clearly home made, it is not an eyesore like some other things i have used for storage, which I am short of at the moment.... because i have too much stuff ♥


So.... it sorta looks trashy and home made, but I am totally over buying all these storage containers only to find they did not fit-in in my new home, or it's contents have outgrown them. I am looking forward to that Ikea thing... it's on caster too.... I hope my descriptions make sense. I could not find a box big enough to hold everything, yet was small enough dimensions to fit where I needed it to fit. Alot of pretty fabric covered boxes you can find at like Walmart or Winners, or Homesense, (T.J. Maxx in the U.S. ) are cardboard, like the same stuff your DVD Player comes in, If you need specific dimension and pretty and functional at the same time, you will have to go all D.I.Y. on that !


I will be making another one of these, with different compartments for my hair accessories and hair appliances ( good-grief ) I think that I have hair accessories and hair stuff in 3 separate areas in my home (... NO MORE!!!!! ) I will be sure to take better detailed pictures .


Any questions, please add a comment and I will answer. I hope I explained this well, it gets a little confusing and I am sorry I did not take detailed pic's of the whole project. But I will next time.


~♥~

Thursday, April 2, 2009

French Mani ( boring ~ but practical ) Fing'rs

So here are some shorter falsie's. I really love Fing'rs products but these guys always crack/split down the middle of my nail, like vertically. Weird, I know. And that would be okay except they end up being pretty sharp, and..... I yank out alot of hair buy accident this way. It's bizarre because they are not thin, and poorly made.... so I don't know whats up. I use alot of different brands of acrylic full coverage nails and This only happens with Fing'rs. And, it is not because === they are curved and my nail beds are flat,== I get good adhesion and they are suitably shaped for my nail beds...


(I am gonna try to incorporate more "props" into my photos )


( part of my stash of pre-painted false nails)


breakage...... after 1 3/4 days wear......... vertical splitting > ????


Close up


So every Fing'rs fake nails I have tried have done this.... and it's too bad because I really like the colors they have, they are wide for my nail beds and....... they look really pretty, and they have soo many cool finishes and nail art. Does this happen to anyone else?


I liked how the dark blue
metallic's were black underneath the free edge, but those metallic's were the worst offenders for my problem. I wonder if anyone else had this happen to them (time for some Internet sleuthing )


Here is a picture of my fake nail stash. When I purchase them, I take them out of the box because I would have no room to house, like, 40 boxes of fake nails. I had hoped to find some clear partitioned cases but couldn't..... so far.


( my stash of fake nails, and nail gems and stickers )


I don't have a picture of the box that I am wearing in the picture, but they are a fing'rs brand shorter sporty-type french manicure.... very pretty ( but dangerous, ha-ha )


So these are the nails I am talking about. I have these two, and I will get two sets of nails out of each package. I am a little cheesed off about the splitting down the middle thing, and I wish that the design was on all the nails, (it's only on 12 out of 36 in the package but whatever), they are very pretty... but I don't think I will be buying them again.


These are really cool full coverage fake nails... maybe I am just rediculously rough on them. I looooooove all the black ones and the ones with the tip nail-art on them. So don't just take my word for it. If they did'nt crack/split on me, I would totally buy them again.


I am really interested to see if this happens to anybody else