
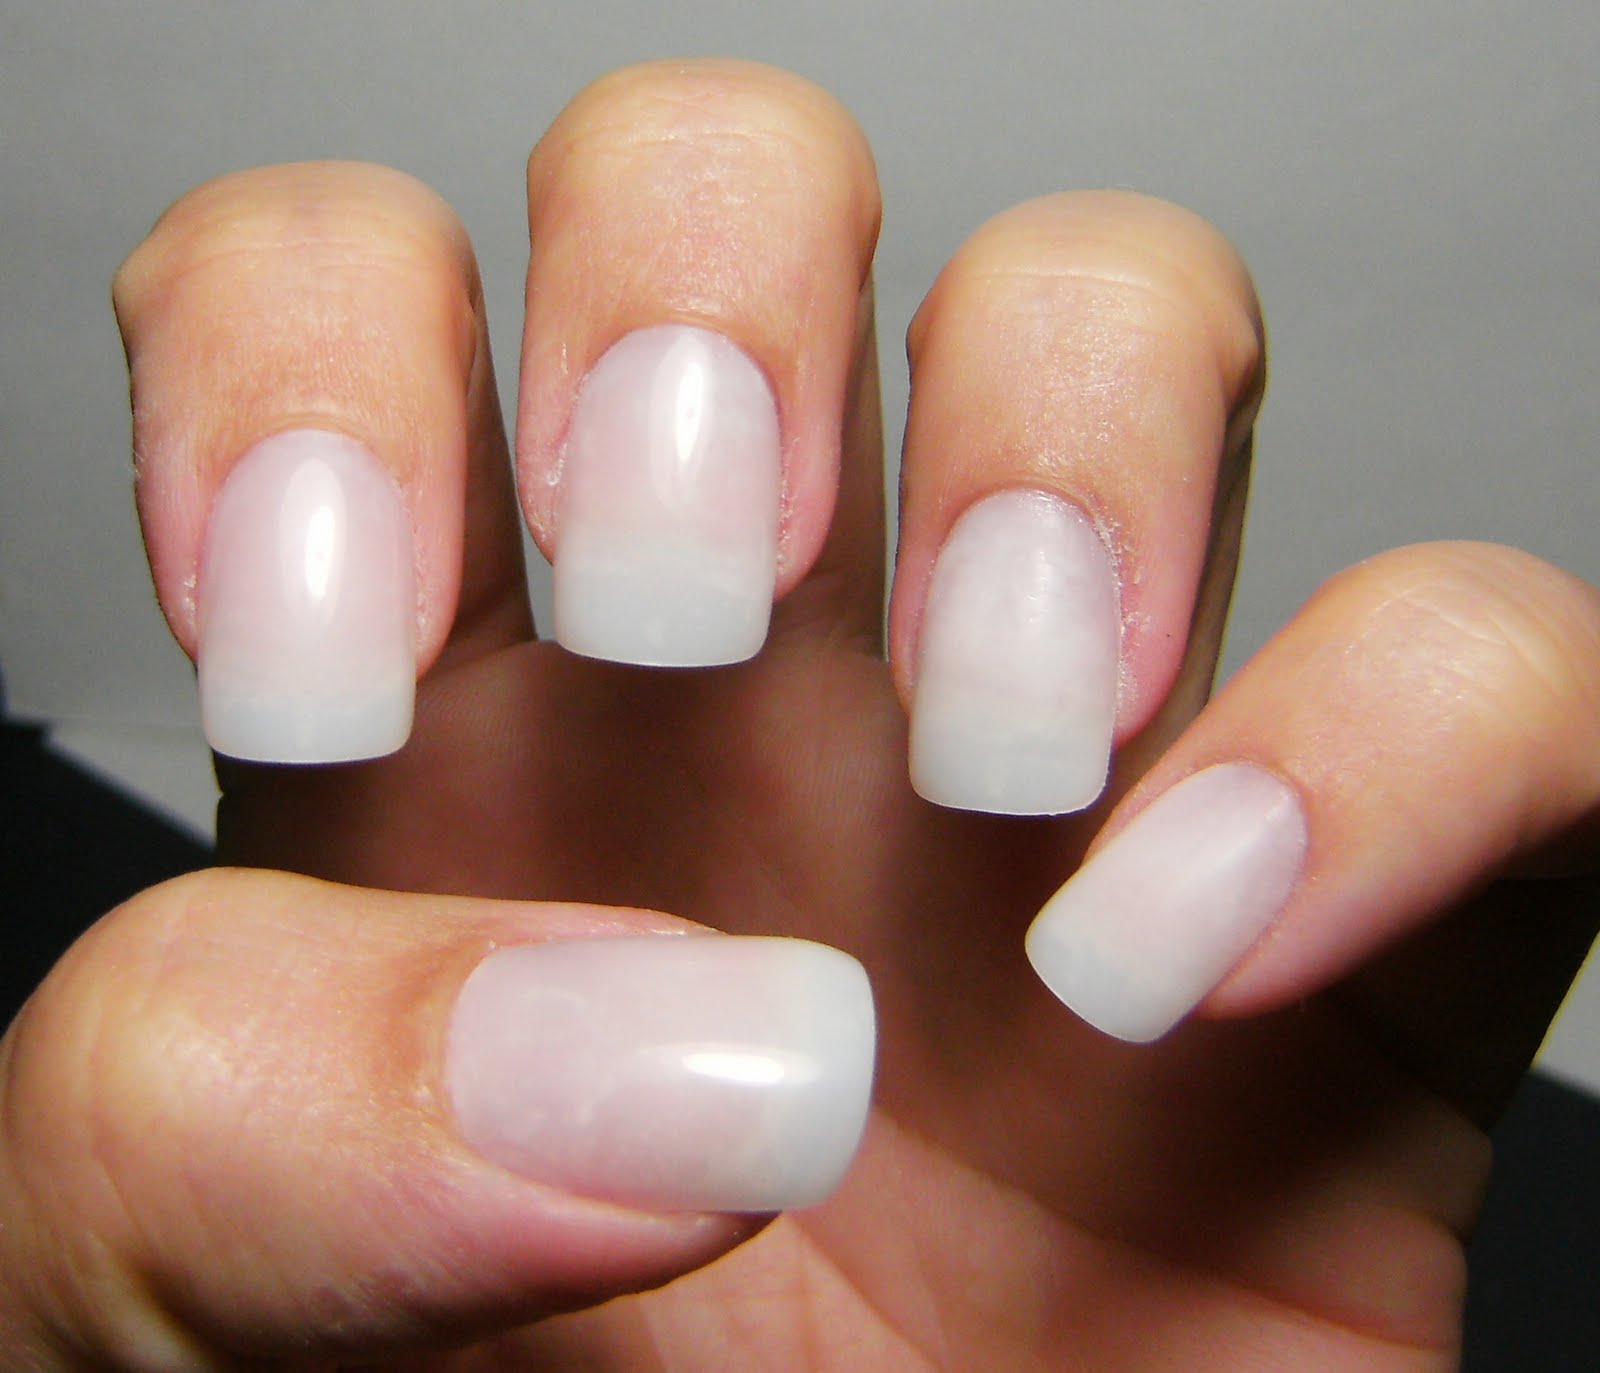
Here is the type of false paint-able nails I use/ I very rarely say I am wearing false nails in my post, because I WEAR FALSE NAIL ALL THE TIME. I have a few posts with my natural nails painted, but 95% of manicure posts are either the nails above, or the old skool FING'RS brand nails ( trophy wife length ~ thank you very much)
I have been wearing Artificial nails for years and years and years. My real , natural nails are healthy and fine. I have never had a 'fungus' or any other weird nail issues. I am a very happy artificial nail user.
I think that my post about applying pre-painted/ pre-decorated nails has waaaaaay better photos, but alot of the information in here is important too. And my post about replacing an artificial nail has alot of great information as well. The photos in this post were taken indoors so they are not that great.
Today is a post about some known issues in regards to applying artificial nails. This is my opinion and my experience. I have written many times about my thin sharp and lethal REAL nails, and that although they grow fast they are very thin, sharp and dangerous. And so I keep them covered for safety reasons.
BUT= that is not the only reason why I wear fake nails. I love how easy and fast it is to paint them!!!!!! The polish dries fast, I never get chips or peeling, and I can count on my polish job lasting a long time. I do not attribute the longevity of my manicure to any brand of polish or TC = I attribute that to artifical nails.
Polish is easily removed with a gentle non-acetone polish remover. Straight up acetone will eat these up! So a non-acetone or gentle polish remover is a must. The polish remover I recommend is Sally Hansen Regular formula ( purple ) or the non-acetone formula ( blue ). I loved cutex non-acetone in the cute little pimp bottle but it is only available in the USA, so I am sticking with those 2 Sally Hansen Removers. I still need to lightly sand the surface with a fine sanding block though..... and I imagine that even though I use gentle non-acetone polish remover, the surface is getting a little bit of damage. That did not happen with the cutex remover. KEEP IN MIND, that polish remover will begin to dissolve artificial nails - so no cotton ball & tin foil removal.....
There is very little selection available in longer false nails at this time... I think that finding a longer length would mean hitting up a beauty supply store or EBay. I very rarely come across longer artificial nails anymore.
ABOUT THE NAILS i BUY
I always buy Nailene Active Square 200 count artificial nails and here is why.
- These nails are wide enough for all sizes of my nail bed.
- The artificial nails do not taper at the sides towards the tip of the nail.
- No problems using non-acetone polish remover - sometimes lightly sanding the surface is necessary
- They are easy to shape and fit my natural nail bed.
- They paint perfectly with no base-coat
- I can apply polish, then remove it several times before the artificial nail becomes weak and needs to be replaced, These WILL weaken and become more pliable with repeated use of polish remover.
- Easy to find at Zellers/HBC Canada, Shoppers Drug Mart and other department stores ( the walmart in my town never has these in stock when I go there
- Price; these are 1 dollar less for twice as many nails. ( whaaaat?) this may be the stores fault, and not other leading brands of Artificial nails company's price point.... however - I find Nailene nails to be priced competitively with other brands in general.
I have nothing unkind or negative to say about any other brand of nail I have bought and used every brand available to me in stores but choose this brand for the above reasons.
Here are some covert op photos that I took at the Zellers Department store in my town


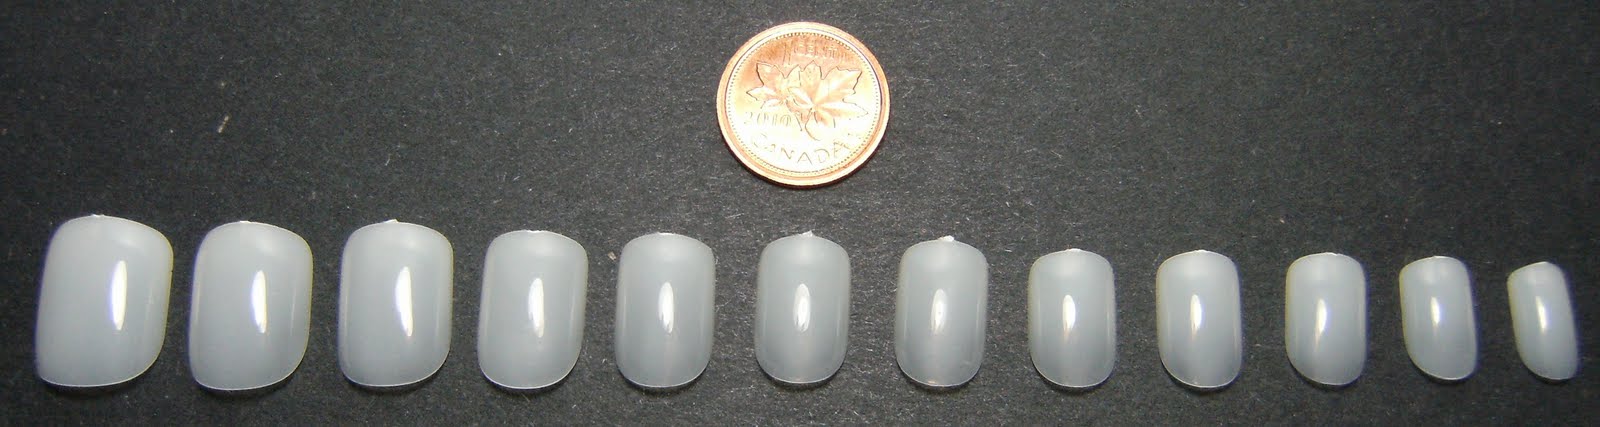
Below - the 12 different sizes available in the box of Nailene nails that I regularly use.
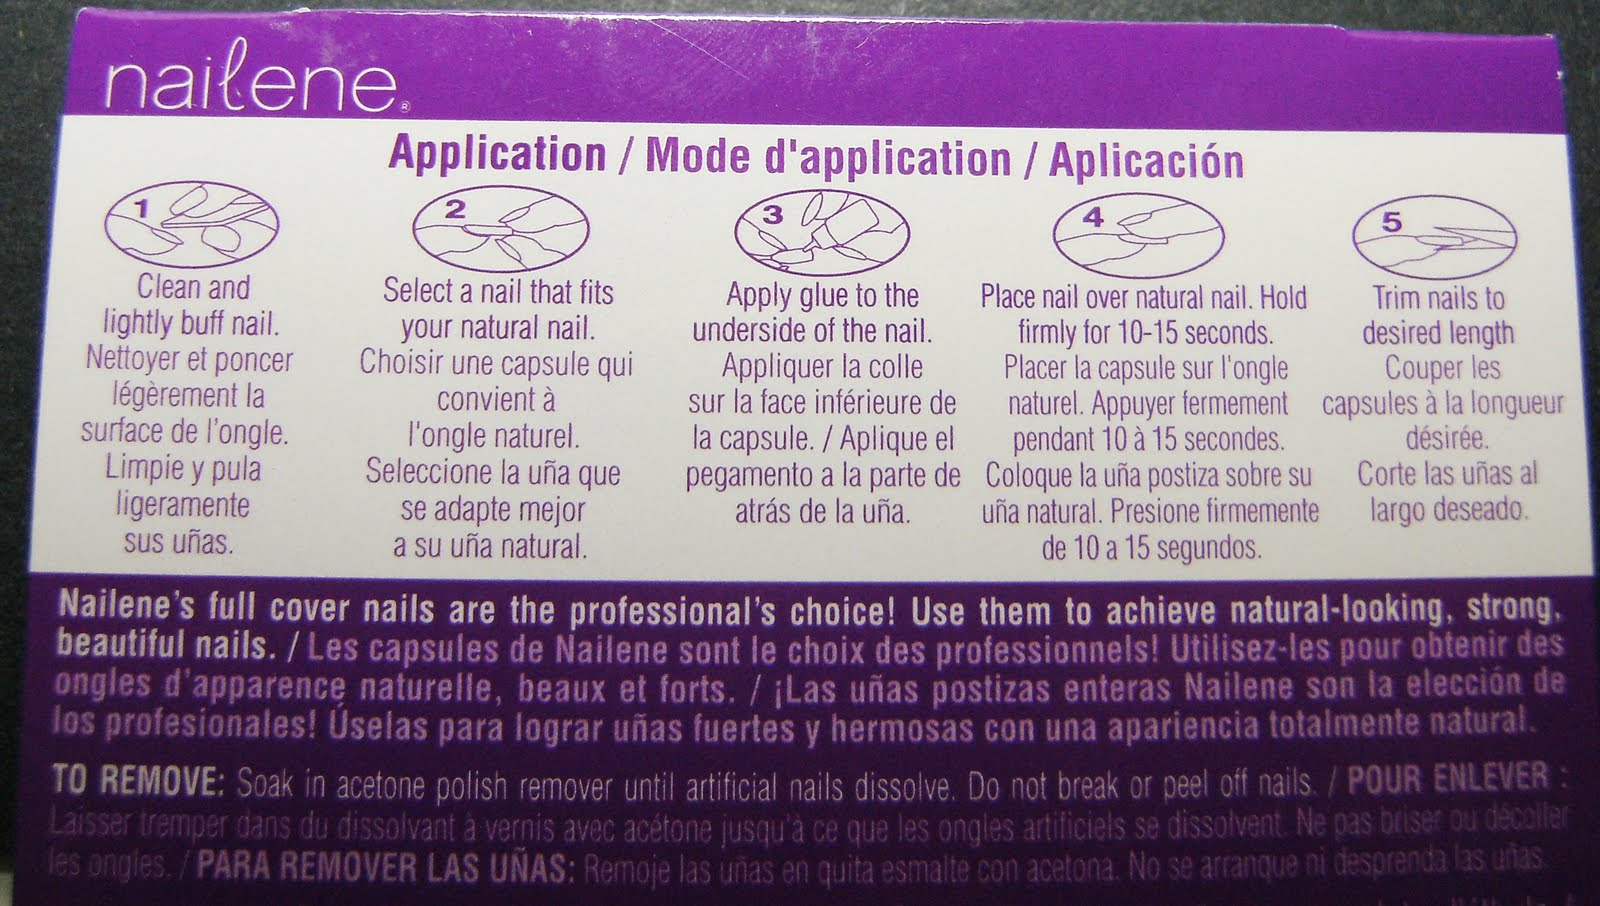
The instructions on the back
Here is a photo of a paper towel that glued to both my fingers my right middle fingernail, and my left index finer nail/finger
hahahahahahahahahahahahaaaaaa

I washed this of as much as I could and then buffed out the glue...UGH!
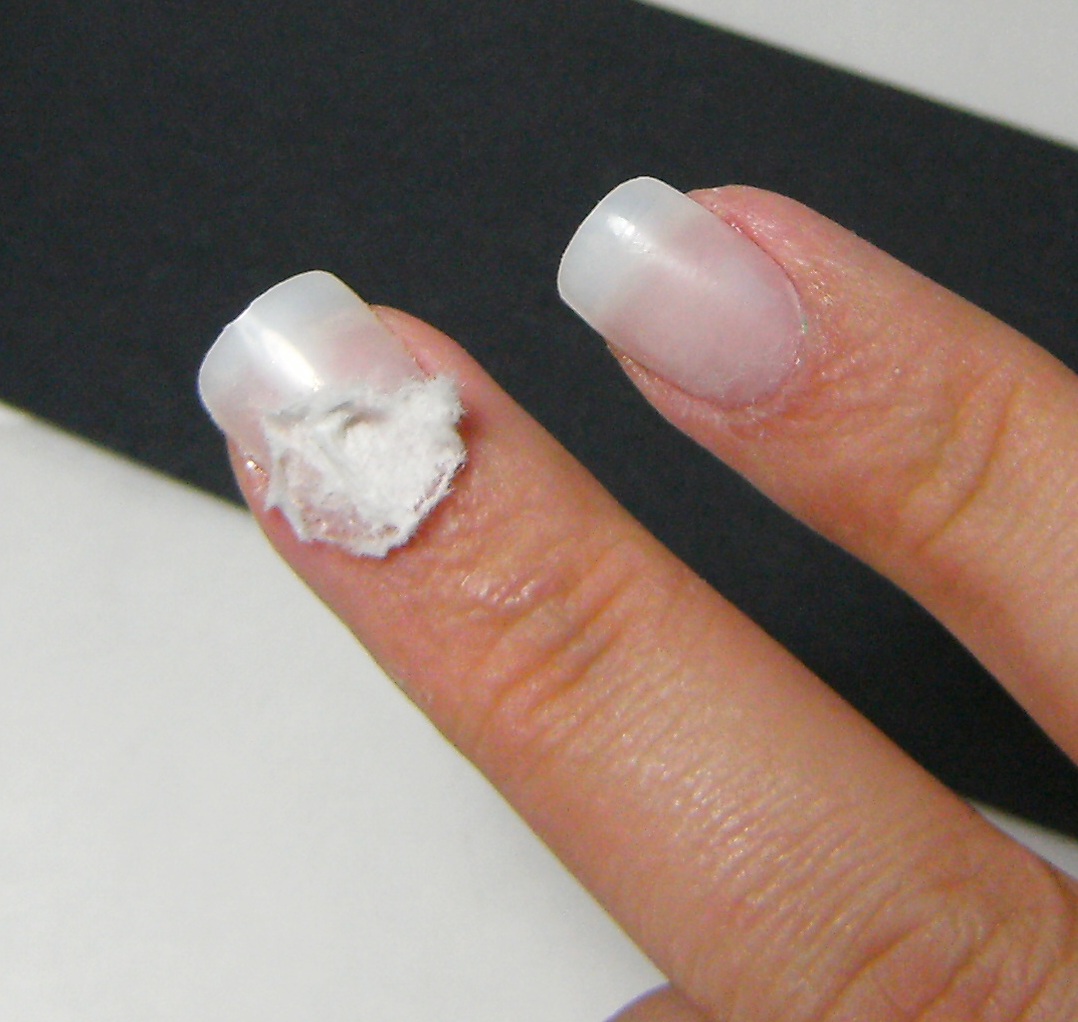
....and I bent that nail in half somehow......
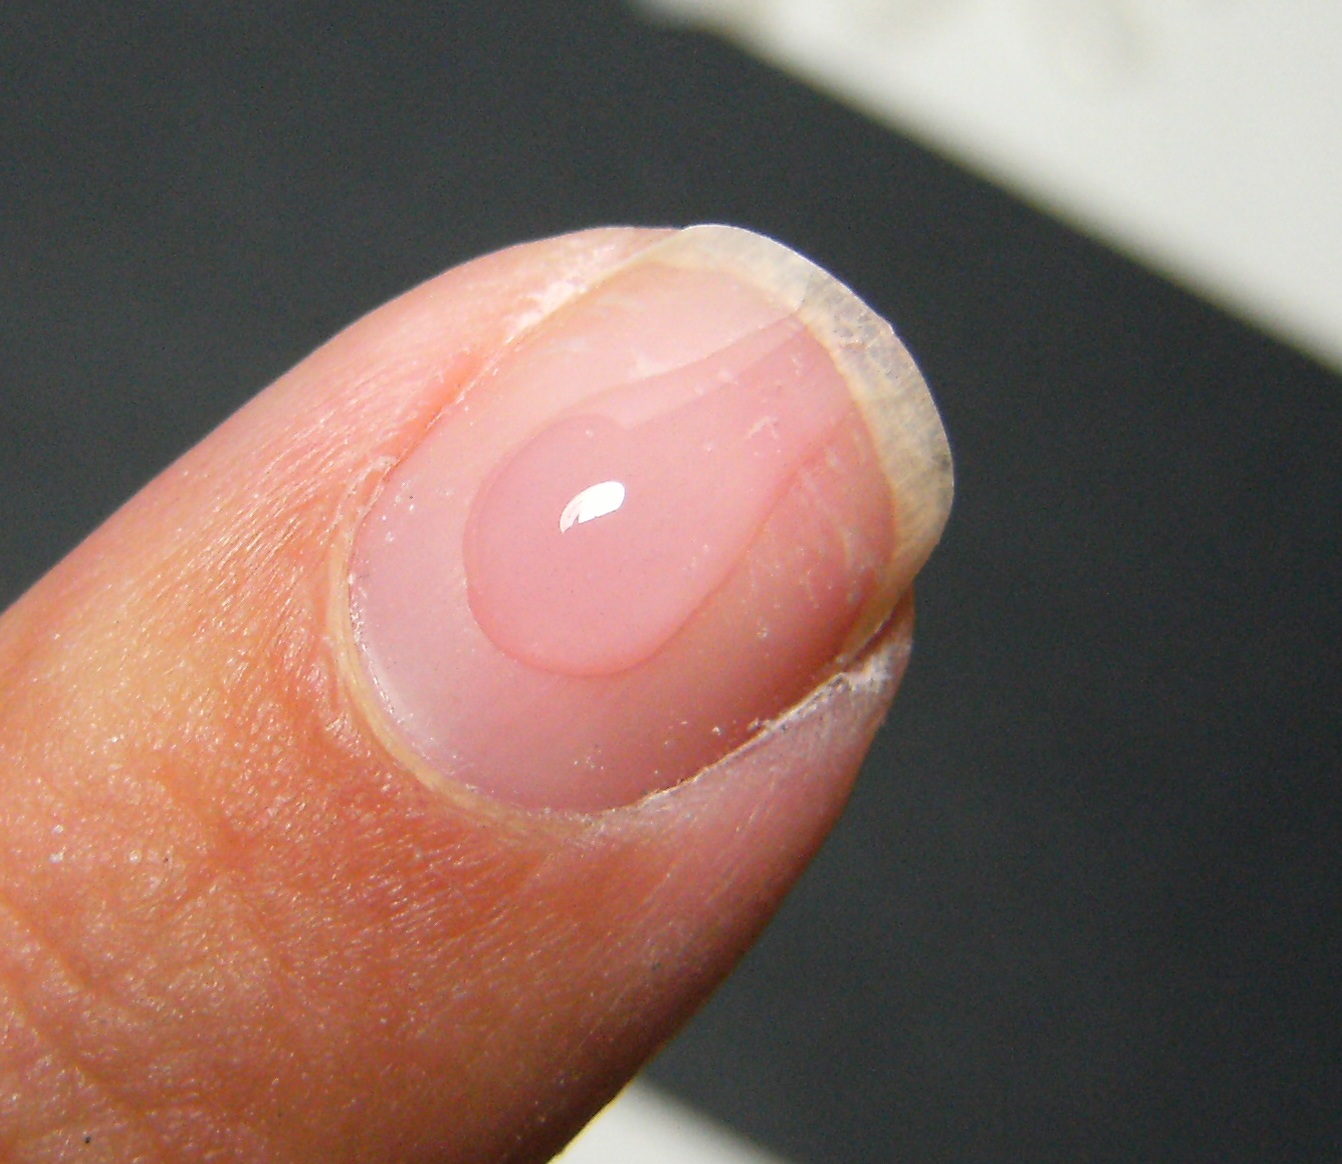
MY NATURAL NAILS
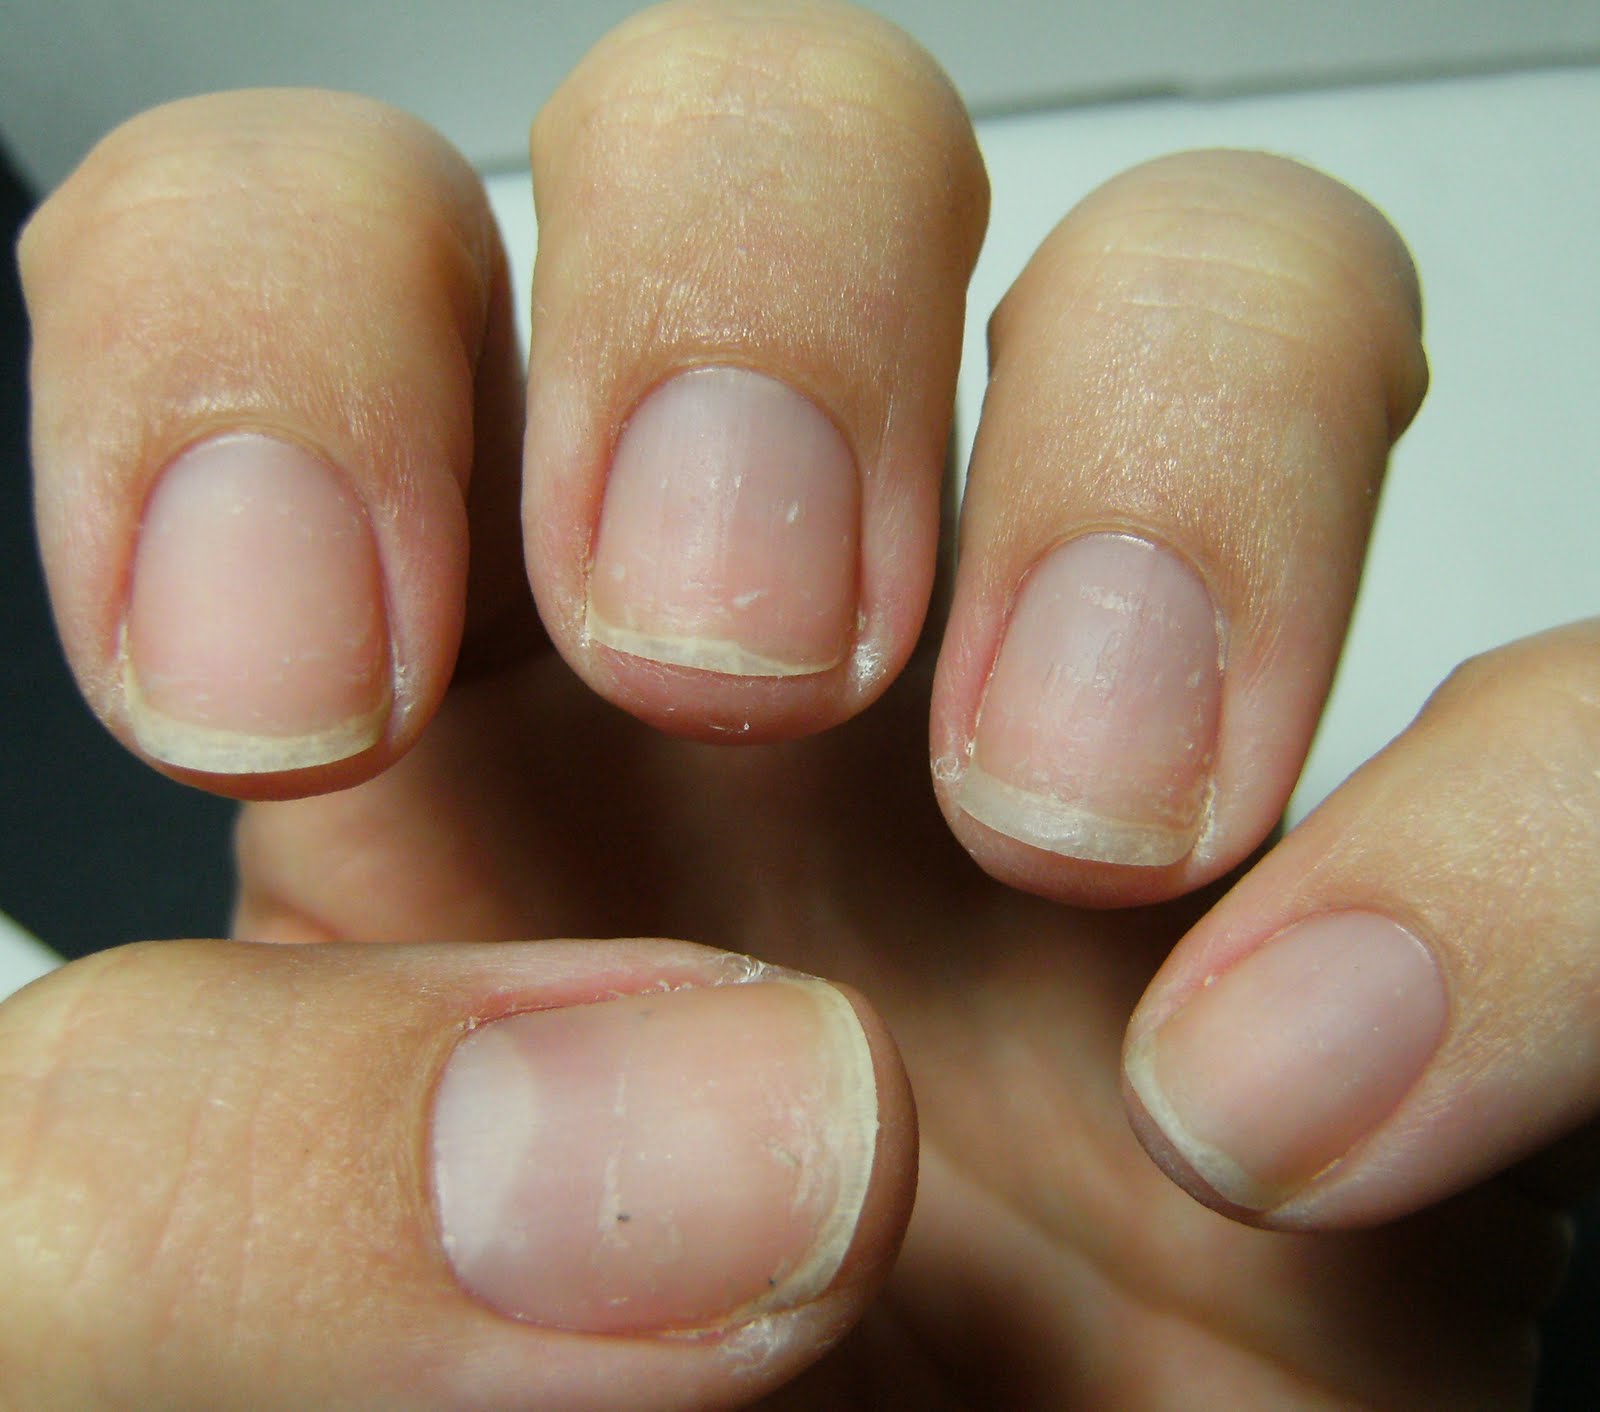
(I'm happy to write that my middle finger nail injury is just fine with what seem to be no long term damage)
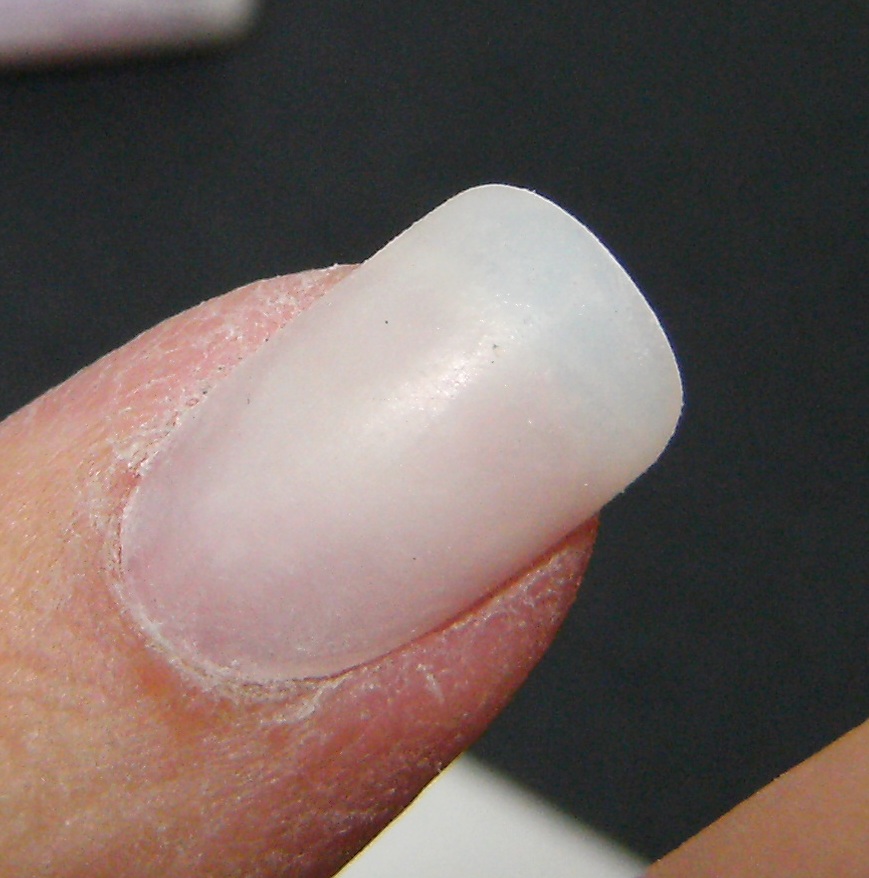
AFTER APPLICATION OF ARTIFICAL NAILS
With buffing paint T.C.
PHOTO?????????
Shaping my nails before applying artificial nails

If possible, scuffing up the UNDERSIDE of the artificial nail, can create better bond with your natural nail. I sometimes use a very bendable worn out paper/foam file to do this, but I am lazy so I often use my battery operated file to do this.
Of course making sure your nails free from moisturizer or other oils, and you have washed your hands at least 10 to 20 minutes before, becuase your NATURAL UN-PAINTED NAILS WILL ABSORB WATER. That is why after a long shower.bath or repeated hand washes polish will peel or chip.... get clear polish and top coat over all surfaces of your nail to ensure a long lasting manicure on REAL nails!
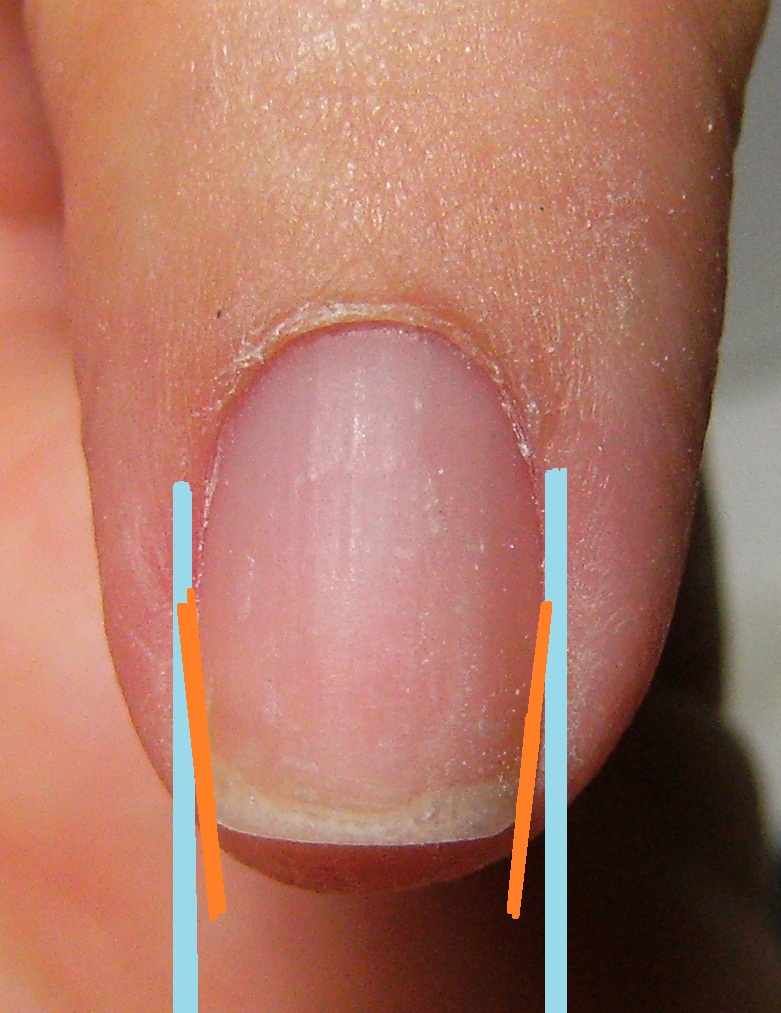
Here is a fabulous diagram on how I generally shape my natural nails before applying artificial nails. The blue lines are the origional shape of my nail, and the orange lines are the new shape.
BLUE: Origional shape of my natural nail
ORANGE: New tapered shape of my natural nail
I MUST ADD THAT.....in my experience, shaping my real nails like this results in tearing and breakage. The straighter the sides of my nails and less tapered my real nails are the less they break. Even though I was gently filing my nails and taking my time and not going crazy with the file, my nails often tore at the sides. My theory is that the wider and more curved the nail bed is, the structure of the nail provide strength and resistance to tearing and breaking,.... even with my super thin nails.... THAT is a topic for a whole other post
KNOWN ISSUES WITH FALSE NAIL APPLICATION
Just like in my post about applying pre-painted artificial nails, or my other post on replacing an artificial nail I shape and lay out all 10 of the artificial nails. I choose sizes that closely match my natural nail width. I shape them to match the curve of the base of my nail where my cuticle is, and ensure that they are not to wide, and there is just a tiny sliver of space between the artificial nail and the sides of my nail.
Excess nail glue on the surface and sides of the artificial nail
Below; a fuzzy photo of the glue I used and the amount of glue NOT TO use. I used way, way too much glue for the surface of this nail but this is going to be an example of a known problem when applying artificial nails. This is not the same glue that comes with the Nailene 200 count nails. But I happened to have this small bottle of glue opened already and want to use it up before I crack open another bottle/tube of nail glue.
(This photo is fuzzy but it is the only photo I have with an actual tube of nail glue, and glue on my nail)
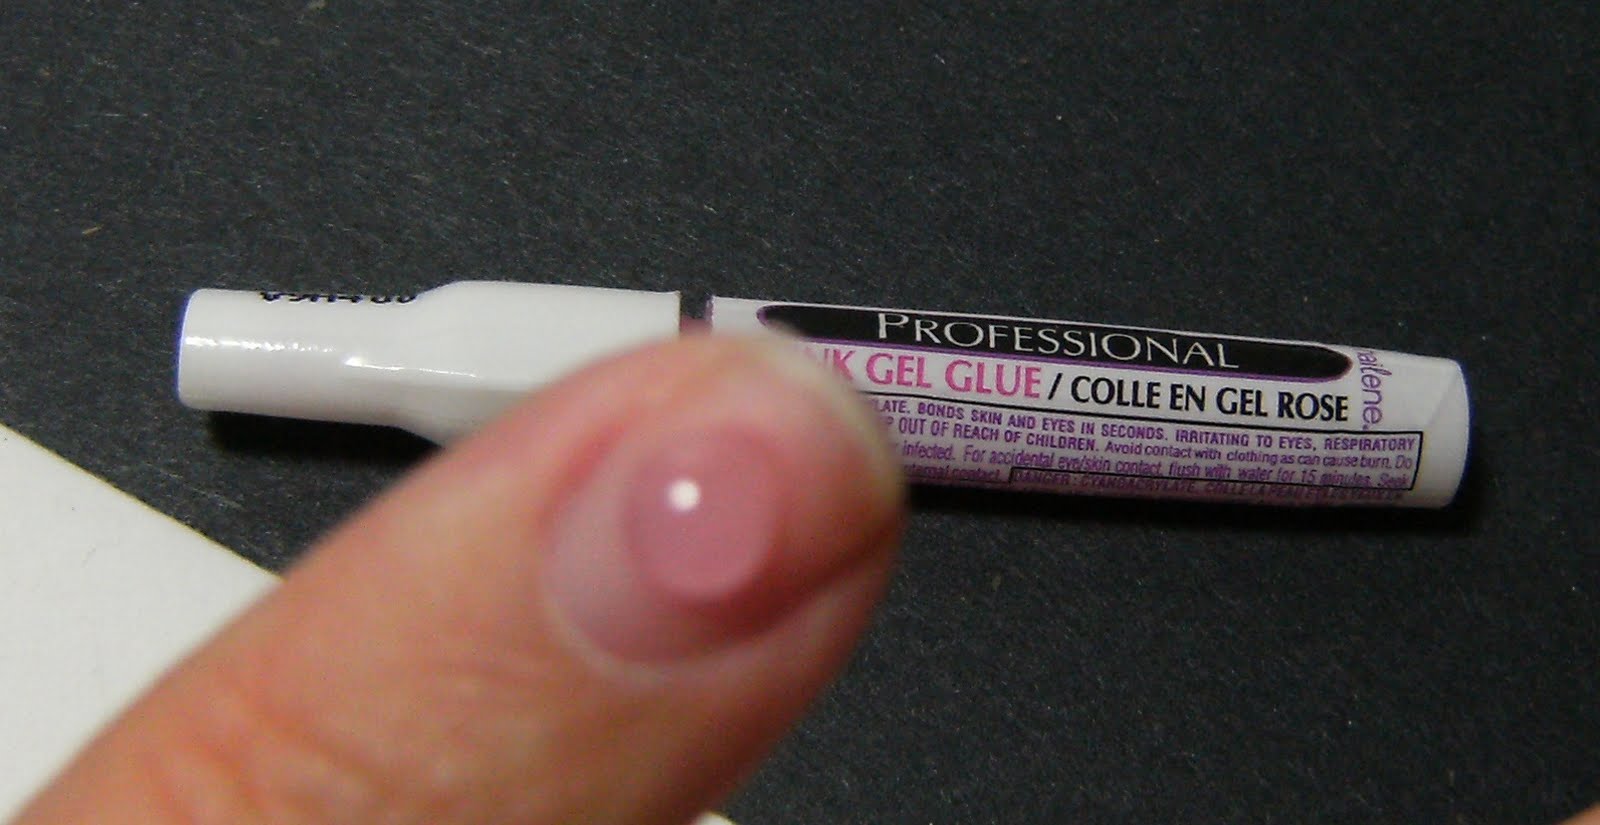
This is far too much glue, but I used this amount to demonstrate the result of using too much glue, when you press the artificial nail down on this much glue, there will eb a lot of glue seepage, and the glue will bubble out of the sides and base of your nails.
Having paper towel handy to absorb excess glue will reduce the amount of buffing and filing of the ( soon to be ) hardened glue. I fold a small piece of paper towel to form a point and hold it against the excess glue.

Here you can see the excess glue seeping out of the sides of my nails, this photo was taken after placing the artificial nail onto my real nail
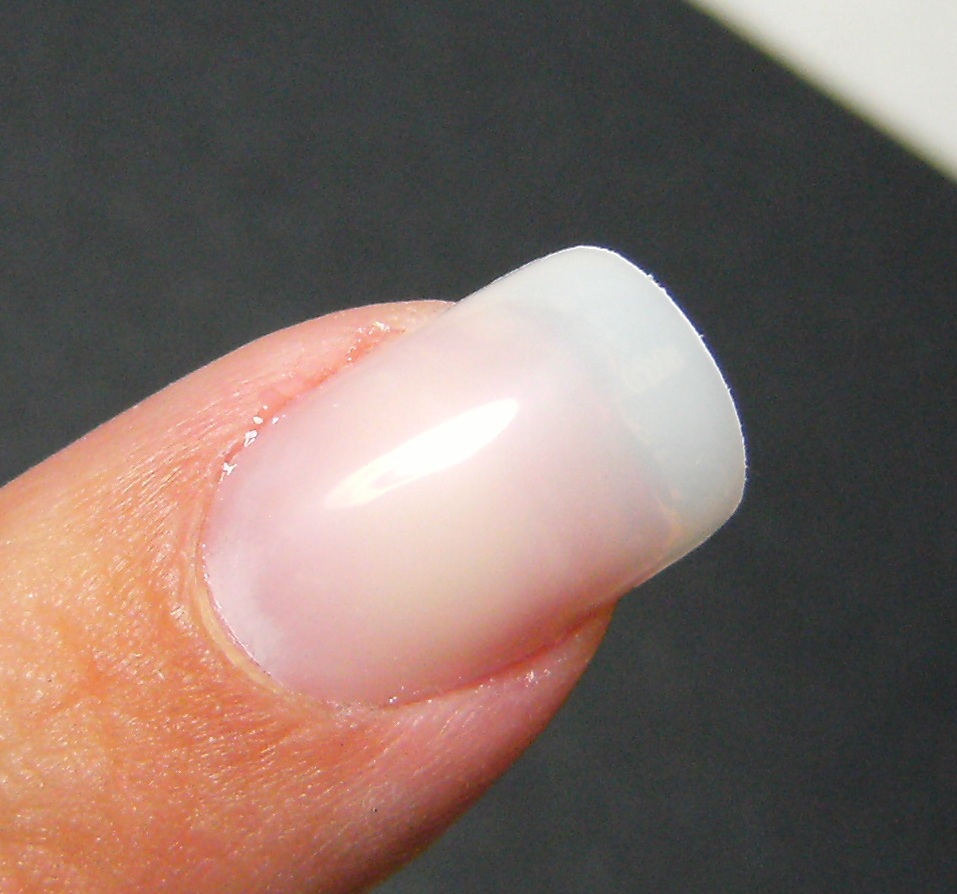
The little nub at the tip of the nail needs to be filed off, I keep forgetting to mention that.
Here I have buffed out the glue that was on the sides of my nails. I marred the high shine that these artificial nails have - but these are to be painted so not to worry. If you happen to get glue on the surface of a funky french or other pre=painted/pre-decorated artificial nail YOU CAN buff it out with a super duper fine sanding block!
The photo above looks bad! But all that white stuff is artifical nail dust and hardened glue dust from sanding/buffing of the artificial nail and the nail glue and will wash off with water. I will add that you should try NOT TO breath in any of this nail dust or glue dust. The glue stuck to my skin at the corners of my nail towards the tip will be there untill I slather on a moisturizer and wash my hands a few times -----please DO NOT try to 'peel' off nail glue that is stuck to your skin.....becuase you will be taking a layer of skin with it♥♥♥
The evening that I applied these I used a alot of moisturizer plus a heavy duty moisturizer on tip of theat and slept with gloves on ( I do this every second night ) to help my skin absorb the moisture to reduce the bond between my skin and the glue. By the next eveningall the little bits of nail glue around my nails, as well as random bits of glue on my fingertips were gone.
So don't panic if you get nail glue along the sides of your nails or nail glue adheres to your skin in any other areas, It will be sloughed of via application of moisturizers and hand washing.
Excess Nail Glue Beneath the tips of the artificial nail
Here is another common problem that comes from using too much glue. Here on my INDEX nail, I have used too much glue and while the nail glue did seep out on the sides of my nails, much more of the excess glue ended up beneath the tips of my nail.
Here you can see that some glue seeped out on the side of the artificial nail...but......

Here you can see there is a substantial amount that has pooled beneath the tip of the artificial nail, my natural nail as well as along the area where my natural nail and skin meet; In this photo I am breaking my own rule, and prying the glue away from skin. Normally I would whip out the acetone and my small angled brush and try to reduce the amount of glue and hopefully reduce the bond between my skin and the nail. This is also the finger that the paper towel was glued to in the photo towards the beginning of this post and there is alot of glue on the left side of my finger in the photo below.
For this photo though, I did wedge this plastic cuticle pusher in between my skin and the nail.
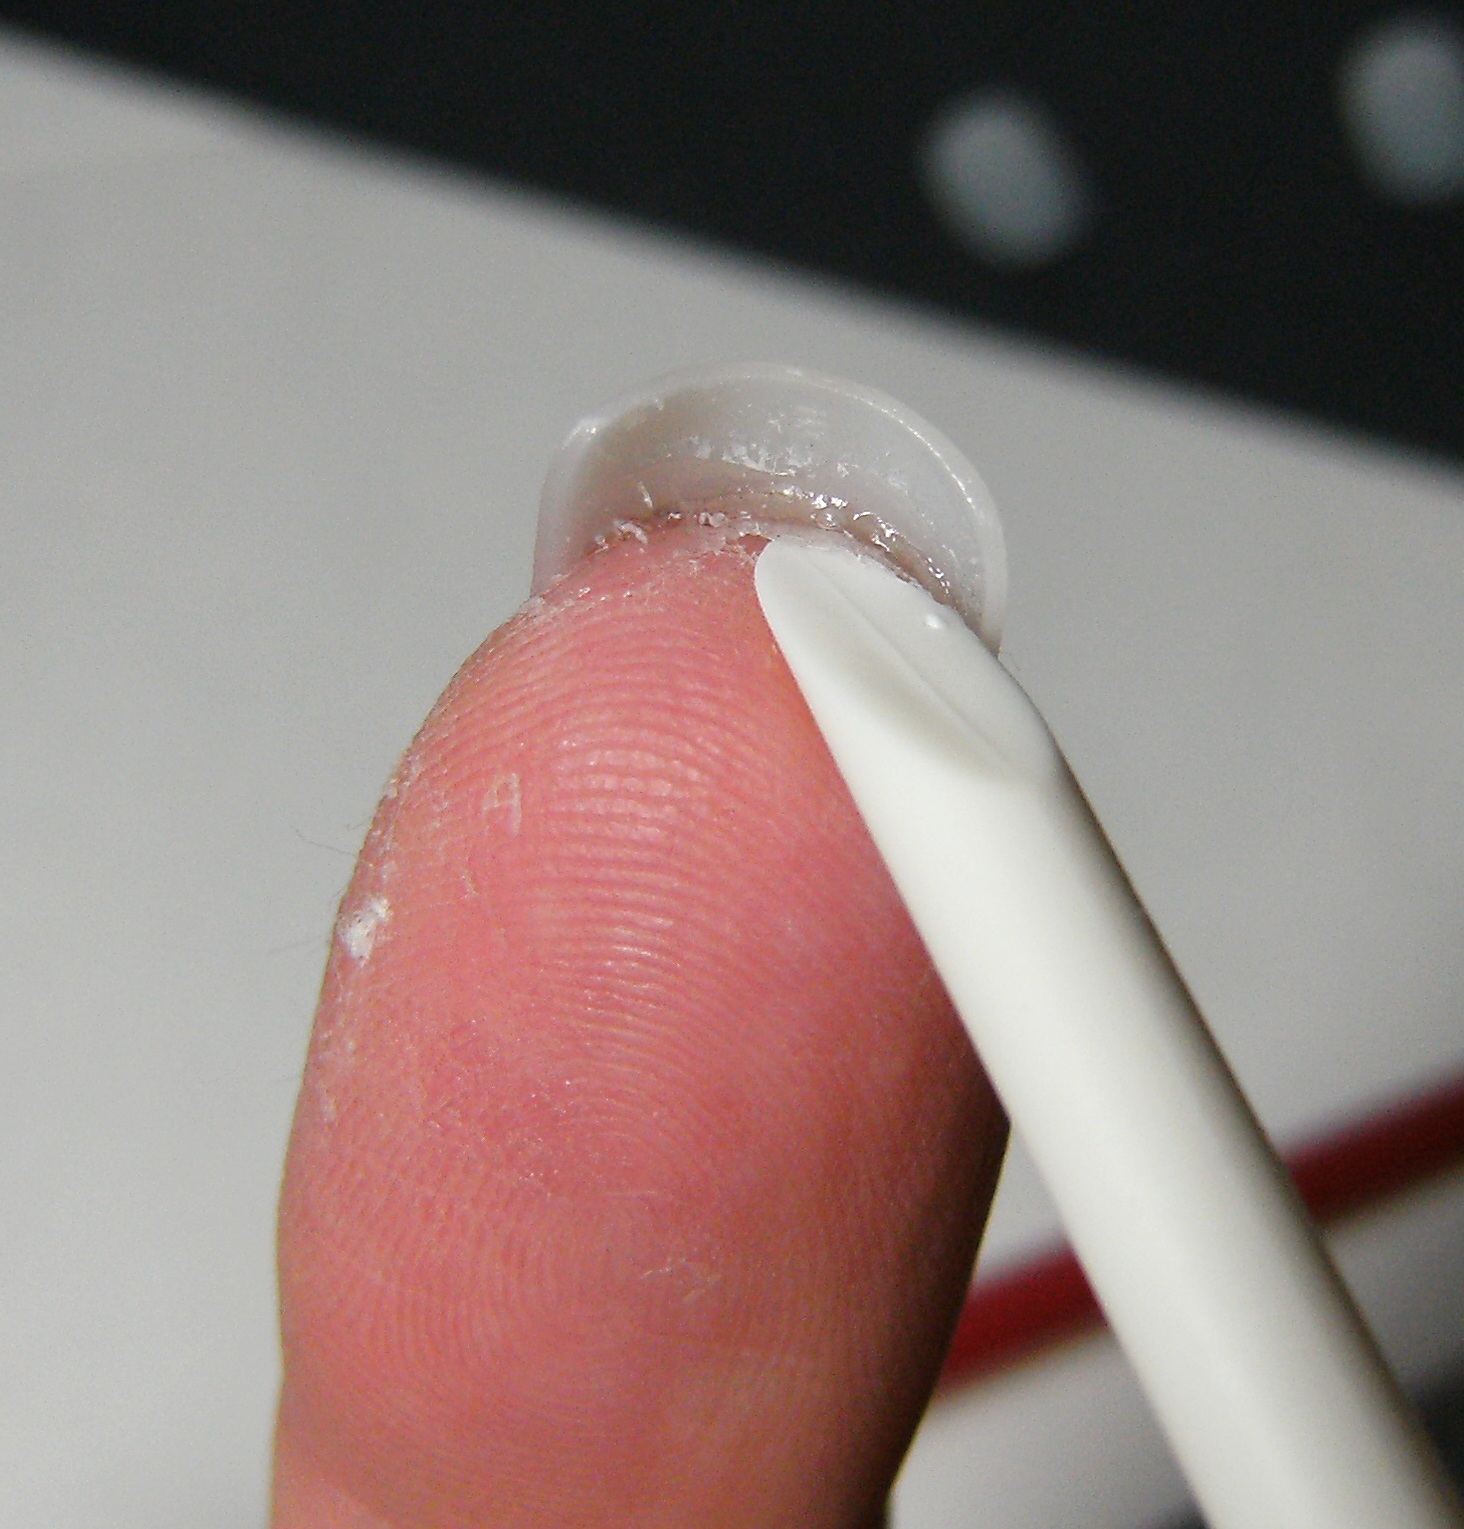
In the above instance I would try to chip away as much glue from the artifical nail then use acetone and a small angled brush to get in there and try to reduce the amount of glue. No matter how little or how much glue I use, I will often get a tiny bit of glue beneath the artificial nail and my real nail. If I happen to have no REAL nail at all, and my nails are just nubbin's then I will definitely get some glue stuck to the skin where the free edge of my natural nail begins.
IRONICALLY although gluing your natural nail/artificial nail to the skin is problem in this instance, I do recommend trying to add a small amount of glue along the line where your natural nail meets the artificial nail. This is a great way to prevent any moisture from entering any areas between the natural nails and the artificial nail. First when my ALL 10 of my paint-able artificial nails are applied and the glue is dry, I swipe a small angled brush dipped in acetone along the underside of the artificial nail. Then I applying a small drop of nail glue to a tooth pick, and tracing the ridge along natural nail where it meets the artificial nail.
In this photo below, the nail at the left ( my RING nail ) I had alot of glue on the surface of the nail which I buffed out. There is still alot of texture due to the hardened glue on the artificial nail. and I will buff this out a little further. Also = the shiny surface is dull of that finger due to the sanding/buffing.
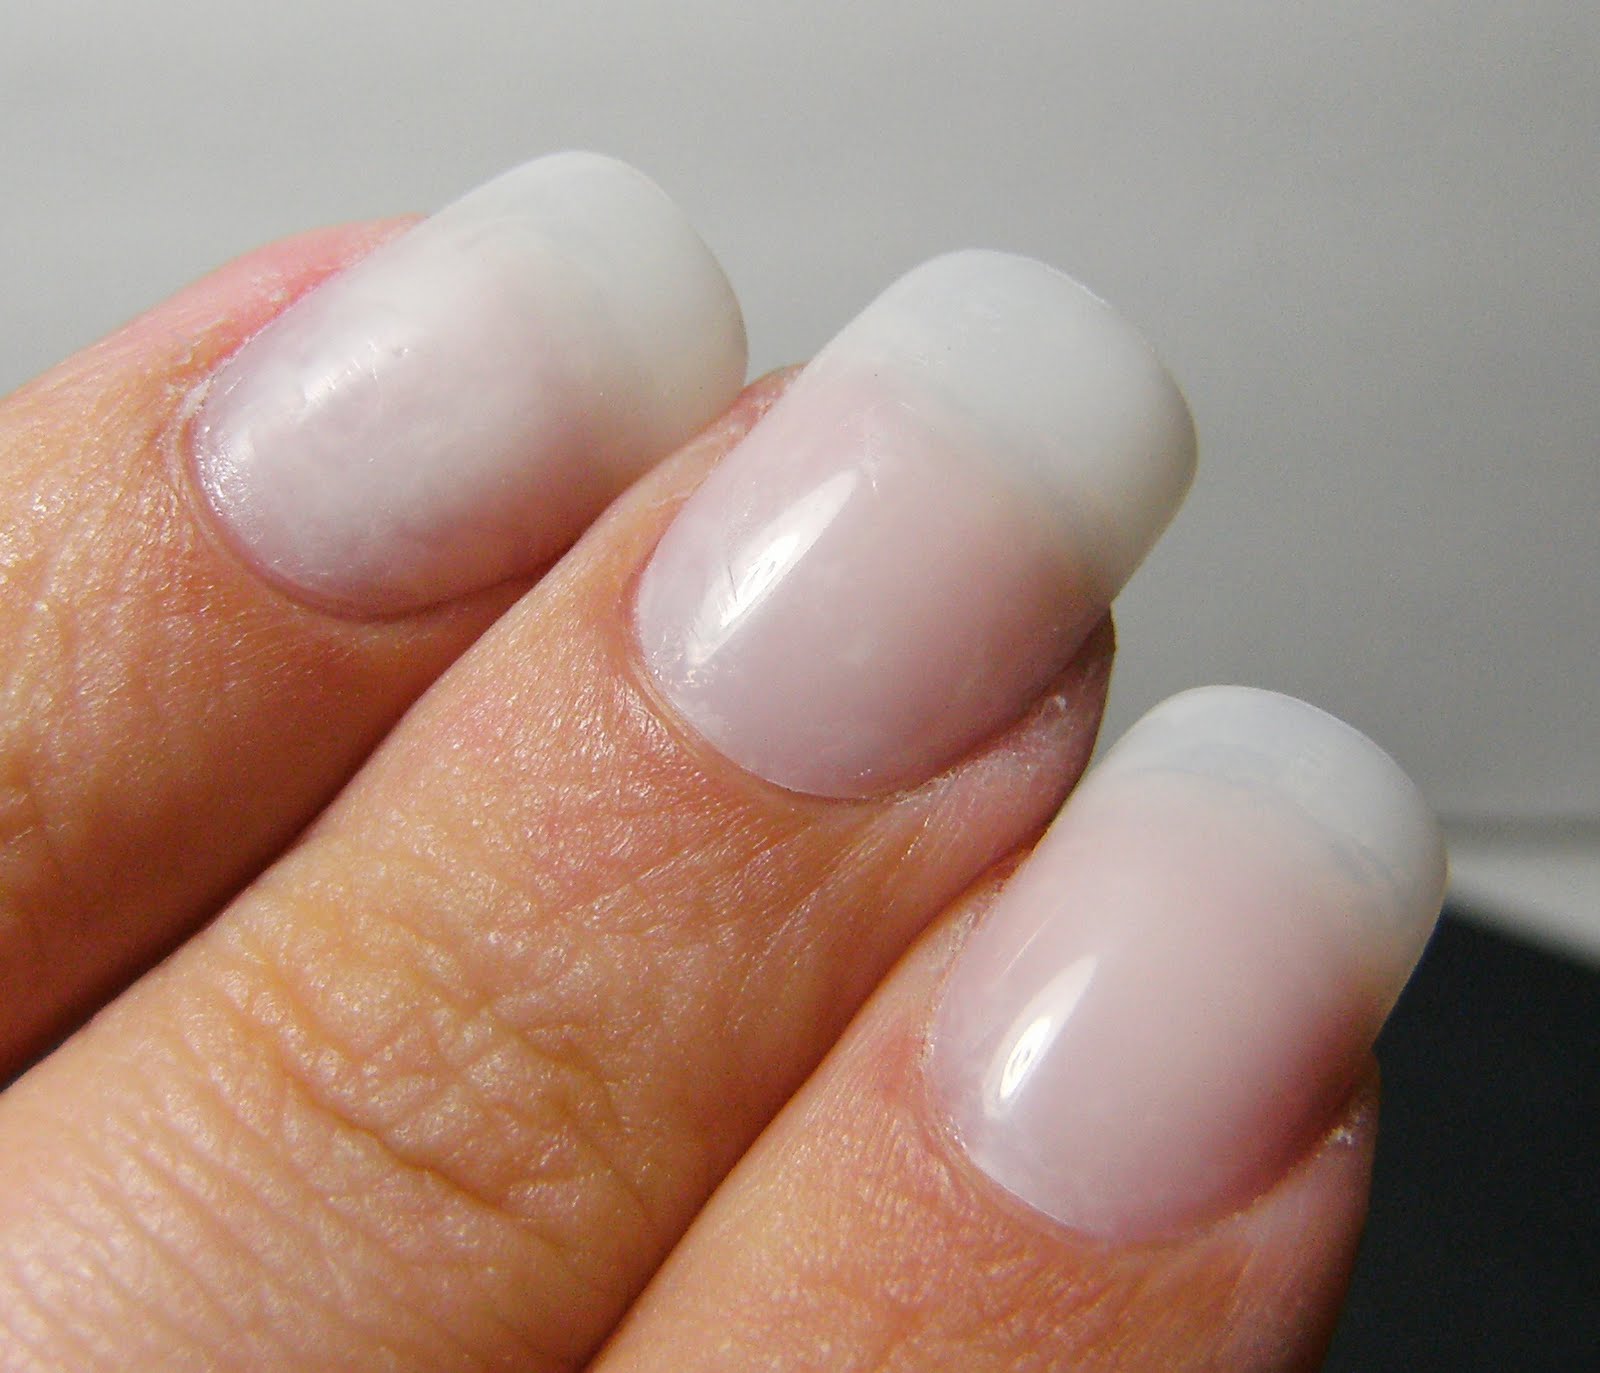
PAINTED UP ALL PRETTY
PHOTO?????
♥
15 comments:
I wear this same brand of nail too!! I have found the same price difference here in MD as well; other brands have half as many nails and cost $1 more... weird. I love these nails and I have found that they are typically pretty durable. I am able to wear the same nails for about a week, then they will start breaking in places or just get lost. Great post!!!
Great post :) My sister wants me to apply fake nails to her soon for our vacation so this will come in handy!
Also, i picked up a pack of those nailene nails (200 pack) exact same ones at a crappy dollar store in my area, (everything in there is OVER a dollar) I think i picked these up for under $3 , great deal!
I love all your tutorials they are so thorough!
I've always wanted to try these but I'm like deathly scared that it will just be one big mess for me haha. Great post :D
purepolishblog.blogspot.com
After reading your falsie posts I decided to pick up some Kiss French Tip ones to put on while a really bad tear in my thumb nail heals. They're super cute and feel pretty natural. They look pretty real too, except for the air bubbles. Oops! haha Oh well. I mostly just wanted to protect my nail.
I really love that you're doing all of these great posts on false nails. I do have one question though? What do you mean by "trophy wife length nails"? Are they super long or something?
I love nailene products!
thank you for this post
xoxo
http://becksmakeupcorner.blogspot.com
I have yet to find those nailene full cover nails, I have tried the kiss ones, hate the, they are too rounded and pop off my nails. I usualy just use the nailene so real french tip ones and after a couple days i start painting them.
Nailene is the way to go when you need a short term quick fix!
I like your blog!!
I'm just getting mine started :)
http://tiptopnaildesigns.blogspot.com
You always do great tutorials!
Thanks for this! I've been looking for a good guide on how to do fake nails and this is really helpful!
♥ Brooke - thank you soooooo much. it took along time to write this. It is strange thatthere is such a huge, monumental price difference.
♥ Danielle -??? whoa that is an awesome deal.... must be from when they changed their packaging.
♥ Kae - your videos are great and you do some amazing nail art. Thank you so much.
♥ Kathleen =- I think filing the artificial nails, and then using the correct amount of glue are key to beautiful and realistic looking artificial nails... It was all practice for me. But I wish I had this info when I first began applying artificial nails.
♥ Sarah - whatever brand works! as long as you are protecting and growing out your nails. Kiss has beautiful designs on their pre-painted false nails.
♥ Starlight - No thats what I call extremely long nails.... nails that I think are almost comical ==to me= The longer false nails that I use are an older package from Fing'rs, and they are a great length. I will do a post in the near future about this.
♥ Becky - I have been happy so far. I just hope they dont change anything and I get a heads up if they pull these off the shelves.
♥ Aggie Pigeon - I like the 3X 'so real' nails I used remover on them like 5 times and they still kept their shiny surface and the pattern did not fade.... They must be coated with a thick coat of....something...
♥ Nail girl- I agree.
♥ Ashley - Thanks - Ill check it out and add you to my nail blog roll.
♥ Arrianne - Thanks I really want to share information
♥ Janelle - I hope I did a good job explaining how I do it. Have fun.
I love these Nailene ones as well. I get the longer ones, so whether I feel like having them short or long, I have the option. Also I really like the color and tint of these. They look natural and shiny, which is nice for me because I rarely paint my nails. My only complaint is that, when you hold them up to a light, they have a really strange dirty orange look to them when looking at the light through them. But that's not a huge deal to me. I just ordered some of the Kiss pre-frenched nails, to see how those are going to look and compare them to mine now.
Where did you buy them WOW
Post a Comment