Pages

Showing posts with label Colors - Yellow. Show all posts

Thursday, May 24, 2012

Why?


The colour and formula on Sally Hansen Insta-Dri polish's is impressive, but the double polish configuration from Summer 2011 is just ridiculous. I have nothing but praise for Sally Hansen Nail products but this one has me scratching my head. I picked this up just after X-mas, wore each polish on it's own shortly after then tucked it into my deez-elemer, forgetting about if for several months.....

Since that time I had noticed a strong nail polish-ey scent in my craft room/make beleive nail salon, but could not figure out where it was coming from. I meticulously inspected each bottle I own, ensuring that they were properly closed and that there were no cracks or flaws in the bottle caps but I could not figure out what it was. 


..... it was this polish bottle, grrrrrrrrr, It did not seal properly so month after month the polish chemicals were evaporating!


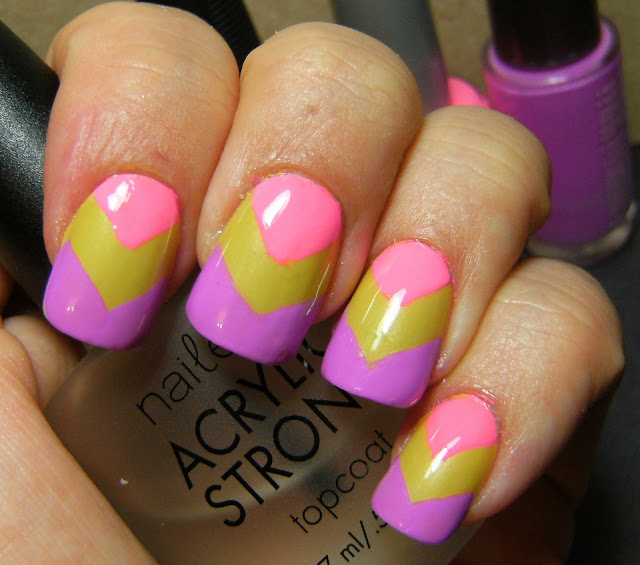
The colours are fabulous and this combination is eye-catching but the deliver sucks. I am not surprised they dont sell these anymore ( at least up here )


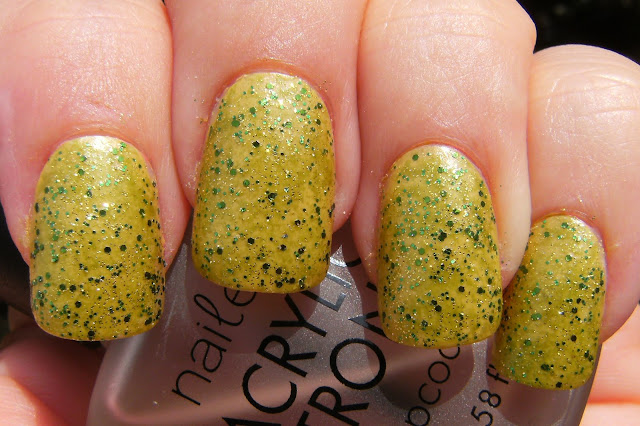
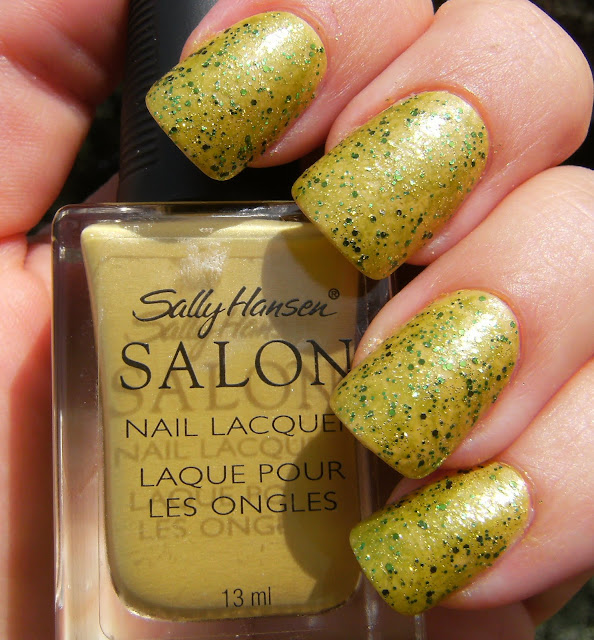
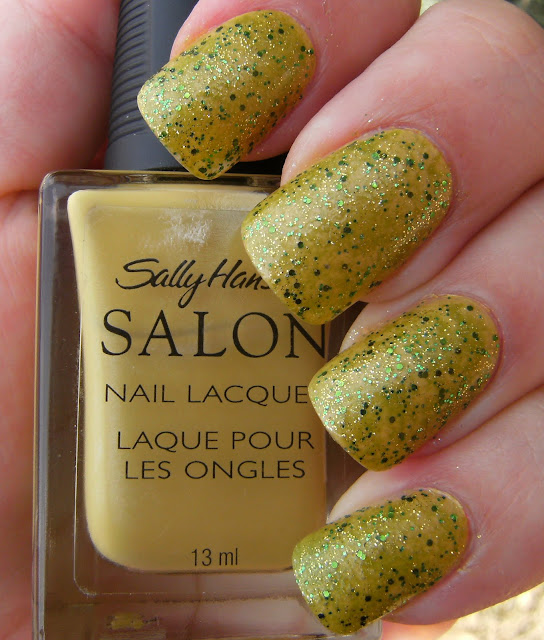
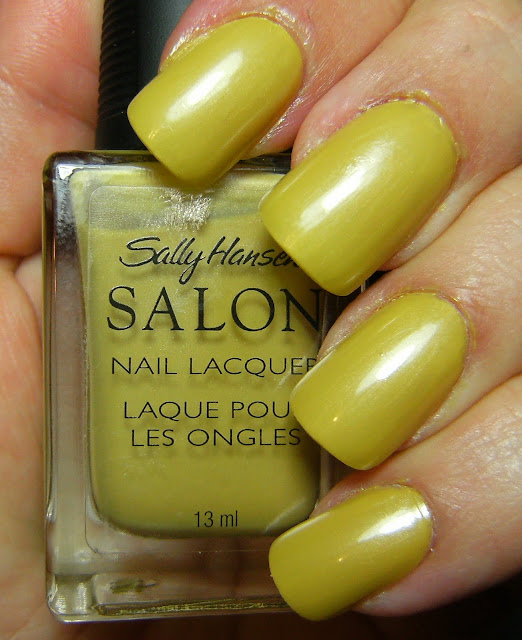
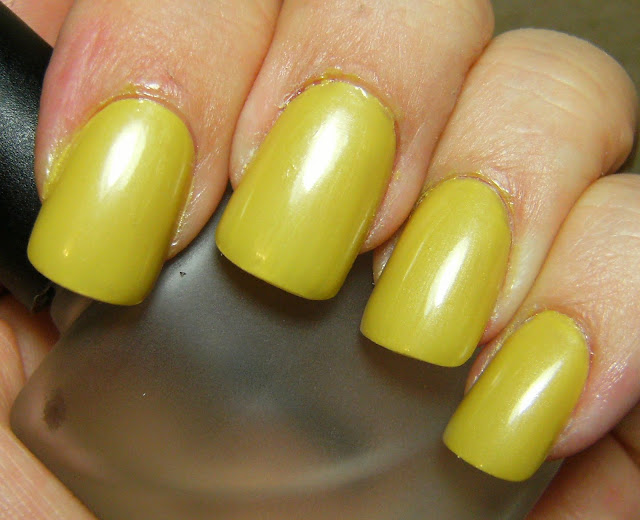
The yellow polish, Lightening, is a nice shade of yellow. On my ring nail is Sally Hansen Mellow Yellow for comparison ( If you have a hankering for a nice yellow polish, just buy this instead). To paint my nails I had to yank out the brush stem and use that instead of that weird oblong cap.... and I didn't do a very good job.


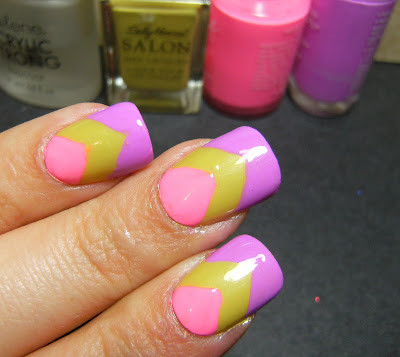
and the lovely chevron mani


messy and not worth it - but I only paid a buck for this polish duo so I shouldn't complain - but i will

After decanting the polish into cute mini bottles -  I can safely say I will never do this again.... there was polish everywhere! These two polishs are dupes to the X-treme Wear polish's pictured below. The X-treme Wear polish's are way easier to work with, more ecenomical in volume and have lids that close properly.

Sally Hansen Insta-Dri Lightening = Sally Hansen X-treme Wear Mellow Yellow
Sally Hansen Insta-Dri Brisk Blue = Sally Hansen X-treme Wear Blue Me Away
 

My mani today is a basic ruffian, I used nail tip guides at the base of my nails becuase my free-hand ruffian manis never look right to me. Below is 2 coats of the Insta Dri in Lightening

I applied the deep french curve at the base of my nail

added 2 coats of the brisk blue

waited till it sorta dried, then removed the french tip guides and added a coat of TC

This colour combo is pretty awesome.......

.....and 1 more photo
o

Wednesday, May 23, 2012

Flim Flam! Franken


 I found this awesome glitter at THE DOLLAR TREE CANADA! and had to whip up a franken ASAP. My heart was set on a pink/orange combo but this rediculously bright yellow flourecent glitter swayed me to whip up a 'Floam' like mani first.

I thought that the clear polish I usually use for fankens would dissolve the colour of the glitter but after two days there is still no bleeding......

I used a base of Wet n Wild White and applied 3 coats of my fanken 'Flim Flam!' This was a hungry glitter and even after  3 coats of TC it is still bumpy. I am excited to wip up at least 2 more of these with the neat glitter I found at THE DOLLAR TREE IN CANADA!!!!!


 I found these awesome glitters at THE DOLLAR TREE CANADA! I am happy that The Dollar Tree stores showed up in the big city ( Wpg ) ..... Now if a Diaso would end up in my Provence somewhere I would never complain about my nail polish availability ever again!

 I also picked up some beads and a few other crafty things.... no nail polish this time. They had a few displays of Billie Cosmetics nail polish which was awesome, but I already have evey single one!

 These are matte neon glitter, I think I will make a green and purple mix next. The other package of glitter is a sheer easter-grass-like glitter which also did well in the clear nail polish base I use....


Always have tape on hand to seal up these little packages of glitter!!!!

 I mixed up the yellow and blue ( this is supposed to be a good photo of the re-sealed glitter packs )

 stuff i used ( check out that settling )

clockwise from thumb - 1 coat, 2 coats and 3 coats with blobby touch-ups

here is 1 coat - note that texture, this was still bumpy after 2 coats of TC

..... and a few more photos


o


Friday, April 13, 2012

Electric Zebra


 Except for the fine cracks in the black Kiss nail art pen, this turned out pretty awesome. I used Sinful Colors Unicorn and Sinful Colors Innocent, sponged on and graduated, then drew the zebra stripes with the fine tipped Kiss nail art pen. When I added TC, the Kiss nail art pen displayed fine cracks..... I wasn't expecting that. So I did what I always do when things don't turn out as expected...... I added Love My Nails Dazzling = Is there anything it can't fix?

Love my Nails Dazzling = I can't quit you

 above and below, I brushed on, then sponged Sinful Colors Unicorn, and Sinful Colors Innocent

 after sponging, my nails looked like the surface of the moon.....

 stuff i used Sinful Colors Unicorn & Innocent, Kiss nail art pen and Nailene TC

there is soooooooooo many ways to draw zebra/tiger stripes

Kiss nail art pen - I really like this even with the fine cracks

Sinful Colors Innocent


here is after I drew on the stripes


 with top coat ( 3 different kinds and clear ) the Kiss nail art pen had fine cracks = weird

Love my Nails Dazzling has to be my favorite way to fix any polish related snafu

o


Wednesday, September 28, 2011

Fly away, cream pink unicorn!


The last few multi polish nail looks I have done, have names that somehow..... go together? Like the combination of words are silly and funny to me. Anyhoo - this is a neat look for crackle polish. I have seen this on several blogs and it my favorite crackle 'look'. I sponged on Sinful Colors Cream Pink, Unicorn and Fly Away. I applied a thin coat of clear polish then quickly applied the Ardene Crackle polish then I added another coat of clear. No TC in these photos.

stuff i used - Sinful Colors Cream Pink, Fly Away, Unicorn Ardene Black Crackle

 I applied the crackle nail polish differently on my ring nail

 Sinful Colors Unicorn. Does anyone else think of a white/silver sparkly polish when they think of the polish name Unicorn? That's what I envision for a polish named Unicorn. If I ever make a white/silver franken polish I will definitely name it Unicron - no - not UNICORN = it will be UNICRON; Cron, C.R.O.N!!!!!!!!1
o

Friday, April 29, 2011

For friday night 2:30 a.m.


3 coats of Sally Hansen Salon Hyacinth, a sponging of Confetti My Favorite Martian, and a coat of Sinful Colors Call You Later.

Here is a mani I wore a few days ago - I contemplated even posting this because of all the thousands of polish's colours I have seen this is the ugliest I have ever come across. I picked this up at the dollar store in my town, just for lulz, as  I am not a fan of this line of Sally Hansen polish's. A real Hyacinth is not this colour so I don't know why they would name it this.

I didnt want it too glittery, so only used 1 coat of the Sinful Colors polish. This was literally a last minute addition ~ I couldn't go out in public wearing just the Sally Hansen Hyacinth polish alone..... what would people think of me? and I didn't want to take it off and do my nails again!

Also the brush on this is 'wimpy', it was smaller and thinner than other polish's. I have tried these SH Salon polish's a few years ago and thought the formula and brush was 'meh'. This line is being dis-continued and these polish's can be found on clearance now; many are plain ordinary colours, pinks reds and Nudes but some shades are very pretty. This polish, Hyacinth was from the spring 2009 Tracey Reese LE collection.

sun

shade

I had to sponge on another colour, because Hyacinth alone with Sinful Colors Call You Later would not be enough to disguise the fuglyness of this shade of polish. Confetti My Favorite Martian is a lovely green glass flecked polish.

.....and here it is alone

Above and below, 3 coats of Sally Hansen Salon Hyacinth.


This is a mani I hoped would work out. The Sally Hansen polish does not look that bad with these two fabulous colours, Billie Pink Pansy and a franken I made earlier this month. I cut out a mailing label in the shape of a 'V' and stuck it on my nail, added the two polish's and a thick coat of TC.


L-R = Nailene Top Coat, Sally Hansen hyacinth, Billie Pink Pansy, franken polish Integrity


This Billie Cosmetic's polish really is that bright. I saw a look like this a few days ago and it was very pretty & tried to copy it. I will have to try again with better colours and possible skip using any type of nail guide or scotch tape.

Sunday, November 7, 2010

♥ Some Funky Glitters ♥

top to bottom, 1 coat.... 2 coats etc.


Claire's Chunky Gold... this is more of a yellow, not gold. All of the Chunky Glitters were on the bargain rack at the Claire's store in my town in spring. I only bought the gold and Silver and now I kinda regret it becuase the snowmen polish ( blue-cross) have released very similar chunky hex glitter polish's in the USA. The silver is very pretty, and although this gold polish is beautiful in it's own way, they yellow tone makes it garish - but still wearable. I have whipped up a few cool frankens with this polish My (DL knock-off ) It was not as difficult to remove as I thought it would be...... other than that not much to say about it.


Below is a franken I made using Claire's Hollywood, a lovely multi-sized holo glitter. I added a small amount of Claire's Magic to this polish, I think it turned out very nice.

A note on making glitter frankens, add colored glitter to polish's that already have glitter in them. It is the FORMULA OF THE POLISH BASE that prevents the glitter from melting or loosing it's color.

This was 2 coats of my franken and on my ring nail is 2 coats layered over NYC China-town. I will likely add some purple or lavender glitter to this in the future.


Sun

Sun

Indoor Flo


 ...and finally a glitter sprinkle mani that was too thick but beautifully glittery.....


Below; before glitter. These are Nailene Natural Wear Artificial nails with the shimmery base # 77359. I added a coat of Sally Hansen Beyond Perfect in Fresh Lavender. Next time I am only doing the glitter sprinkle-ing once... and laying my hands flat instead of up ( duh ) the glitter effect became way to thick.

I tried to find a video on you tube on how to do this... but I could not find one. If anyone has a great tutorial on sprinkling glitter over wet nail polish, let me know ♥


I used and opalescent small square glitter that I found at Micheal's craft store around Easter-time. I did two 'coats' of glitter for this mani - and it ended up being way too thick. I also held my hand up immediately after and the glitter slid around on my nail.... leaving a large bump at my smile-line. So for next time it's only going to be 1 coat of polish, then a sprinkling of glitter, then a coat of clear and finally Top Coat.
 .... and there was glitter everywhere