Pages

Showing posts with label FALSE NAIL APPLICATION/REMOVAL. Show all posts

Thursday, April 14, 2011

a break from the purples & fun with acrylic kits

Sally Hansen hard as Nails Tahiti Sunrise 3 thin coats without TC

But First - I found a blog - AGAIN - with many photos from different blogs and places around the web. What are these 'mirror' blogs? what is the purpose of them? There is no comments or contact info, so I don't understand what the point is.

( EDIT) Thanks again stompy boots.... i thought it some shenanigans and tomfoolery was afoot, but wanted some input)

moving along.................

These Hard as Nails polish's are being discontinued in Canada, pretty sure that they are on sale everywhere. I picked up a few at a little drug store in my town on clearance. This is a shimmery orange with some subtle lite gold flash. It took a bit longer to dry then the X-treme Wears,  which was disappointing - but it is a pretty colour. I did not apply TC as I had some fun nail art plans......

My ring nail is an acrylic kit that I applied over my natural nail. I did not grind it down so there is a 'hump' towards the tip of my nail. Acrylic kits are not hard to work with but the are stinky! Normally I would do this the normal way by applying a 'tip' over the tip of my nail extending the length, then apply the acrylic kit. I find that using the sticky guide to form an entire nail is way to hard and takes too long.  This is a test run to see the longevity of this product in regards to my application and activities.

indoor                                                                          sun


indoor flo

I do not have alot of Orange shades of polish. Here is the few I have with some links. A few of these are technically not orange but more on the coral side ~ I lump these into the same category.

SH Coral Pink, ColorRama Sunrise Sensation, Claire's Dreamsicle, 
Sally Hansen Tahiti Sunrise, NYC Spring Street


Icing No Name neon orange creme, Billie Orange, (or here) Billie electric Coral, 

I know I have a few more oranges somewhere.... these few were easy to spot in my deez-elmer.


... and here is a quick experiment I did with acrylic.  There is many great tutorials on you tube so if you want great video tutorials check it out!

...........a few different acrylic kits

Oh now I remember why I don't use these often.... they smell terrible! I can hang my head over multiple bottles of polish for hours and acetone does not bother me but these are soooooo strong - even with the windows open & fans going.

It is easy to do, and when used with nail tips can get some decent results - but for me the scent is a huge deterrent - so I just use glue on artificial nails - they are way easier.

So - on my ring nail I did the two part acrylic kit, there is many videos on you-tube on how to do this, I will get some nail tips and do a picture tutorial in the future but for now I have just applied the acrylic on my ring nail. I did 4 polish changes and the acrylic hung on like no-ones business! I pried it up and added some acetone into the separated area- the acetone helped to release the acrylic from my natural nail. I still had to pry it off (which you shouldn't do).

I did not do a stellar grinding job- so there is a malformed area towards the tip of my nail,  I did not want the dust floating around after inhaling the acrylic liquid lol.


here is what it looked like when I first applied it over my natural nail.

I did not file this or buff it to a high shine - I always keep my nails painted so putting the effort in to having a clear acrylic nail is not for me. I used acetone to prep my nails and this acrylic hung on through dish-washing, and around the house stuff. I changed my polish 4 times, too.


after 2 polish changes


after 3 polish changes

I used a toothpick to gently pry the already loose acrylic nail from my natural nail. I dipped a small brush into acetone and let the acetone drip in between my natural nail and the artificial nail.


I wear artificial nails because my natural nails are thin, sharp and dangerous. Even when they are short I still run the risk of hurting myself, so I keep them covered up with artificial nails. 


For whatever reason that I may not be wearing my artificial nails this summer, I may do a test run of the acrylic kit on my shorter natural nails just for fun. Though I do prefer to use basic artificial nails that can be found at drug stores and department stores.


Tuesday, July 20, 2010

♥ Paintable False Nails -


Here is the type of false paint-able nails I use/ I very rarely say I am wearing false nails in my post, because I WEAR FALSE NAIL ALL THE TIME. I have a few posts with my natural nails painted, but 95% of manicure posts are either the nails above, or the old skool FING'RS brand nails ( trophy wife length ~ thank you very much)

I have been wearing Artificial nails for years and years and years. My real , natural nails are healthy and fine. I have never had a 'fungus' or any other weird nail issues. I am a very happy artificial nail user.

I think that my post about applying pre-painted/ pre-decorated nails has waaaaaay better photos, but alot of the information in here is important too. And my post about replacing an artificial nail has alot of great information as well. The photos in this post were taken indoors so they are not that great.

Today is a post about some known issues in regards to applying artificial nails. This is my opinion and my experience. I have written many times about my thin sharp and lethal REAL nails, and that although they grow fast they are very thin, sharp and dangerous. And so I keep them covered for safety reasons.

BUT= that is not the only reason why I wear fake nails. I love how easy and fast it is to paint them!!!!!! The polish dries fast, I never get chips or peeling, and I can count on my polish job lasting a long time. I do not attribute the longevity of my manicure to any brand of polish or TC = I attribute that to artifical nails.

Polish is easily removed with a gentle non-acetone polish remover. Straight up acetone will eat these up! So a non-acetone or gentle polish remover is a must. The polish remover I recommend is Sally Hansen Regular formula ( purple ) or the non-acetone formula ( blue ). I loved cutex non-acetone in the cute little pimp bottle but it is only available in the USA, so I am sticking with those 2 Sally Hansen Removers. I still need to lightly sand the surface with a fine sanding block though..... and I imagine that even though I use gentle non-acetone polish remover, the surface is getting a little bit of damage. That did not happen with the cutex remover. KEEP IN MIND, that polish remover will begin to dissolve artificial nails - so no cotton ball & tin foil removal.....

There is very little selection available in longer false nails at this time... I think that finding a longer length would mean hitting up a beauty supply store or EBay. I very rarely come across longer artificial nails anymore.


ABOUT THE NAILS i BUY


I always buy Nailene Active Square 200 count artificial nails and here is why.

  • These nails are wide enough for all sizes of my nail bed.
  • The artificial nails do not taper at the sides towards the tip of the nail.
  •  No problems using non-acetone polish remover - sometimes lightly sanding the surface is necessary
  • They are easy to shape and fit my natural nail bed.
  • They paint perfectly with no base-coat
  • I can apply polish, then remove it several times before the artificial nail becomes weak and needs to be replaced, These WILL weaken and become  more pliable with repeated use of polish remover.
  • Easy to find at Zellers/HBC Canada, Shoppers Drug Mart and other department stores ( the walmart in my town never has these in stock when I go there
  • Price; these are 1 dollar less for twice as many nails. ( whaaaat?) this may be the stores fault, and not other leading brands of Artificial nails company's price point.... however - I find Nailene nails to be priced competitively with other brands in general.

I have nothing unkind or negative to say about any other brand of nail I  have bought and used every brand available to me in stores but choose this brand for the above reasons.

Here are some covert op photos that I took at the Zellers Department store in my town


Below - the 12 different sizes available in the box of Nailene nails that I regularly use.

The instructions on the back


Here is a photo of a paper towel that  glued to both my fingers my right middle fingernail, and my left index finer nail/finger

hahahahahahahahahahahahaaaaaa

I washed this of as much as I could and then buffed out the glue...UGH!
....and I bent that nail in half somehow......

MY NATURAL NAILS
(I'm happy to write that my middle finger nail injury is just fine with what seem to be no long term damage)

AFTER APPLICATION OF ARTIFICAL NAILS


With buffing paint T.C.

PHOTO?????????


Shaping my nails before applying artificial nails

Here I have filed the corners of my nail inward so my natural nail tapers.  Before I apply nail glue, I scuff up the surface of my nail with a fine to medium grit nail file. I have no before photo

If possible, scuffing up the UNDERSIDE of the artificial nail, can create better bond with your natural nail. I sometimes use a very bendable worn out paper/foam file to do this, but I am lazy so I often use my battery operated file to do this.


Of course making sure your nails  free from moisturizer or other oils, and you have washed your hands at least 10 to 20 minutes before, becuase your  NATURAL UN-PAINTED NAILS WILL ABSORB WATER. That is why after a long shower.bath or repeated hand washes polish will peel or chip.... get clear polish and top coat over all surfaces of your nail to ensure a long lasting manicure on REAL nails!


Here is a fabulous diagram on how I generally shape my natural nails before applying artificial nails. The blue lines are the origional shape of my nail, and the orange lines are the new shape.


BLUE: Origional shape of my natural nail

ORANGE: New tapered shape of my natural nail


I MUST ADD THAT.....in my experience, shaping my real nails like this results in tearing and breakage. The straighter the sides of my nails and less tapered my real nails are the less they break. Even though I was gently filing my nails and taking my time and not going crazy with the file, my nails often tore at the sides. My theory is that the wider and more curved the nail bed is, the structure of the nail provide strength and resistance to tearing and breaking,.... even with my super thin nails.... THAT is a topic for a whole other post

KNOWN ISSUES WITH FALSE NAIL APPLICATION

Just like in my post about applying pre-painted artificial nails, or my other post on replacing an artificial nail I shape and lay out all 10 of the artificial nails. I choose sizes that closely match my natural nail width. I shape them to match the curve of the base of my nail where my cuticle is, and ensure that they are not to wide, and there is just a tiny sliver of space between the artificial nail and the sides of my nail.


Excess nail glue on the surface and sides of the artificial nail

Below; a fuzzy photo of the glue I used and the amount of glue NOT TO use. I used way, way too much glue for the surface of this nail but this is going to be an example of a known problem when applying artificial nails. This is not the same glue that comes with the Nailene 200 count nails. But I happened to have this small bottle of glue opened already and want to use it up before I crack open another bottle/tube of nail glue.


(This photo is fuzzy but it is the only photo I have  with an actual tube of nail glue, and glue on my nail)


This is far too much glue, but I used this amount to demonstrate the result of using too much glue, when you press the artificial nail down on this much glue, there will eb a lot of glue seepage, and the glue will bubble out of the sides and base of your nails.

Having  paper towel handy to absorb excess glue will reduce the amount of buffing and filing of the ( soon to be ) hardened glue. I fold a small piece of paper towel to form a point and hold it against the excess glue.


Here you can see the excess glue seeping out of the sides of my nails, this photo was taken after placing the artificial nail onto my real nail


The little nub at the tip of the nail needs to be filed off, I keep forgetting to mention that.


Here I have buffed out the glue that was on the sides of my nails. I marred the high shine that these artificial nails have - but these are to be painted so not to worry. If you happen to get glue on the surface of a funky french or other pre=painted/pre-decorated artificial nail YOU CAN buff it out with a super duper fine sanding block!

The photo above looks bad! But all that white stuff is artifical nail dust and hardened glue dust from sanding/buffing of the artificial nail and the nail glue and will wash off with water. I will add that you should try NOT TO breath in any of this nail dust or glue dust.  The glue stuck to my skin at the corners of my nail towards the tip will be there untill I slather on a moisturizer and wash my hands a few times -----please DO NOT try to 'peel' off nail glue that is stuck to your skin.....becuase you will be taking a layer of skin with it♥♥♥

The evening that I applied these I used a alot of moisturizer plus a heavy duty moisturizer on tip of theat and slept with gloves on ( I do this every second night ) to help my skin absorb the moisture to reduce the bond between my skin and the glue. By the next eveningall the little bits of nail glue around my nails, as well as random bits of glue on my fingertips were gone.

So don't panic if you get nail glue along the sides of your nails or nail glue adheres to your skin in any other areas, It will be sloughed of via application of moisturizers and hand washing.


Excess Nail Glue Beneath the tips of the artificial nail


Here is another common problem that comes from using too much glue. Here on my INDEX nail, I have used too much glue and while the nail glue did seep out on the sides of my nails, much more of the excess glue ended up beneath the tips of my nail.


Here you can see that some glue seeped out on the side of the artificial nail...but......


Here you can see there is a substantial amount that has pooled beneath the tip of the artificial nail, my natural nail as well as along the area where my natural nail and skin meet; In this photo I am breaking my own rule, and prying the glue away from skin. Normally I would whip out the acetone and my small angled brush and try to reduce the amount of glue and hopefully reduce the bond between my skin and the nail. This is also the finger that the paper towel was glued to in the photo towards the beginning of this post and there is alot of glue on the left side of my finger in the photo below.

For this photo though, I did wedge this plastic cuticle pusher in between my skin and the nail.

In the above instance I would try to chip away as much glue from the artifical nail then use acetone and a small angled brush to get in there and try to reduce the amount of glue. No matter how little or how much glue I use, I will often get a tiny bit of glue beneath the artificial nail and my real nail. If I happen to have no REAL nail at all, and my nails are just nubbin's then I will definitely get some glue stuck to the skin where the free edge of my natural nail begins.

IRONICALLY although gluing your natural nail/artificial nail to the skin is  problem in this instance, I do recommend trying to add a small amount of glue along the line where your natural nail meets the artificial nail. This is a great way to prevent any moisture from entering any areas between the natural nails and the artificial nail. First when my ALL 10 of my paint-able artificial nails are applied and the glue is dry, I swipe a small angled brush dipped in acetone along the underside of the artificial nail. Then I  applying a small drop of nail glue to a tooth pick, and tracing the ridge along natural nail where it meets the artificial nail.


In this photo below, the nail at the left ( my RING nail ) I had alot of glue on the surface of the nail which I buffed out. There is still alot of texture due to the hardened glue on the artificial nail. and I will buff this out a little further. Also = the shiny surface is dull of that finger due to the sanding/buffing.


 PAINTED UP ALL PRETTY


PHOTO?????


Saturday, July 17, 2010

♥ IMPORTANT = Replacing a False Nail ♥


OMG - not IMPOTENT = = =  IMPORTANT good greif....  I can't believe I did not notice that, I need a proof reader so I can stop embarrasing myself.


above - the nail I am replacing... there is nothing really wrong with it. I have been making jewelery in the evenings and have alot of scrapes and scratches on the surface of my nail, ( left corner) and there is a tiny bit of lift towards my cuticle from PICKING AT STUFF AND USING MY NAILS AS TOOLS which really, if you want to have beautiful nails ( real and artificial ) do not use your nails as tools!

 I suppose I should start calling them artificial nails, but false is faster to type......

In my previous post I showed how I apply false nails, below is an informative post on how I remove my false nails using the acetone drip method. If you need to remove your false nails fast, you can always soak your nails in a bowl of acetone.... however I prefer this as it seems to work fast and is less messy than the acetone soak method. Ideally, soaking your nails in warm soapy water AFTER a shower is the most gentle safe method to remove your false nails, but this is fast, easy, safe for your nails, cuticles and fingertips and uses way less acetone♥

Below; Stuff I use, a small angled brush, made by cutting a cheap dollar store brush bristles on an angle, acetone, which I pour into the cap of the acetone bottle, a non linty type of  cloth if you can get it or paper towels... PROTECT YOUR WORK SURFACE === acetone will eat through the finish on furniture! Tin foil is a good way to protect your work surface.


Here I have dipped the brush into the acetone and am allowing it to drip along the base of my nail, It will eventually eat through the glue and the false nail, helping to loosen the glue from my natural nails, as well as loosen the glue from the false nail.

You can start at any area of your nails, if you happen to have a false nail that is lifting from the sides of the nail ( my favirote ) then you should try to have the acetone drip into this area, I find that it is a safer for me to have the acetone drip from the base of my nail, then wedge something in between my real nail, and my false nail. And the base of false nails is alot thinner, making the removal alot faster by starting in this area


Here after a short amount of time, the false nail is beginning to lift away from the natural nail. I wedge a  NON SHOP OBJECT in this area, so I can more easily get the acetone in between my real nail and the artificial nail.

Because the base of artificial nails is alot thinner than the tips of artificial nails, this makes this area a better candidate for removal, in the photo below the acetone has eaten through the false nail, as well as the glue. The base of the false nail is gummy, gooey and pliable. ( the lighter area at the base of my nail ) I GENTLY  try to pry and break this area apart - NO SCRAPING or tugging. This process does not take long and it will be easier to get acetone to other areas of the nail surface.


See, that didn't take long. I am wedging the plastic cuticle pusher in between the false nail and my natural nail. This makes it easier to get the acetone into this area.


Here is a better photo of this in action

Ta-da - There is still some gooey glue and false nail remnants on my natural nail. Now all I have to do is swipe acetone across my nail, either using the angled brush, or paper towel or these fancy lint free gun cloths. Paper towel works just fine.


ewwwe - remnants of glue, the false nail, and the rough surface of my natural nails


an assortment of files.

I usually have my nails naked for at least 2 days a month, I take note of any weirdness ( never had any ) and use this time to do heavy duty around the house stuff, or do some crafty paint projects, move furniture around, and so and so.... Anytime you remove false nails there will be some glue and false nail bits stuck to your nail, you can buff that out with a sanding block or buffing block, or by using fine multi-grit nail files.

The sanding block below - IS MY FAVORITE SANDING BLOC i HAVE EVER OWNED I bough 3 at the Dollar-rama like 2 years ago and have not seen them since! They are awesome as it is a hard six sided plastic base with long lasting sanding paper, the one I have been using has lasted a long, long time. It is easy to hold, and the grit has remained gritty for a long time.


Here is my natural nail after removing the previous nail glue and buffing out any raised areas. Having a bit of roughness to the nail, will actually help the glue adhere better to your natural nail, you do not have to wash your hands of your natural nail dust, I find that when I roughen up the surface of my natural nail, and leave that nail dust, the glue adheres much better to my natural nail, helping my false nails stay on longer. I will do a natural nail post in the next month or so - showing the removal of artificial nails, buffing out my natural nails, and painting my natural nails = I think it will be a nice informative post♥


I shape a false nail to match the shape of my natural nail.
Just like in my previous post on applying false nails


Here is a fuzzy action shot of me applying nail glue to my natural nail

This is the amount of glue I used. I pressed the false nail for approximately 25 seconds, just to be sure there is good adhesion between my natural nail and the false nail.

The new nail, glued on. This time  did not have any glue seepage, though I do have a few bubbles at the base of my nail near my cuticles. Now all I need to do is a wash my hands of any false nail dust, and apply moisturizer.

Here is another shot of the 'new' nail

... Finally, if possible, place your opened glue in a small zip lock bag. I do this to extend the life of my opened nail glue, and becuase I throw one of these in my purse when I go out; and I DO NOT want nail glue to get on my sunglasses again.....EVER! Or get nail glue on anything else in my purse for that matter.♥


Friday, July 16, 2010

False Nail Applciation - and dotting tool practice = PIC HEAVY


I can see this dotting toll coming in handy for nail art in the future.....This is my first 'real' mani using this nifty dotting tool that I picked up in the scrap-booking section of my favorite dollar store in my town. This is Ardene 
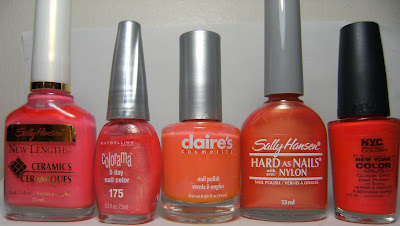
'Matte About Blue' from yesterday, and Sally Hansen Insta Dri 'Mint Sprint' on the diagonal. The dots are China Glaze 'For Audrey', which apparently I have never worn as a full mani!!!! Whaaaat? I am wearing ChG 'For Audrey' on my toes right now, I love love love that polish colour!!!

Keep reading for my pic heavy tutorial on how I apply false nails. Tomorrow - or possibly this evening I will post a tutorial on how I replace a damaged false nail. If you don't feel like reading on here are 4 tips for applying sheer/see-thru false nails;

1. Use lotsa glue, like a split pea size, or even a sunflower seed size, or, or........ okay maybe look at the glue photos. I'll think of something to compare the amount of glue to.

2. When you apply the nail over your 'lotsa' glue, hold for at least 15 to 25 seconds -  this makes a huge difference in the amount of bubblez.

3. Don't freak out if the glue seeps out or gets on your cuticles. Have a paper towel handy and fold in a few times so it makes a point -  hold the point on the area where the glue is in order to absorb some of the glue. If you own a sanding/buffing block with various sized grits or coarseness then you can buff out glue blobs, and even fingerprints which I have done below. It is not the ideal example as I have a humongous bubble beneath the fingerprint but it is a good example of what NOT to do.

4. The nail files that Nailene supplies with their false nails are COARSE!!!! take your time when filing your false nails, and check to make sure that you are not over filing your false nails.

====================================================================
 
Some happy news; I have figured out how to take great videos. I had NO IDEA it would take 4 hours to 'upload' a 1 minutes and 28 second video to YOU TUBE, though.... that was surprising. So here is some Friday Night thankfulness.

THANK YOU, THANK YOU, THANK YOU~ To anyone out there posting awesome make-up and nail art videos.  Thank you soooooooo much. My weekend goal is to get some nail Tut's up. I had no idea it would be sooooooo hard to make a video of things - UP-CLOSE, like with the camera less than 6 inches from my nails - but I did it.


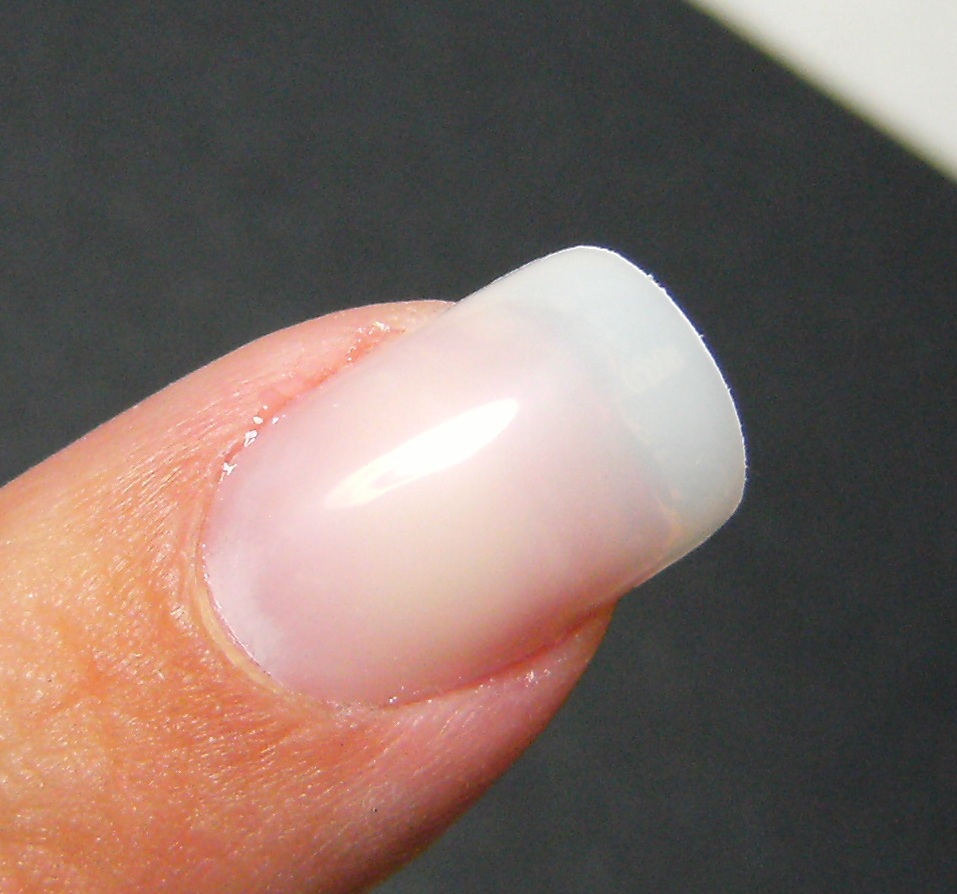
Anyoo - before the heavy duty info, here is a fun mani I did to stretch my previous mani


So; after wearing Ardene Matte About Blue for the day, I decided to add Mint Sprint on the diagonal using nailene Straight french tip guides, then applying two coats of S.H. Insta Dri in Mint Sprint.  I actually got alot of bubbles with the mint sprint....
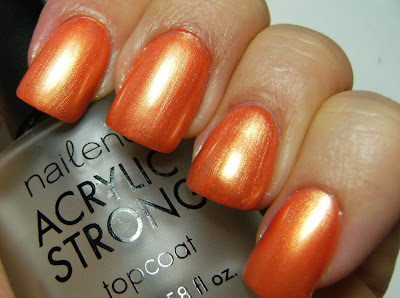
When Mint Sprint was dry, I removed the french nail tip guides and applied a coat of Nailene Acrylic Strong Top Coat. Since I painted my Toes with ChG 'For Audrey' and already had it on hand, I thought I should practice using my dotting tool and dotted ChG For Audrey along the diagonal line where the two polish's meet.


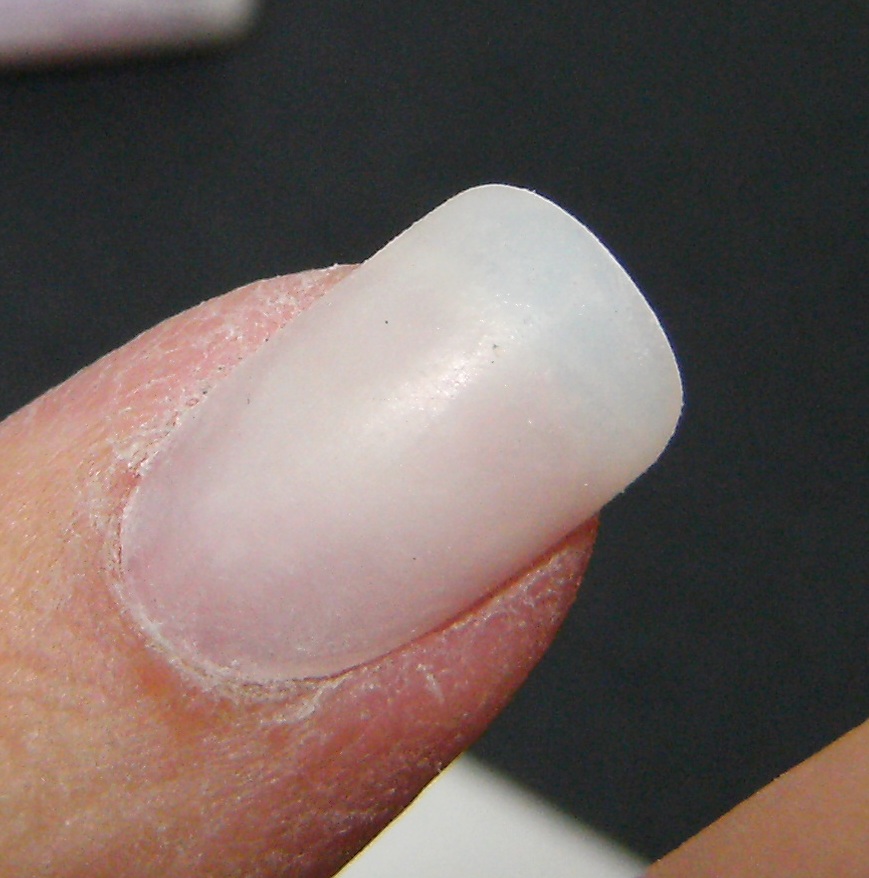
Here is a shot of Sally Hansen 'Mint Sprint' I am pretty sure I just bought this a month or so ago, why is it separating already
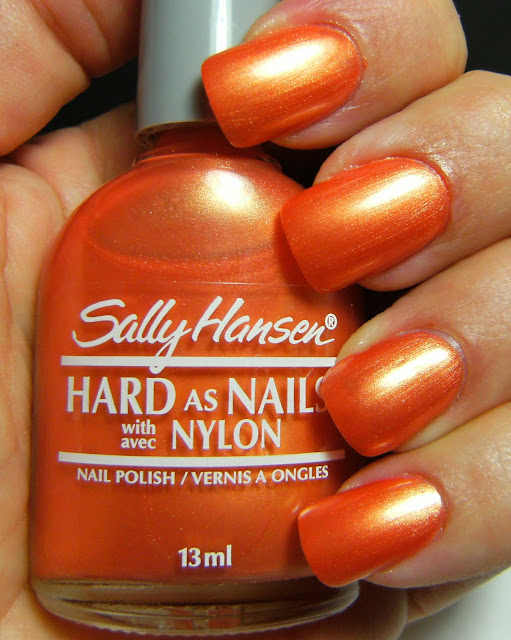
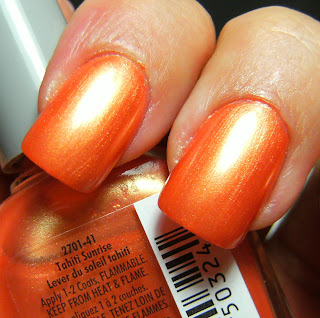
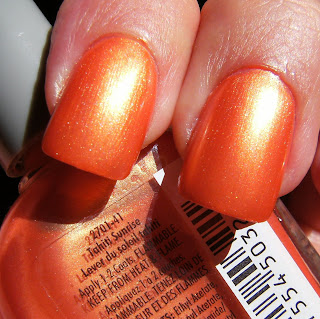
A sunshine pic

Close-up

♥♥♥


So; here we are at my false nail application tutorial. From start to finish, I can apply a fresh set of nails in under 10 min.... I wear false nails becuase my natural nails are very thin but super-duper sharp. I cut people. And myself.

False nails are way, way easier and faster to paint.  I find painting false nails to be much much faster than painting my real nails, and the polish lasts a lot longer. There are so many high quality and inexpensive options available in regards to false nails. I prefer Nailene nails becuase they are wide enough for my nail bed, they do not taper and they are often a better value for my $$$.

At least once a month I get an email about my trophy wife length false nails ( fing'rs brand ) and have found that there is very little options in regards to loooooong false nails. Most lengths are 'sport' or 'active'. I think that if someone is looking for something a little longer than what is available in department stores or pharmacies, then I would encourage them to check out beauty supply stores.


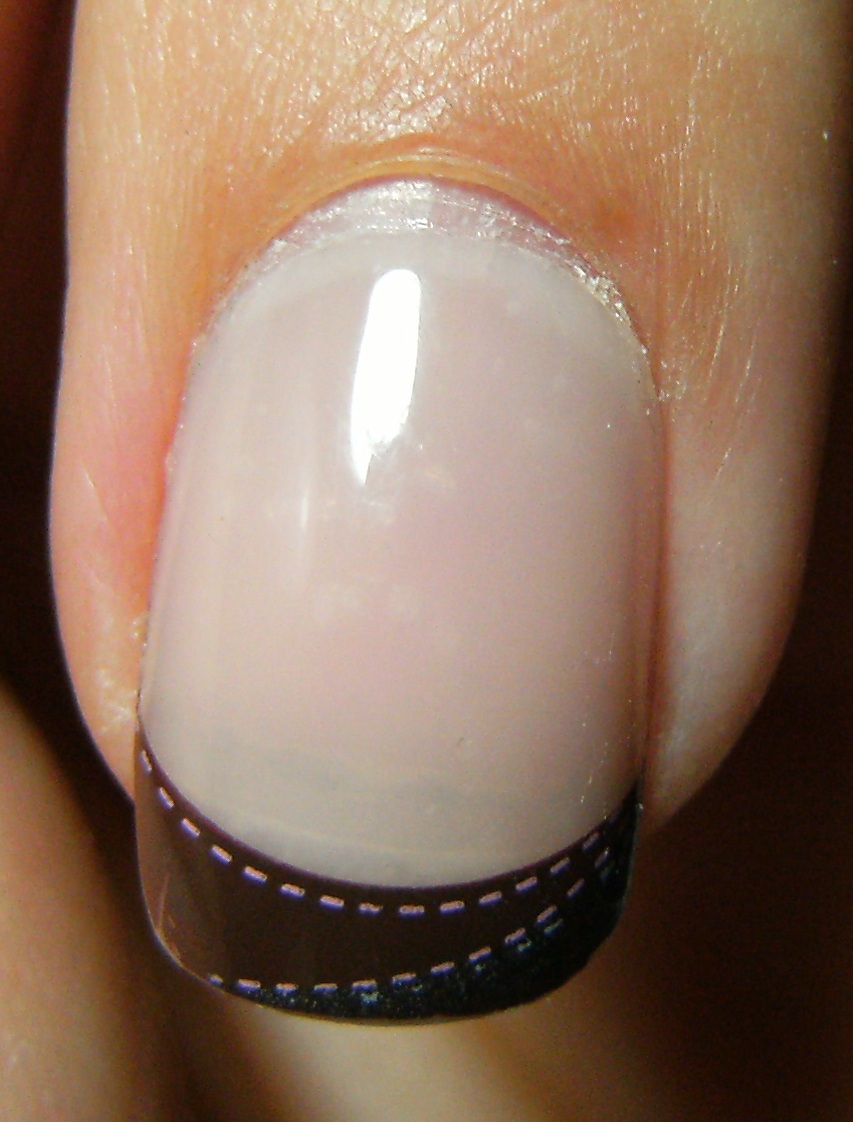
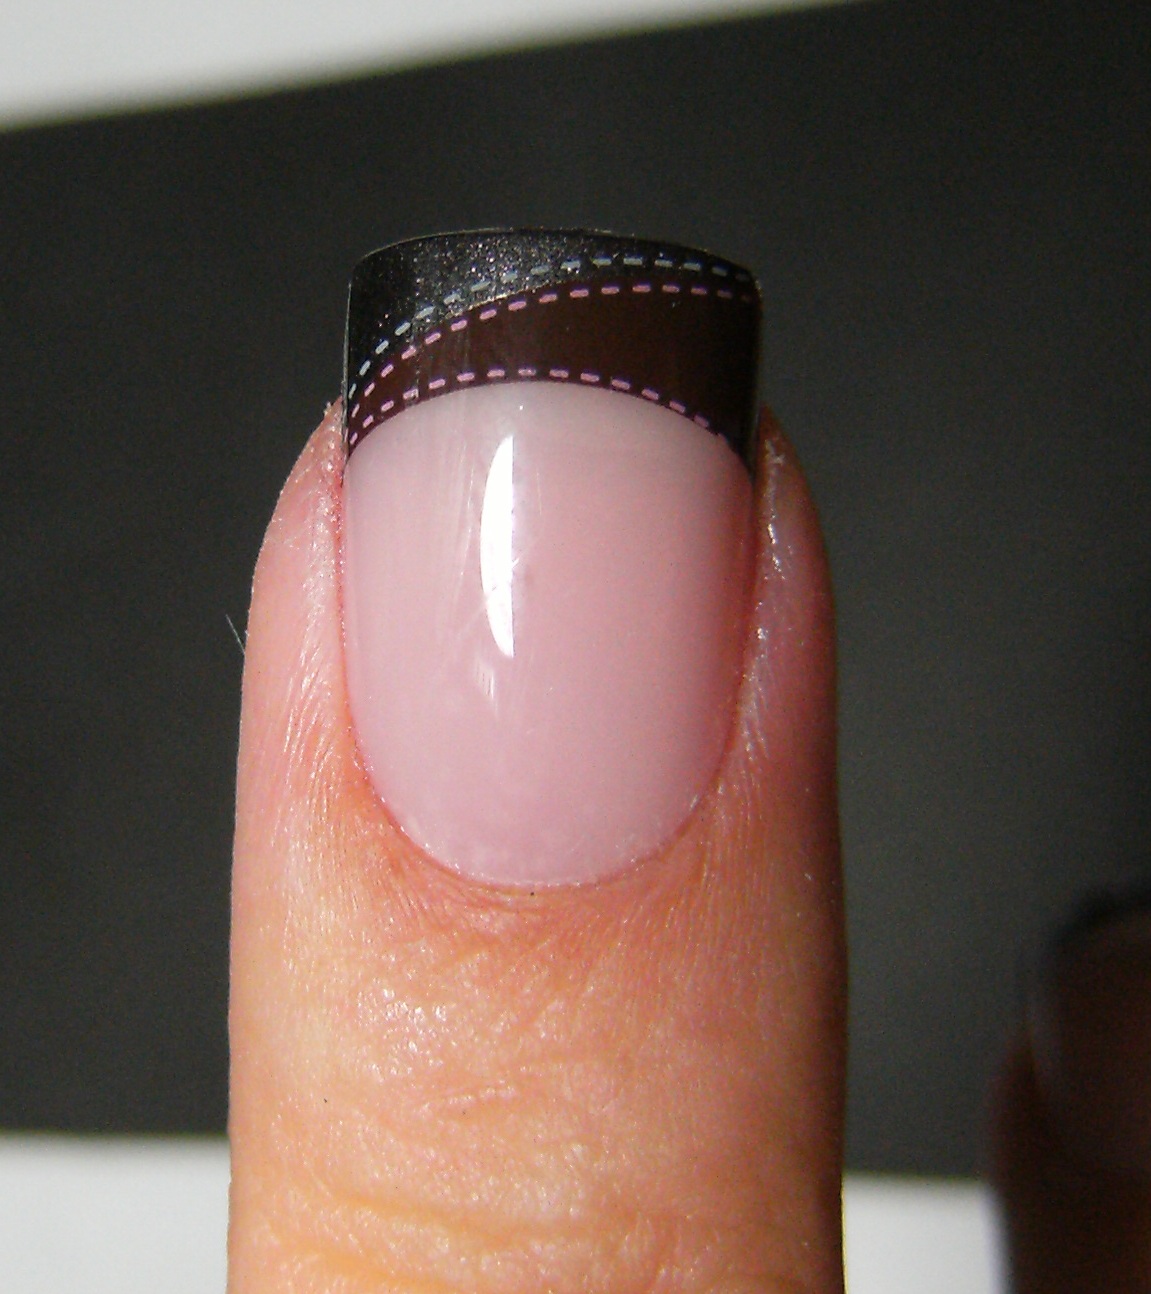
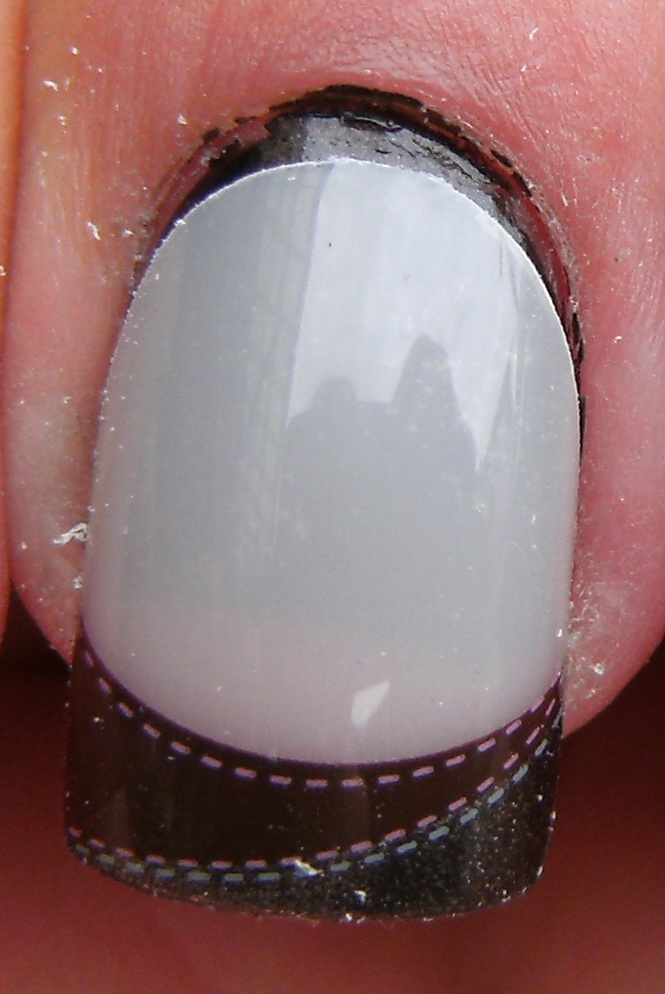
Below; Nailene Couture Nails in 'Tweed'----- that stitching is adorable!!!!!


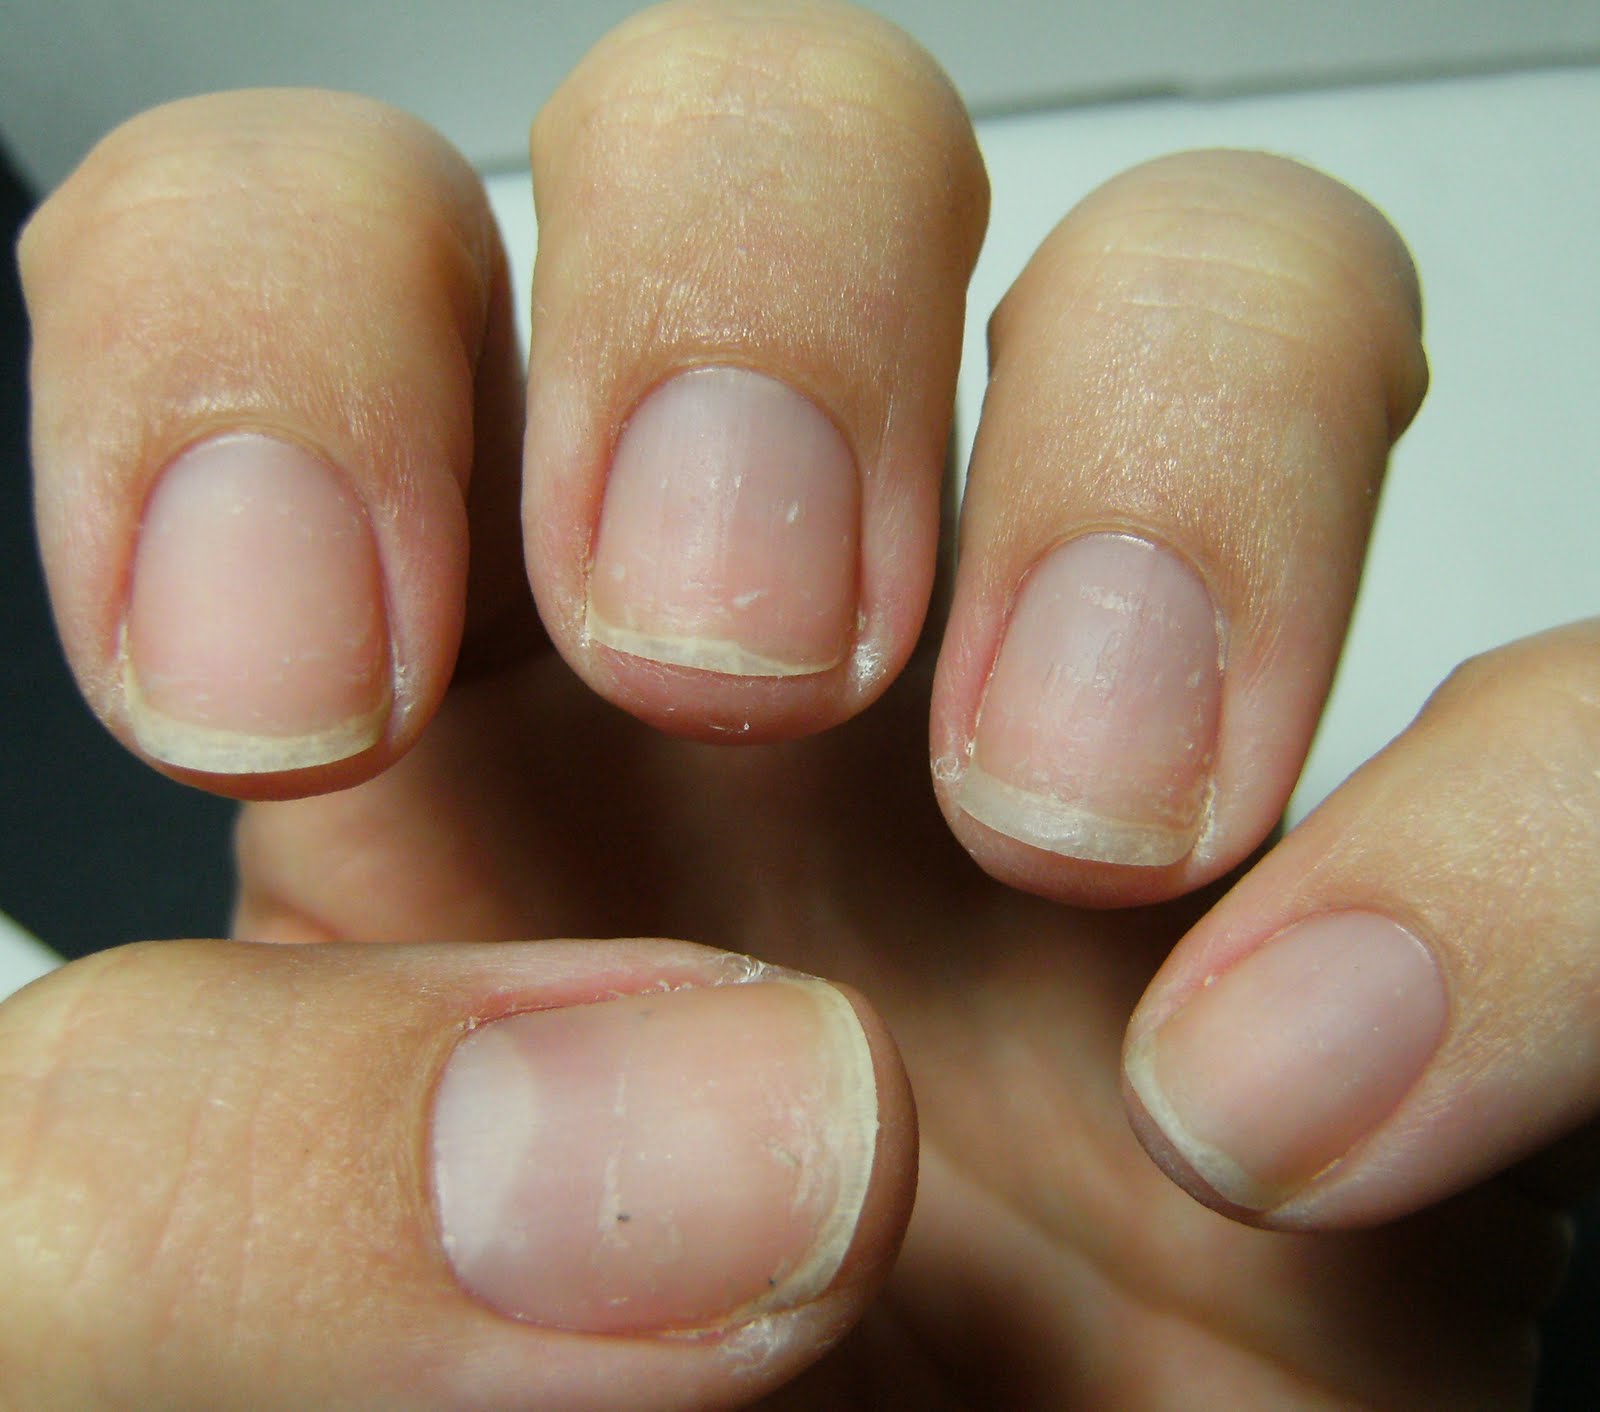
please ignore my dry cuticles and all the glue accidents! It was really hard to apply these; apply glue, file etc = and then stop and take photos! Really, really hard. But I think I put together a helpful and informative post.


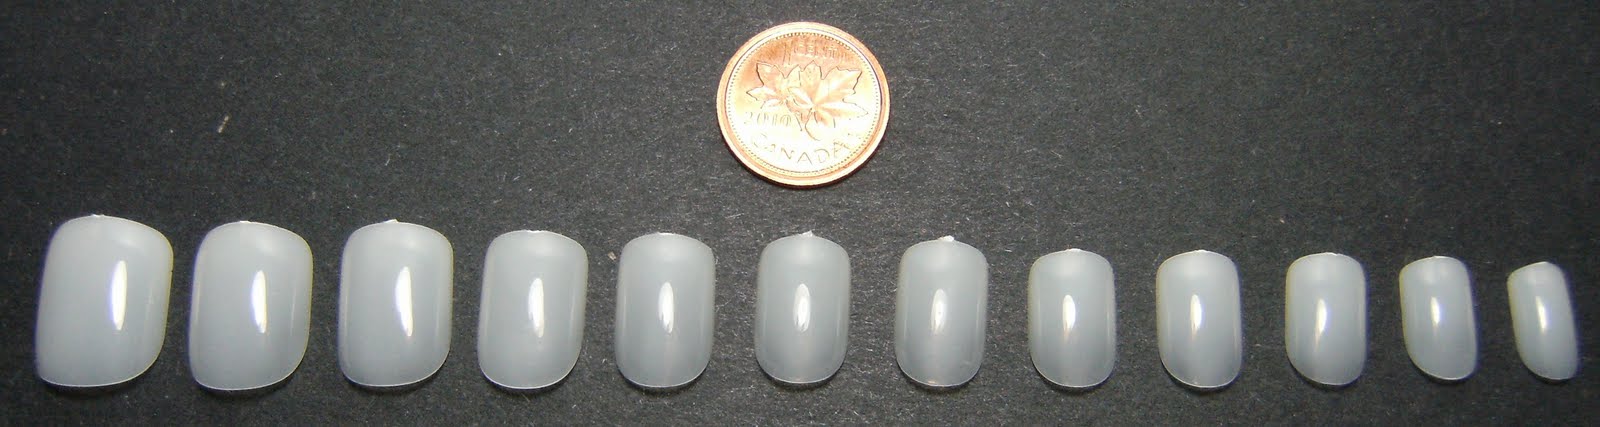
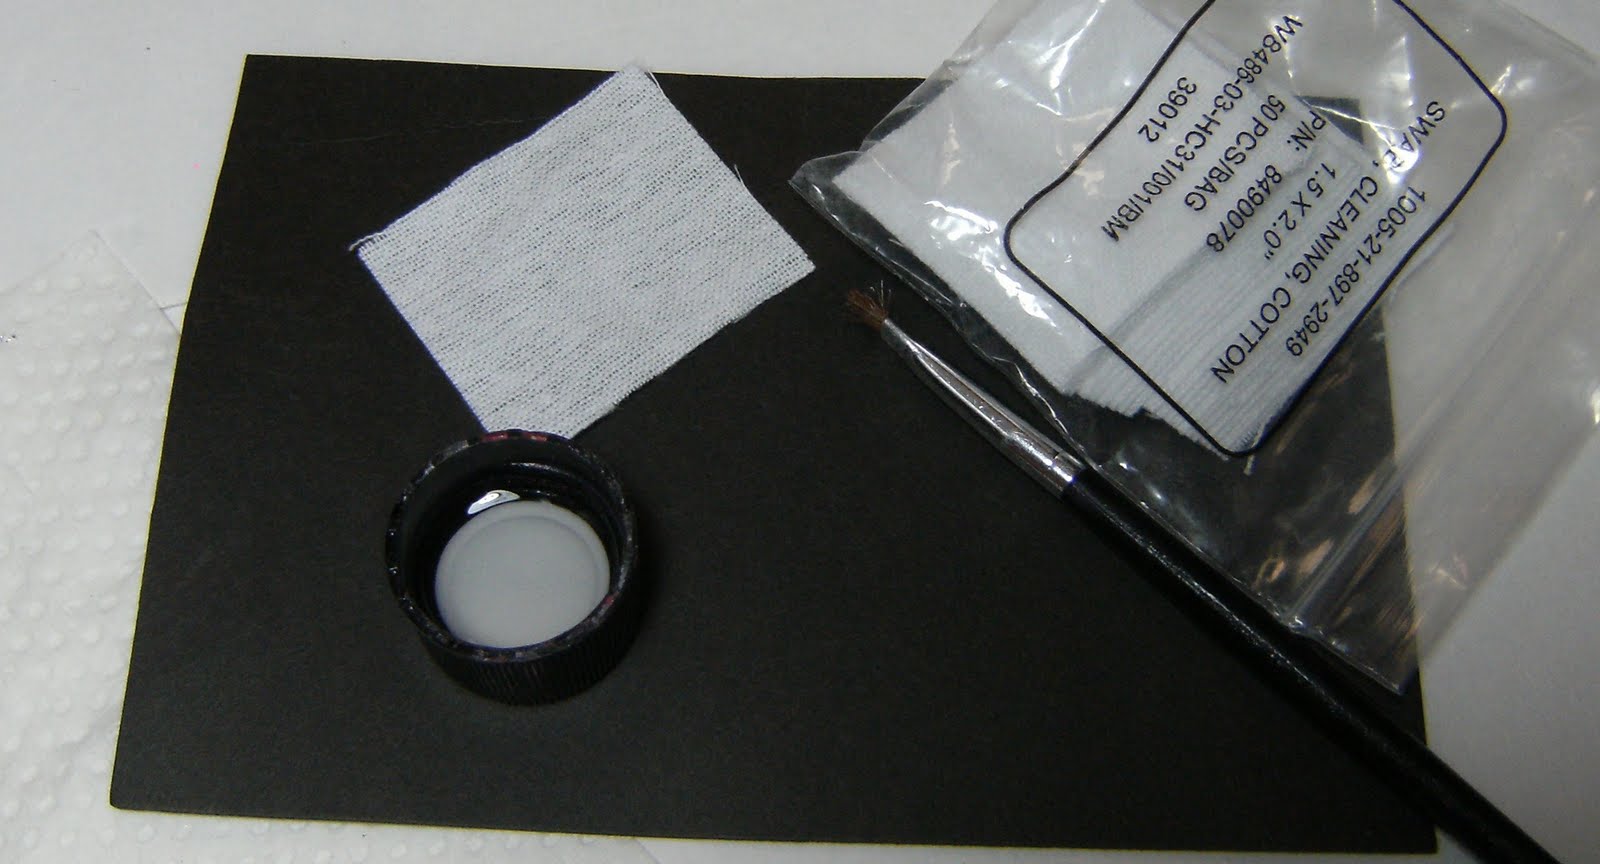
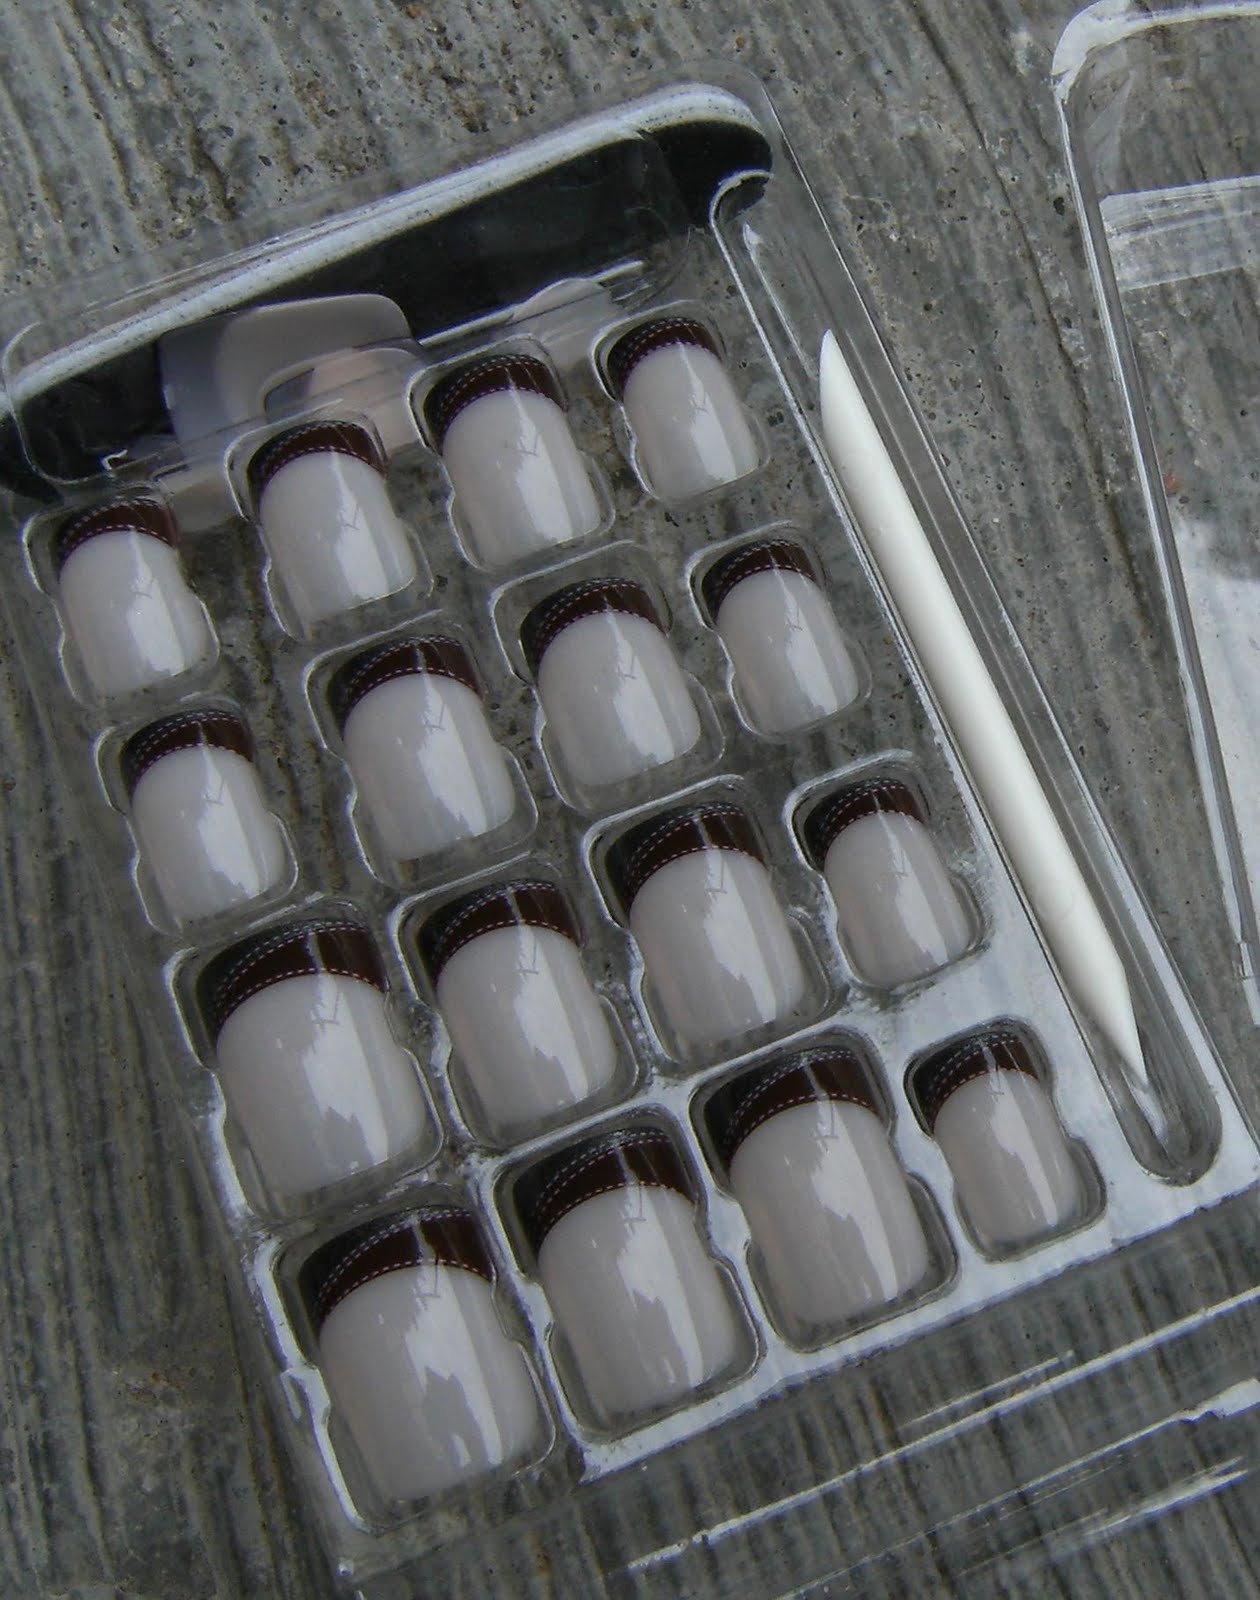
These are the nails I used purchased by moi specifically for this tutorial

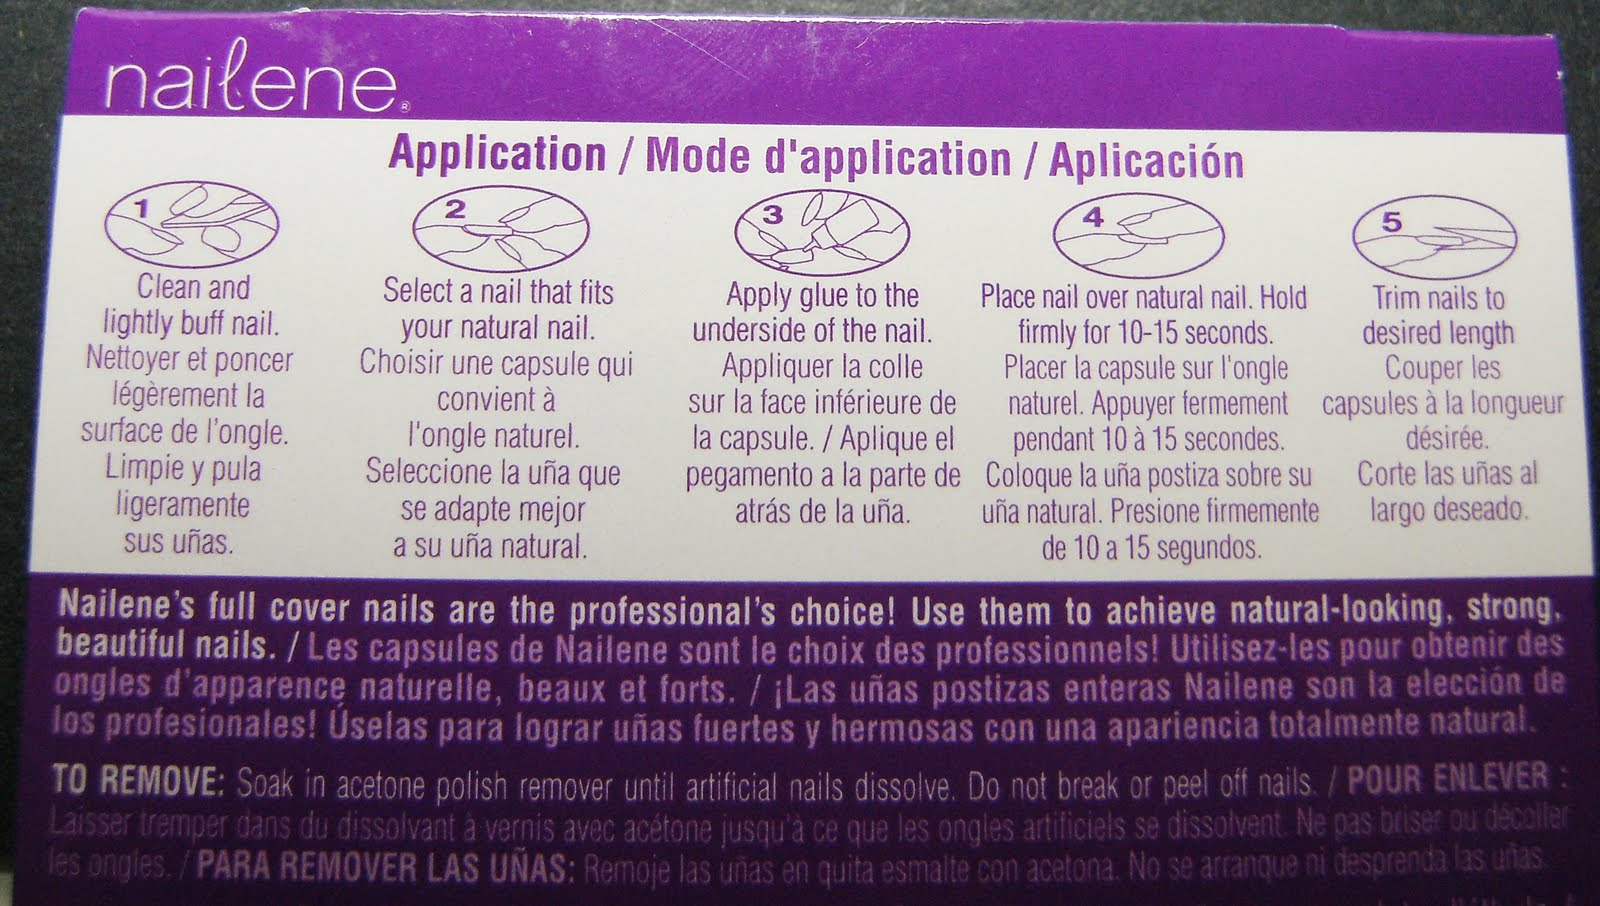
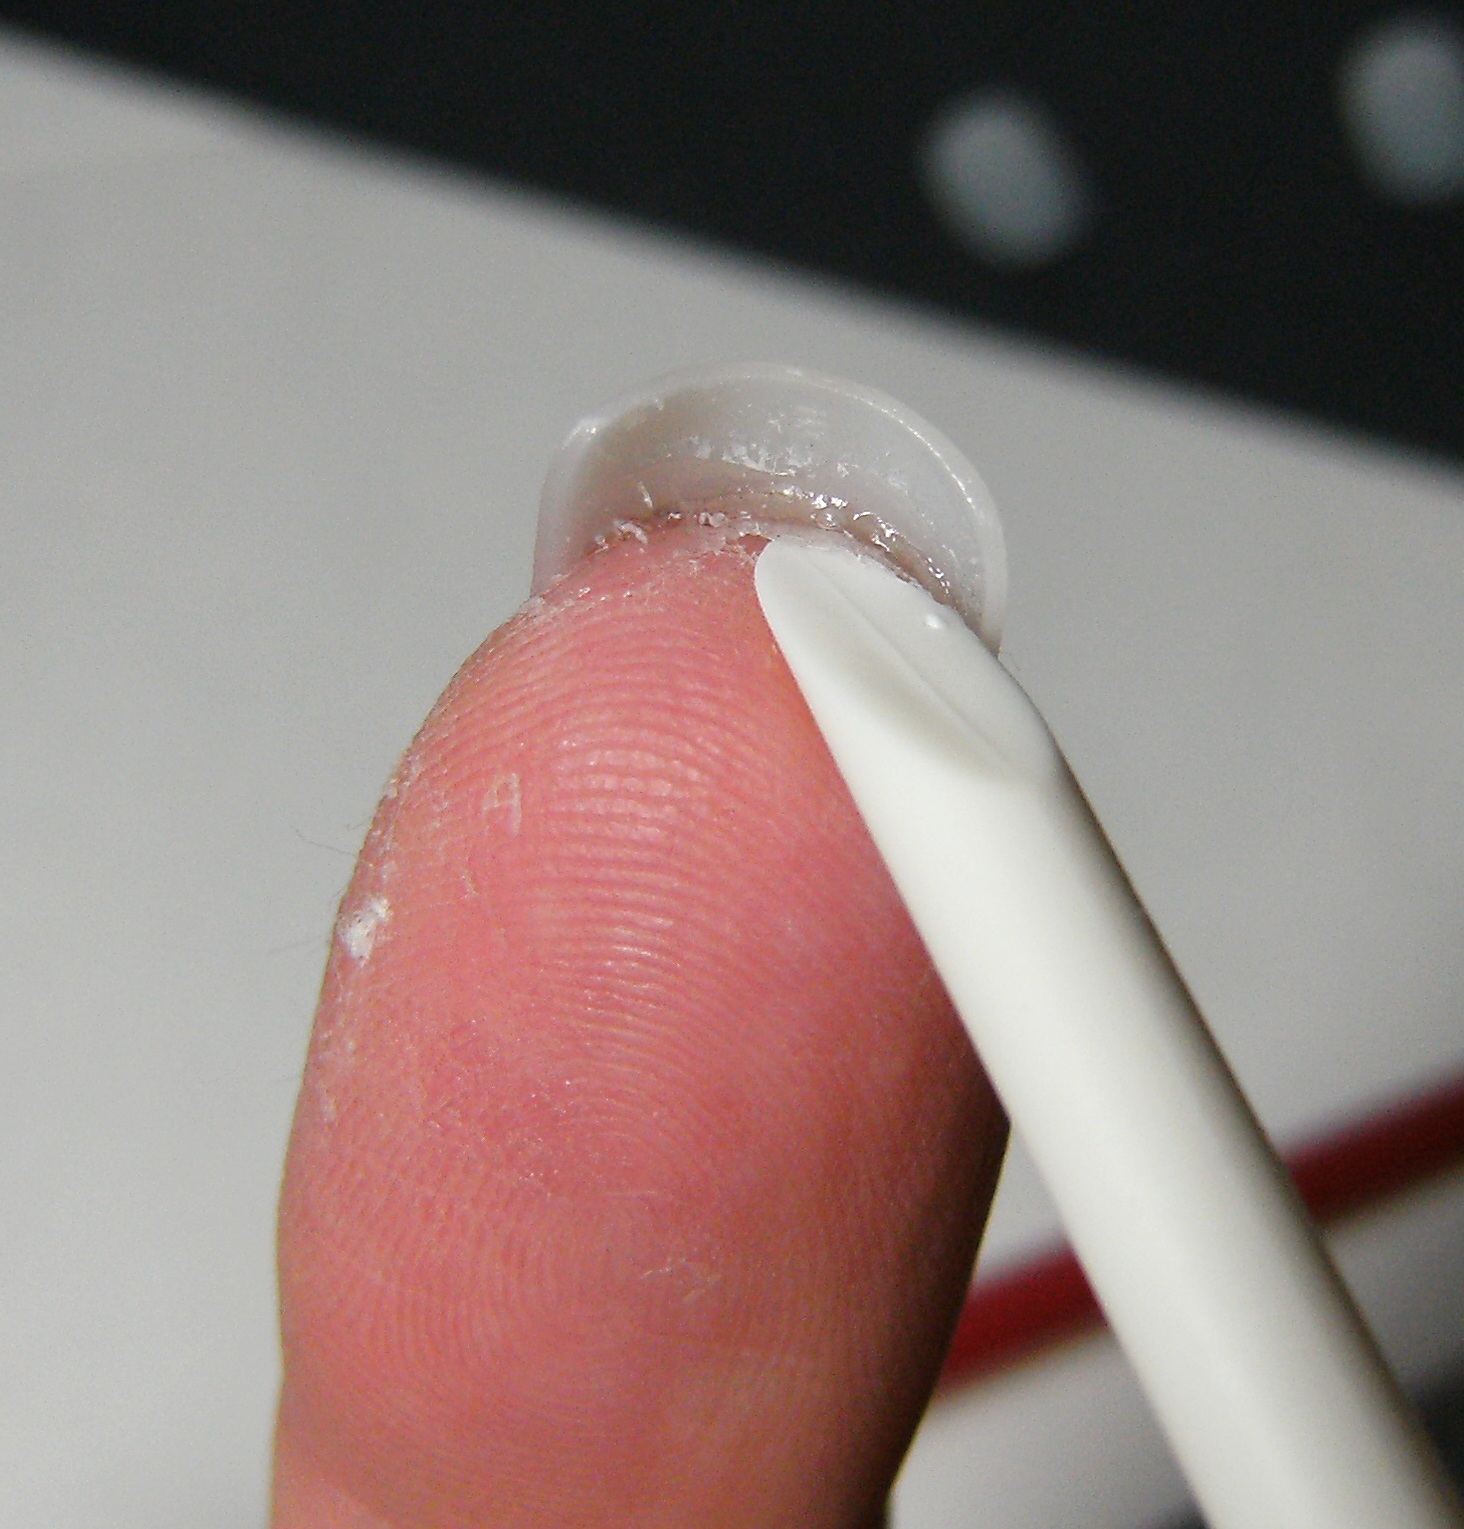
ALL Nailene nails come with a PLASTIC cuticle pusher, a coarse nail file and pink tinted glue

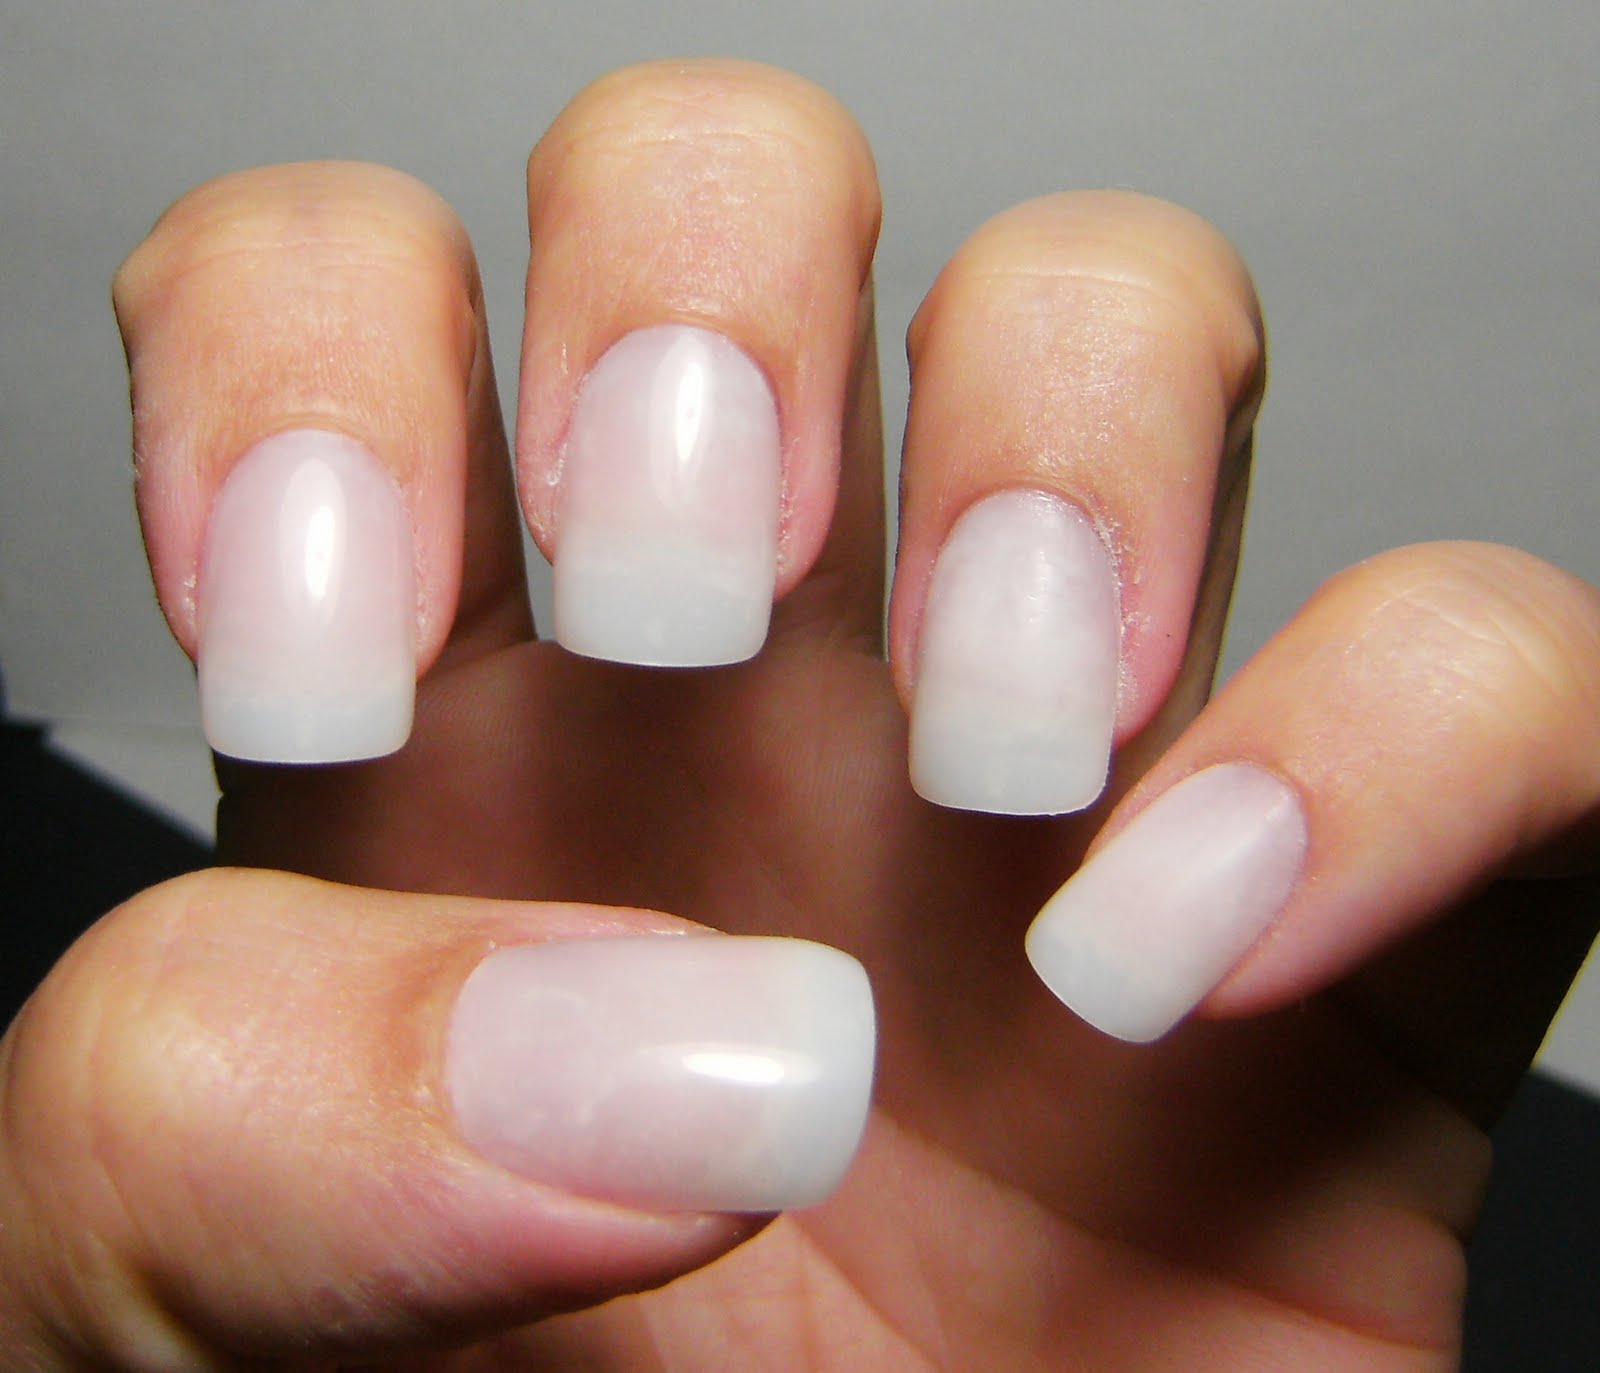
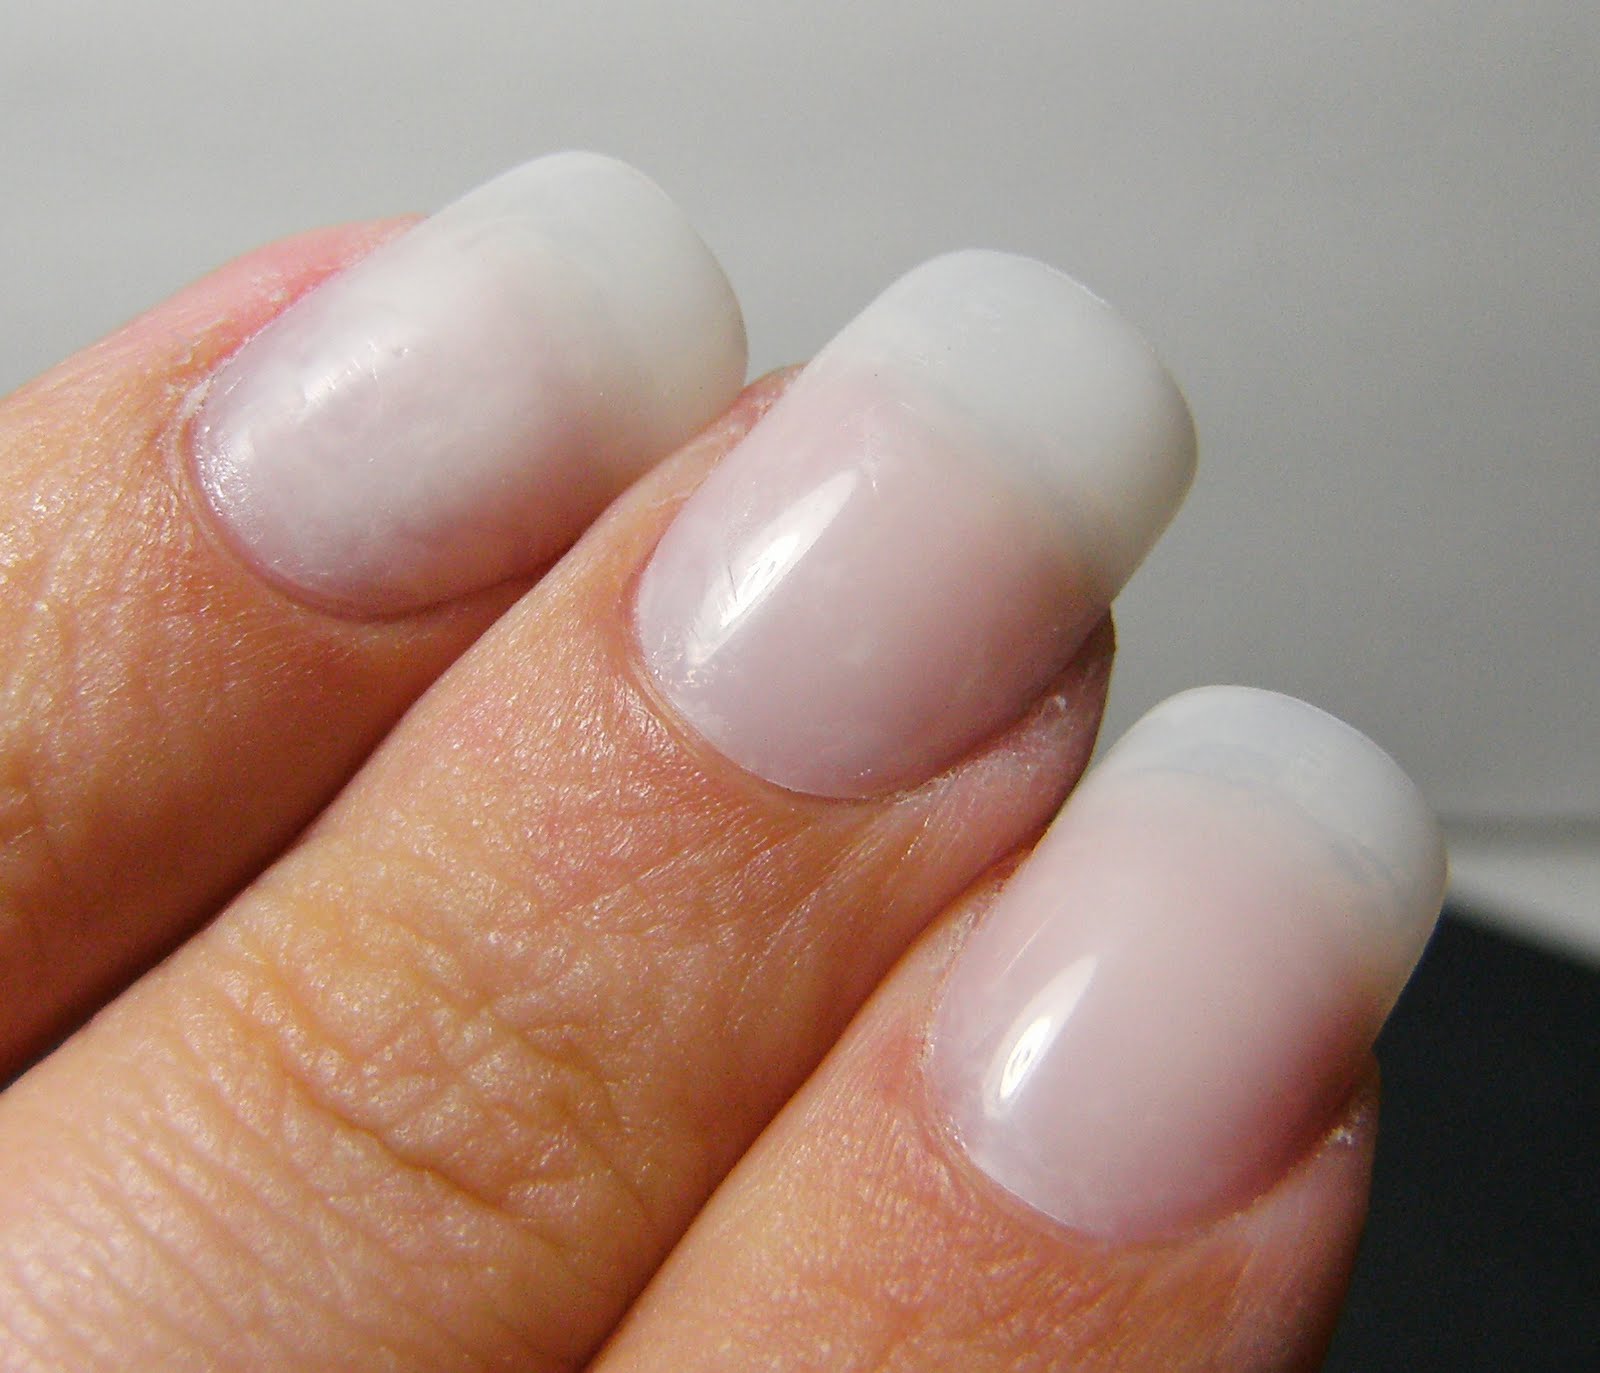
In order to get photos on how to shape false nails so they mirror the curve of the base of my nails and my cuticles I have painted my REAL nails with a dark polish ( S.H. NO CHIP 'Tuscan Dreams') This is a fabulous example why I am really into false nails. 15 minutes after I applied this polish, I grabbed my jacket and totally got a fabric imprint on my nails.... this was only 2 coats of the dark polish, with a coat of base coat - no T.C.  If I apply polish to my false nails, they are usually bone in less than 30 min, and  thats after two coats of polish and before T.C.


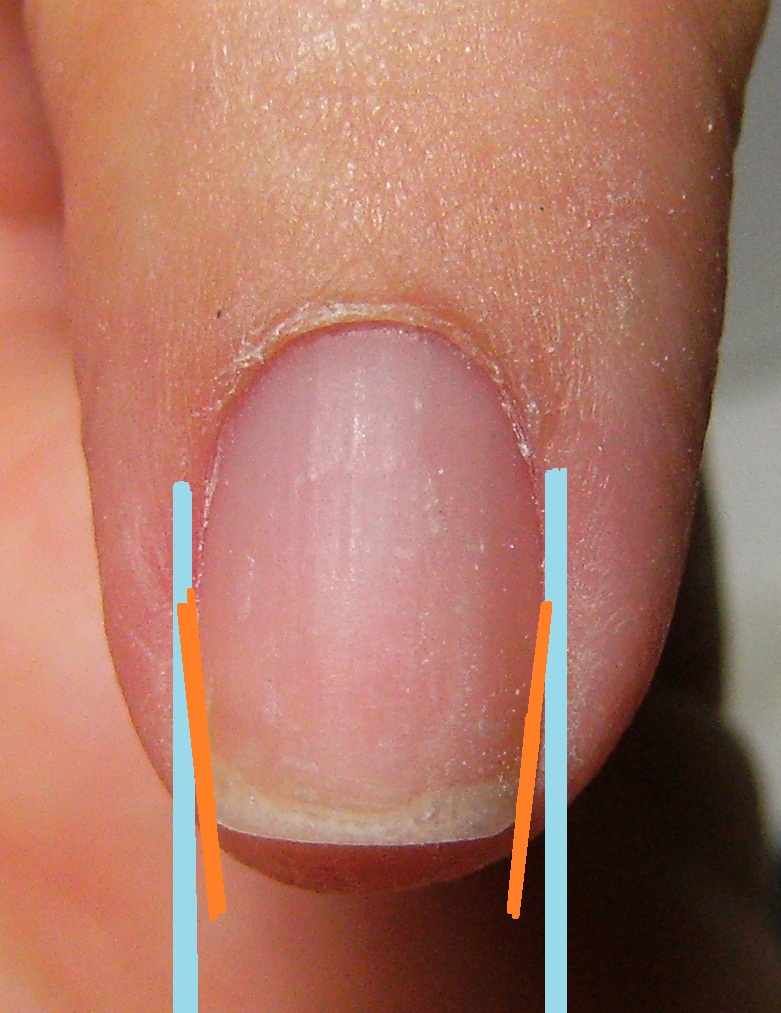
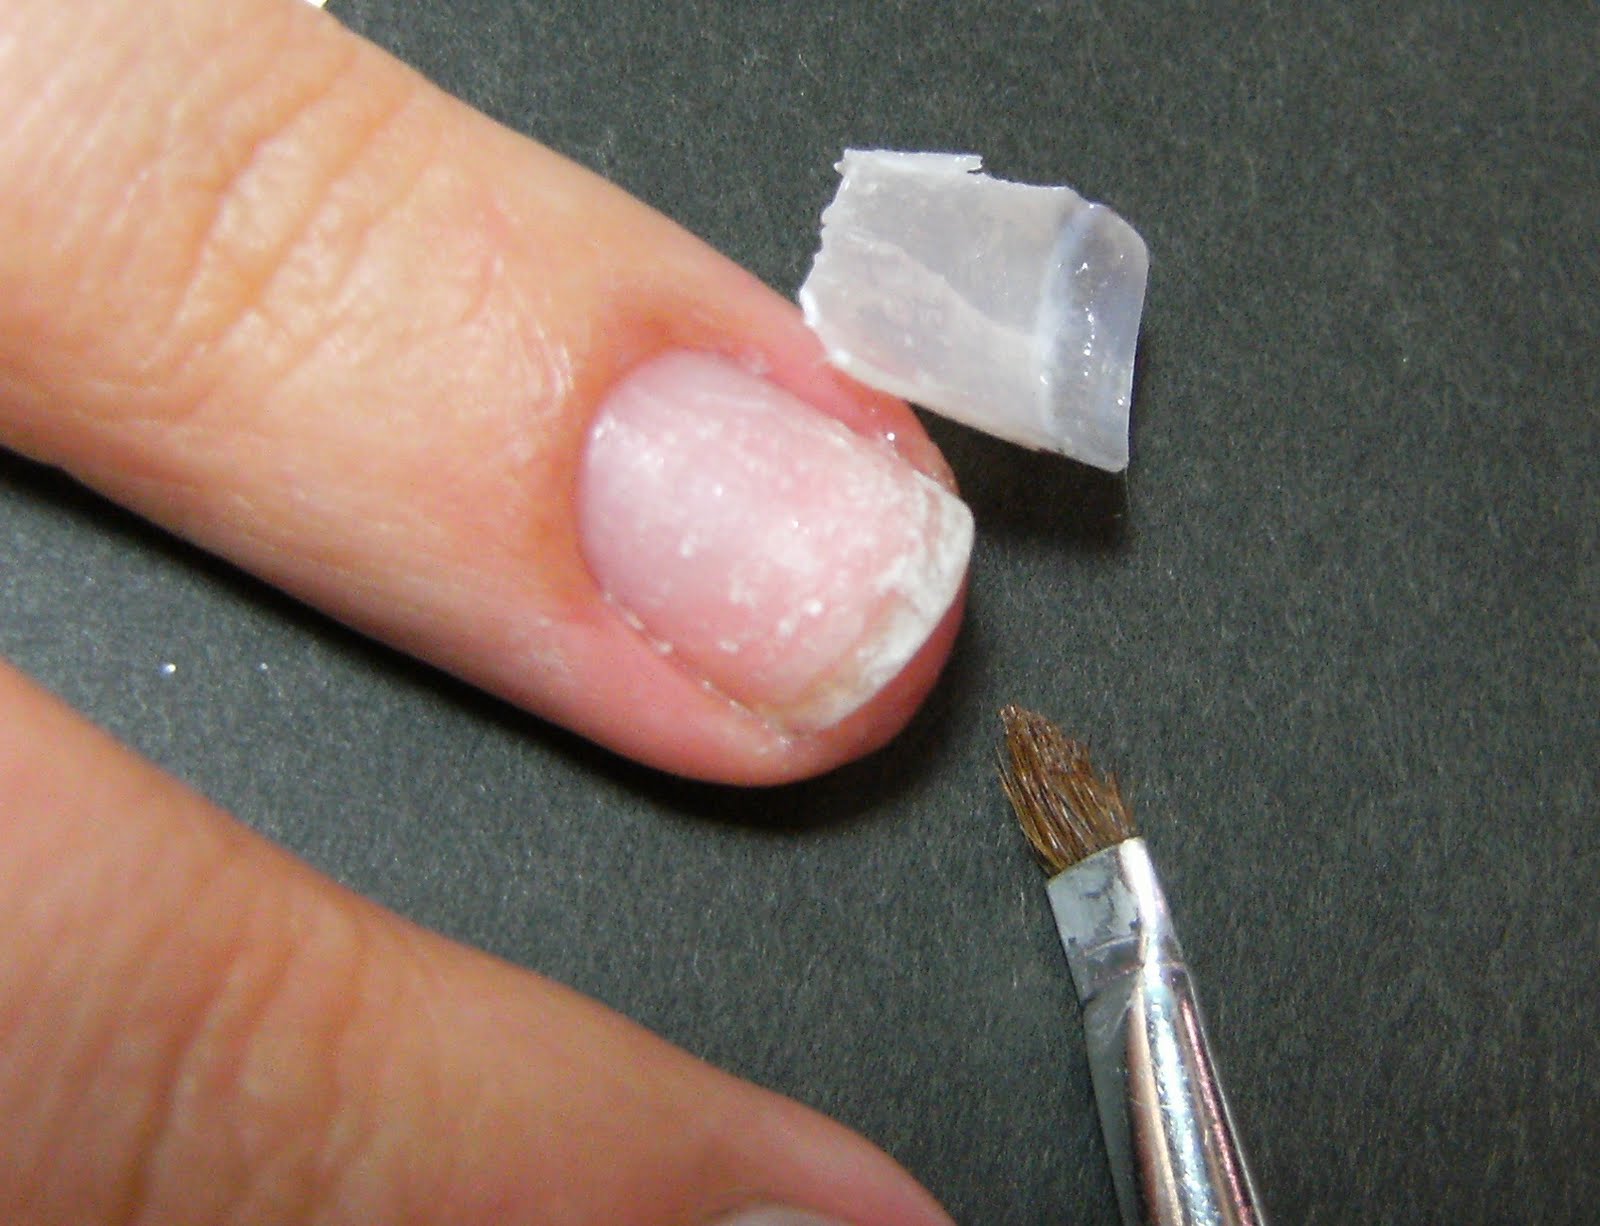
Here, I have placed a false nail near the base of own natural nail to show the difference between the curvature of the false nail and the base of my real nails.


Here is the false nail placed directly against the base of my nail, notice there is a gap between my cuticle and the false nail. The base of the false nail is much more square, and needs to be shaped to match the curvature of my cuticles.


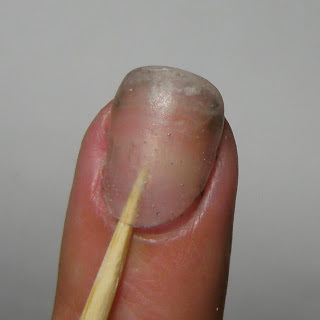
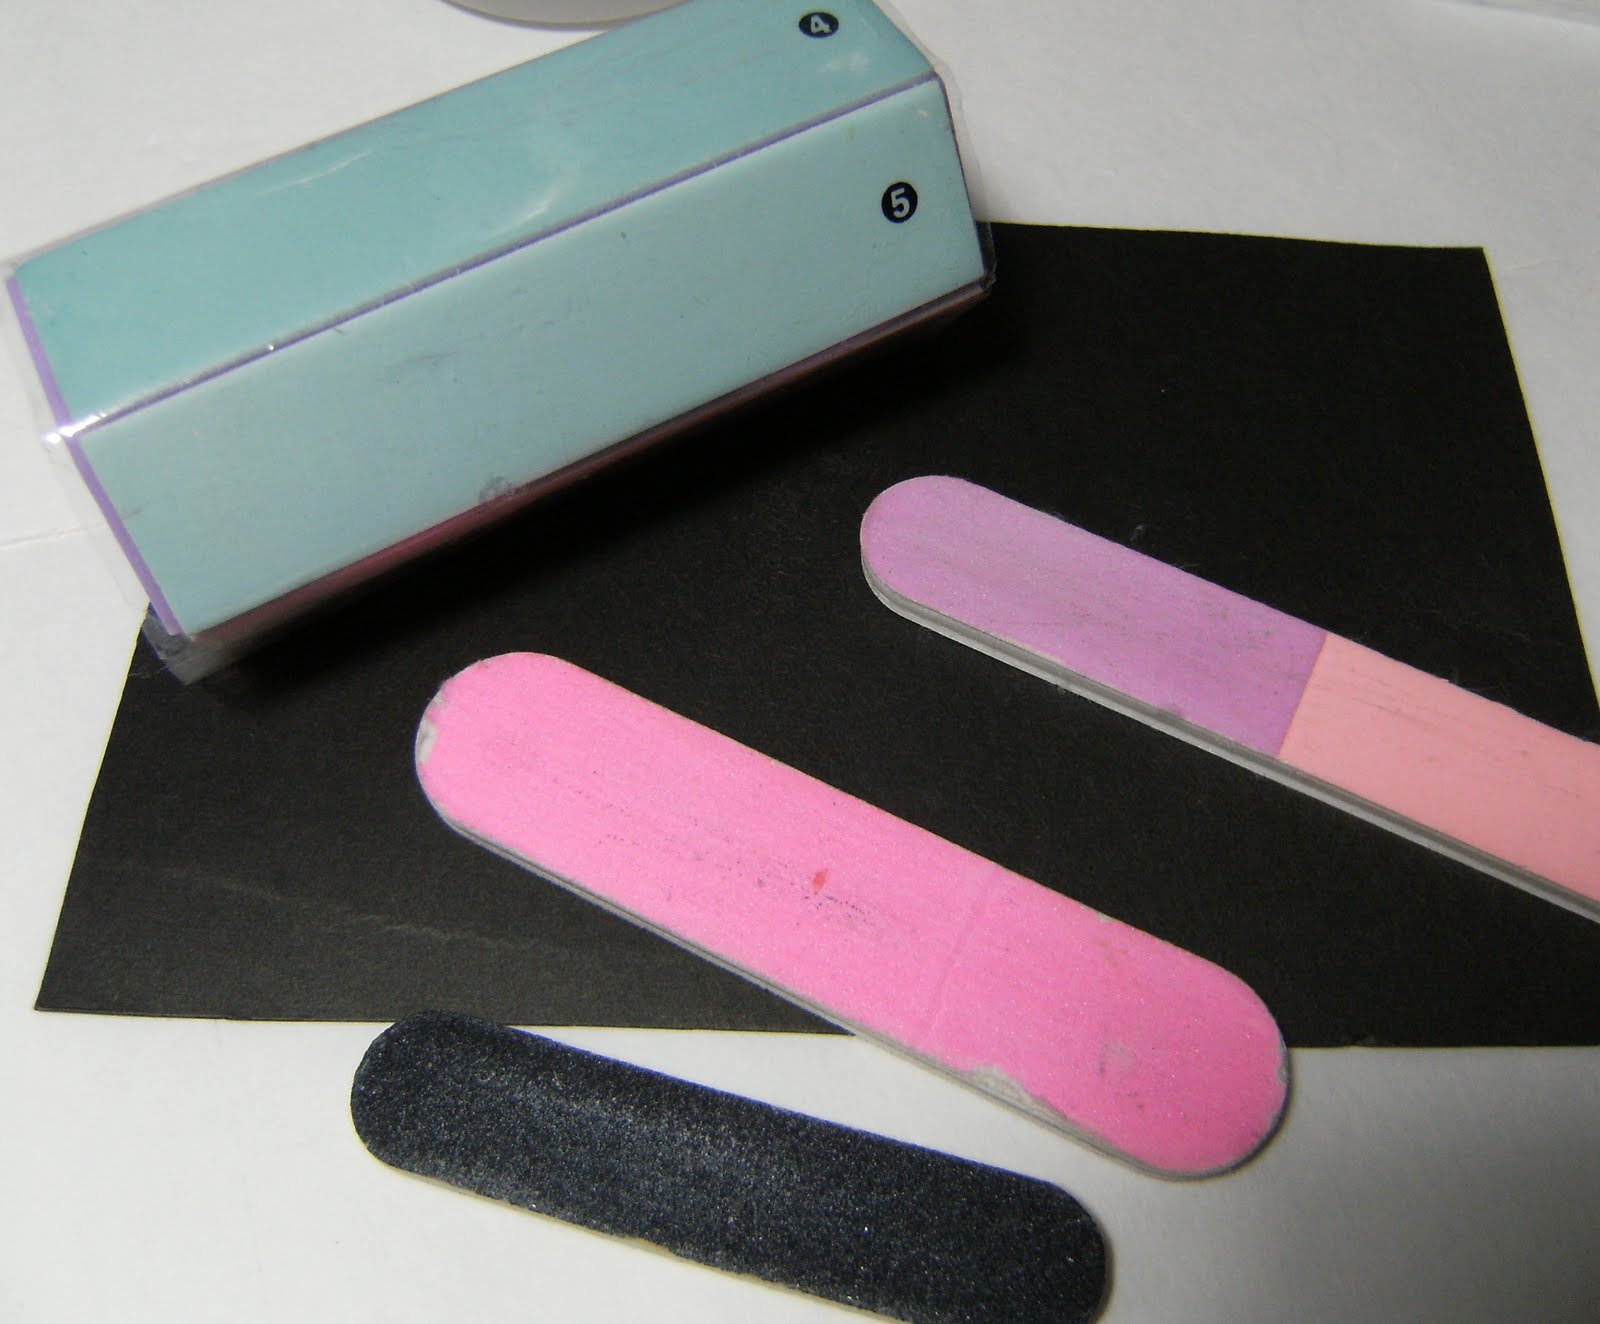
Here I am filing the false nail, using the finer side of the Nail file. I take my time and periodically check my progress. The Grey side is the finer side, while the Black side is very, very coarse.

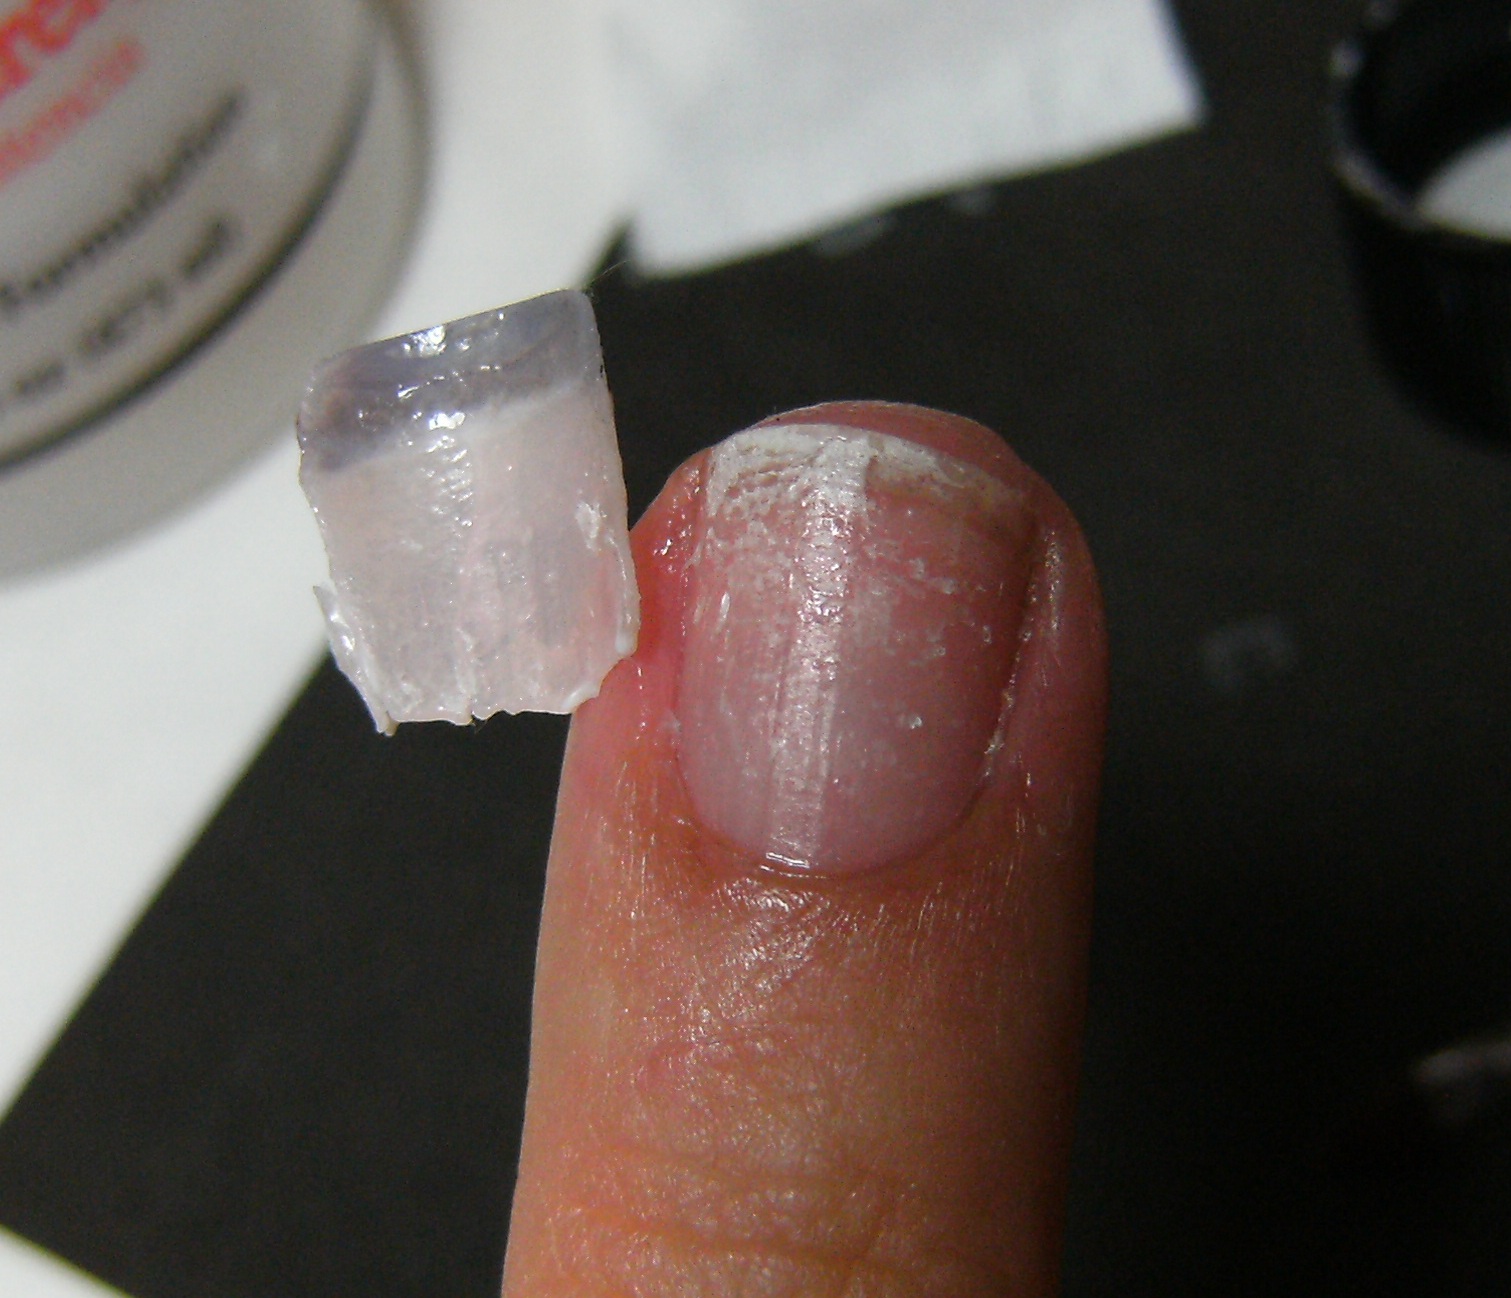
AFTER; here I have filed the false nail to match the curve of my real nail. I also had to take down the sides just a bit, I swiped it across the file 3 times and that about does it. I try to have just a sliver of space at the sides of my nail. This will ensure that the false nail is not TOO WIDE for my nails. If the false nail is TOO WIDE for your natural nails you will get a BIG BUBBLE - like in my thumb which is posted a few photos down.

~ BEFORE ~

~ and AFTER filing ~

and here it is placed against my real nail
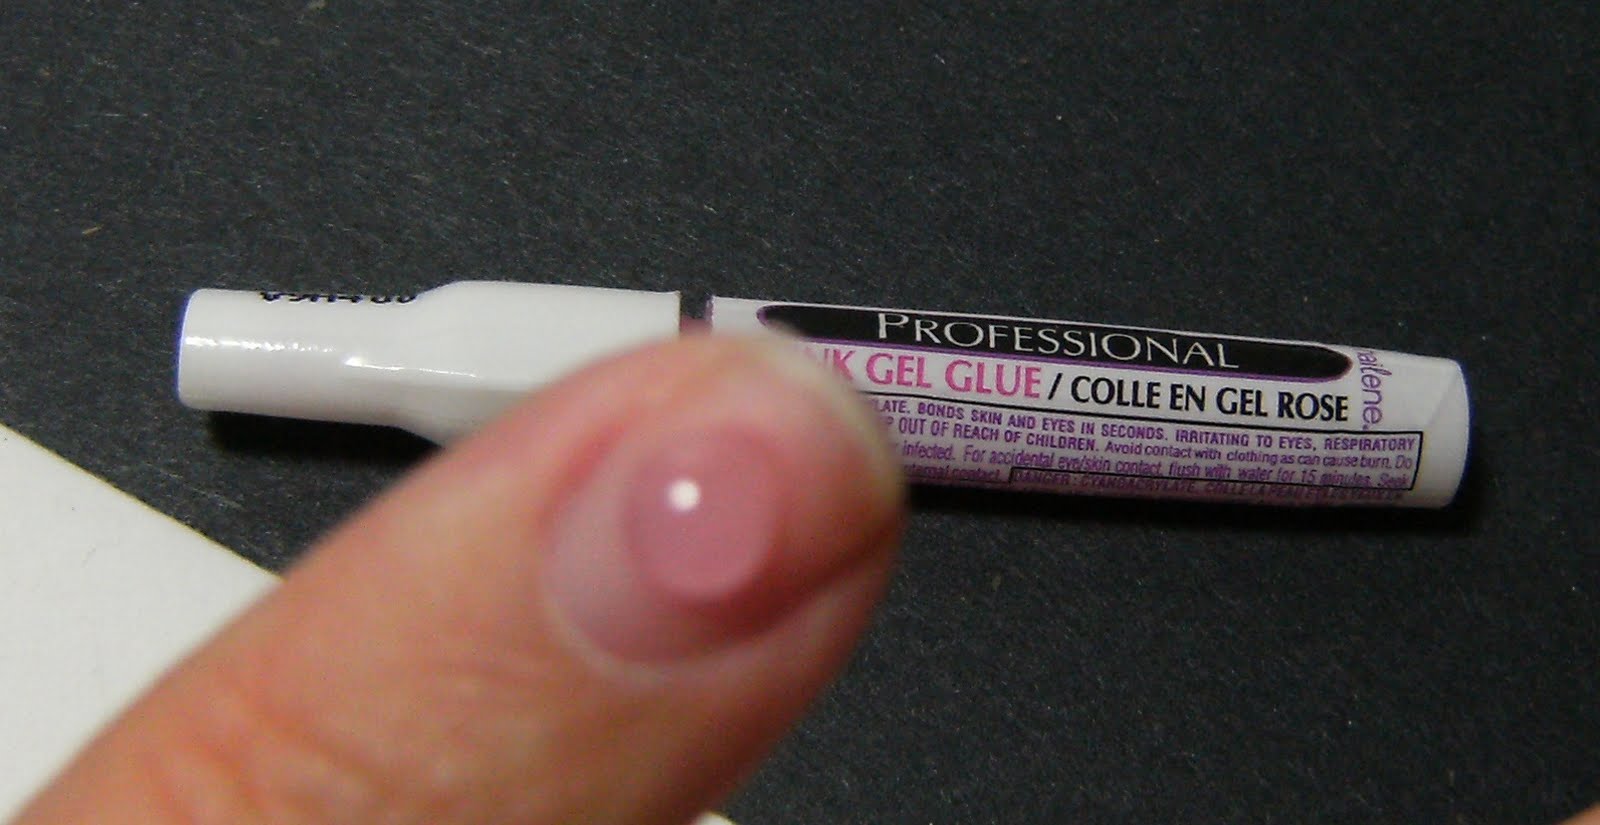

GLUE!!!!!


At this point I have shaped all 10 of my false nails, and have them laid out in order to apply them. I make sure that my nails are free from any oils or moisturizer and that my hands are fully dry. Your natural nails ABSORB WATER and nail glue or nail polish will not adhere properly to your natural nail when they are 'retaining water' A good habit to get into is enveloping your natural nails with a clear polish or top coat, to ensure that water or even the water in moisturizers will not penetrate into your natural nail.

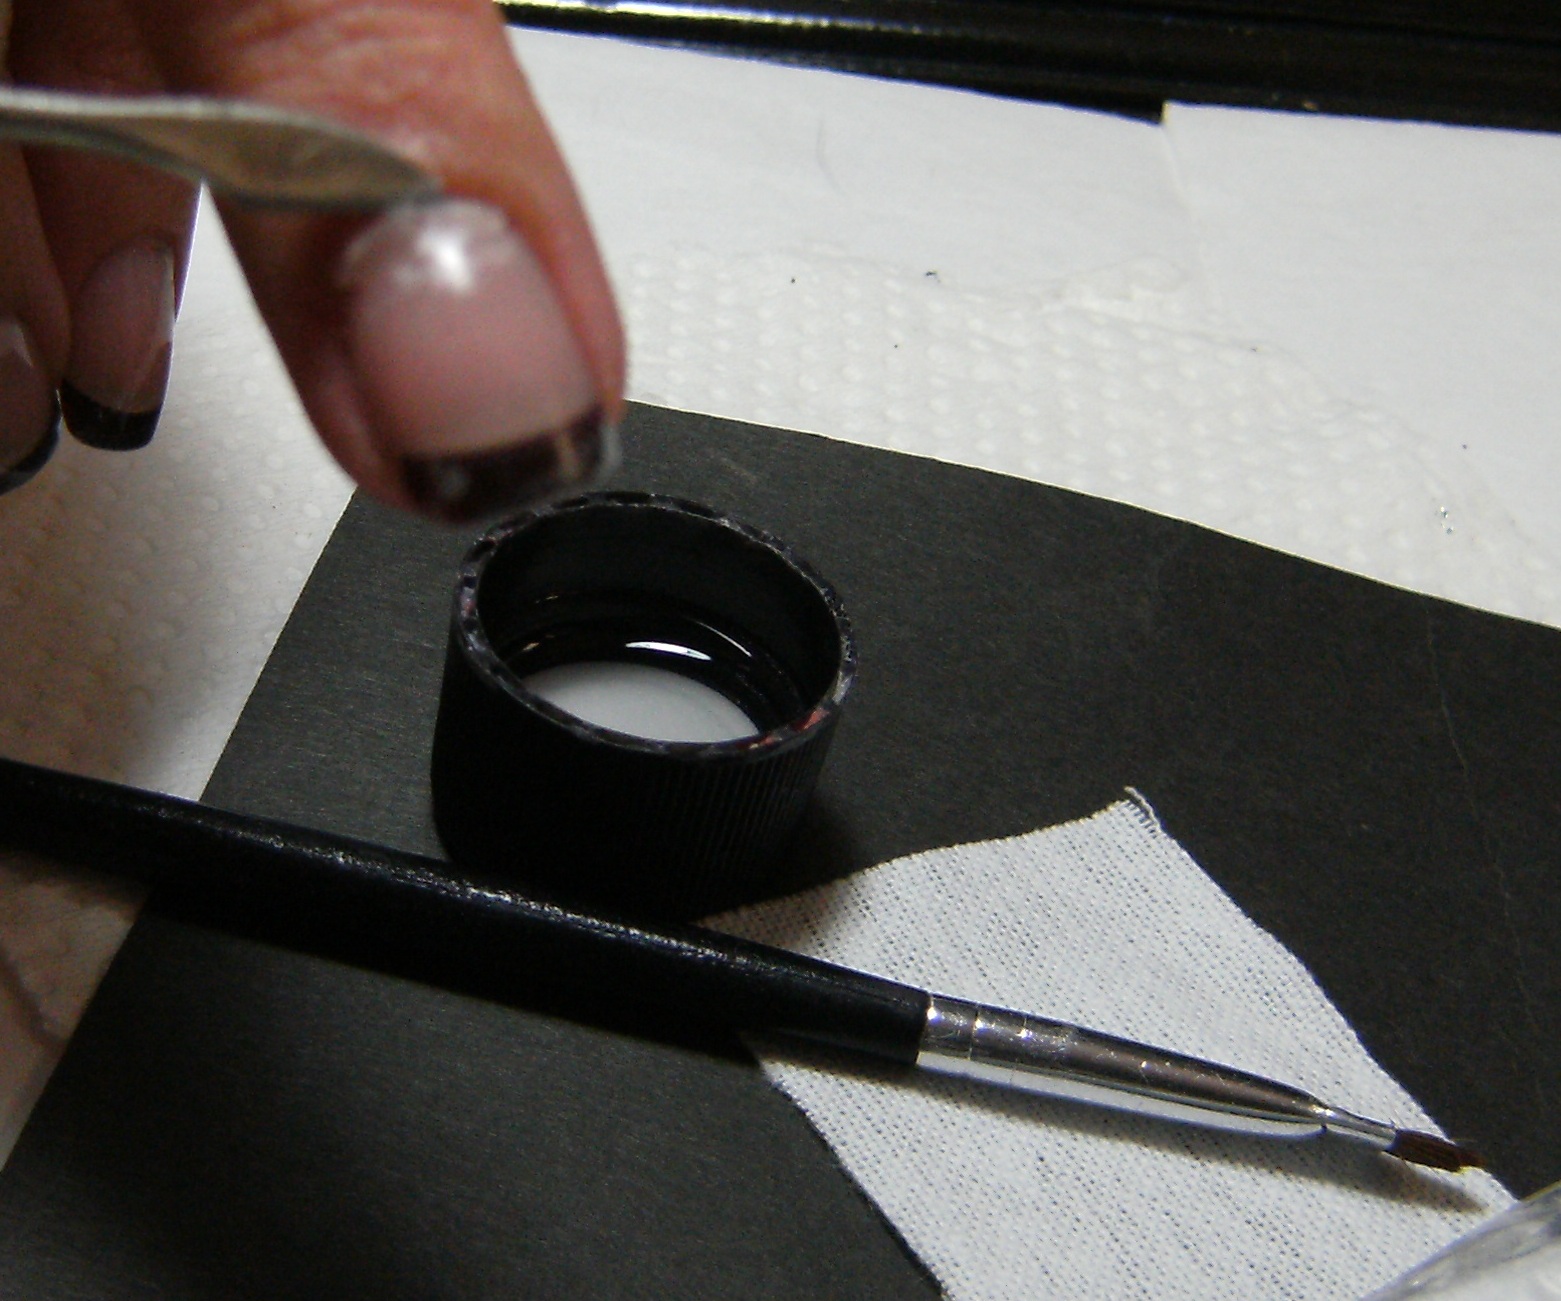
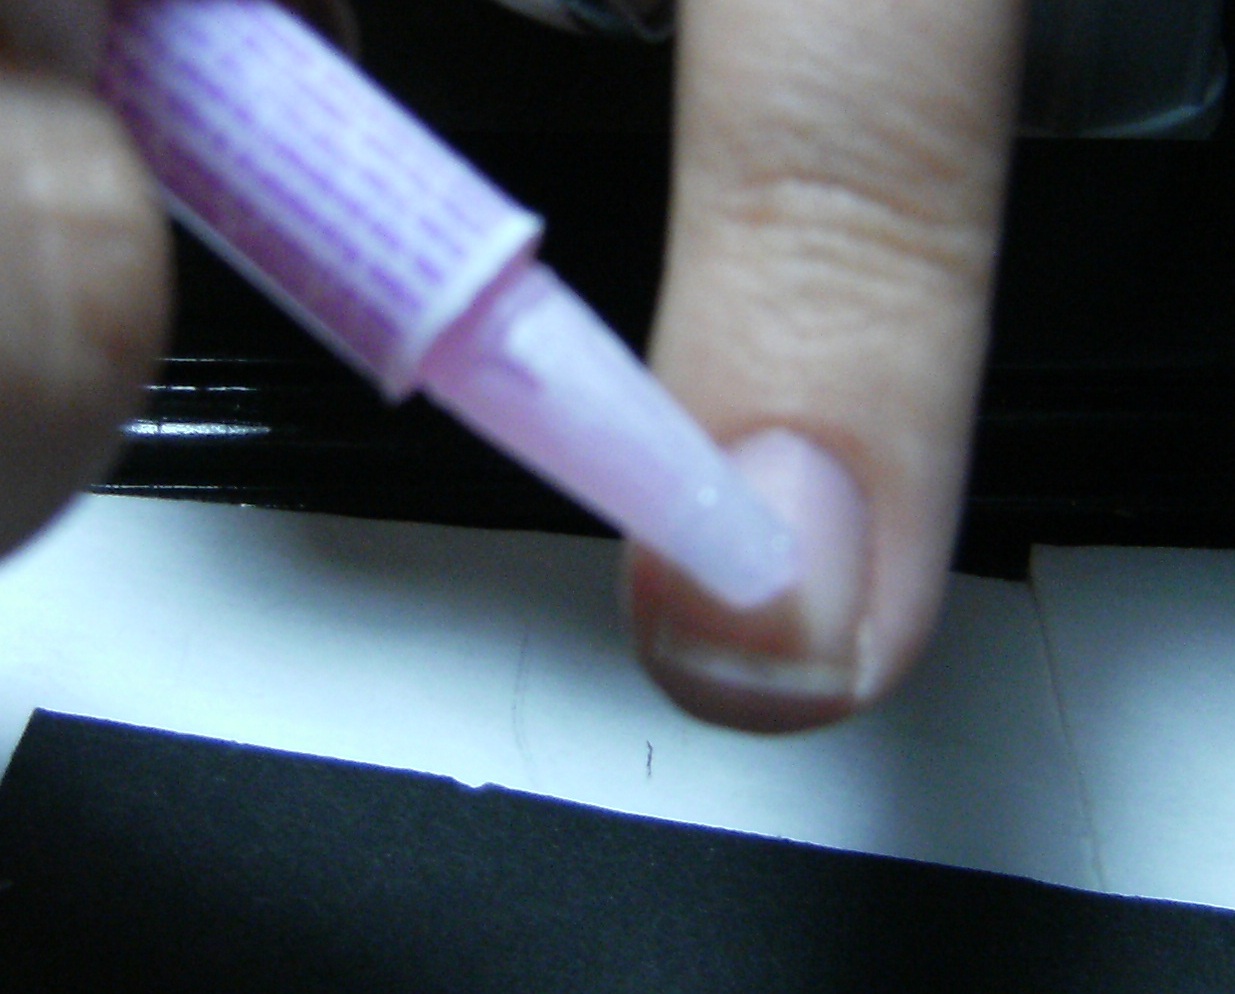
Below: This is the amount of glue I use to prevent bubbles. IT DOES SEEP OUT IN AREAS but if you have a paper towel handy you can absorb most of the glue. I fold a small piece of paper towel several times and create a point which you can hold up against the glue mistake, DO NOT RUB, just try to absorb as much glue as you can. Any glue that gets on your nails can be CAREFULLY  buffed out using a multi grit sanding block, buffing block or fine file.

So - I would say that this amount of glue is a smidgen too much but I find if you use a good amount in relation to the surface of your nail you get less bubbles.


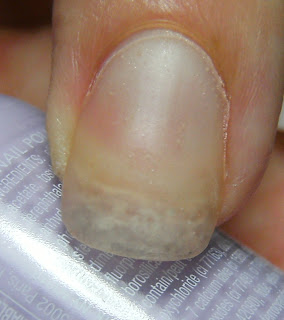
here you can see the glue has seeped out from beneath the false nail. While trying to take photos of this the glue hardened and I did not get to it in time. I did buff it out with a nail buffer block, though.

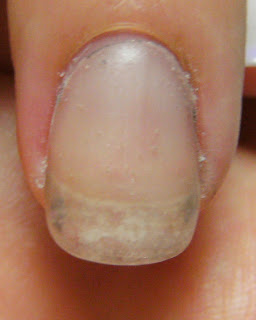
Here I have applied glue to my middle fingernail. You can see the nail beside my middle finger has some glue showing along the side of it. After applying glue I have held the false nail down for approximately 15 to 25 seconds, it's a little overkill, but I want to ensure the glue fully dries. The space along the sides of my nail is needed in order for any excess glue to seep out. Initially it looks bad up close like this, but after I wash my hands and apply moisturizer it is not noticeable


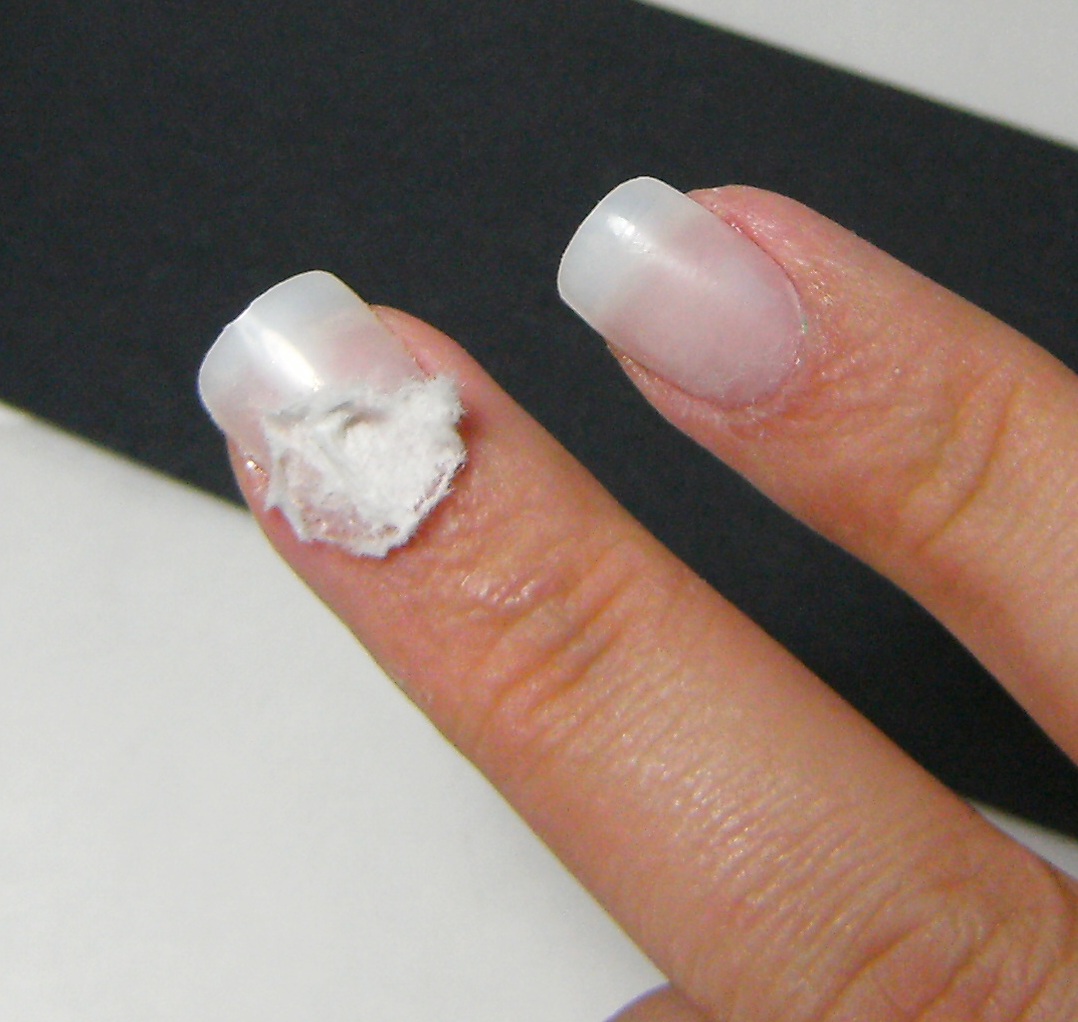
Yes, this fuzzy photo is the nail file glued to my finger finger = fabulous!  It was just a little glue and fell off shortly after this photo♥


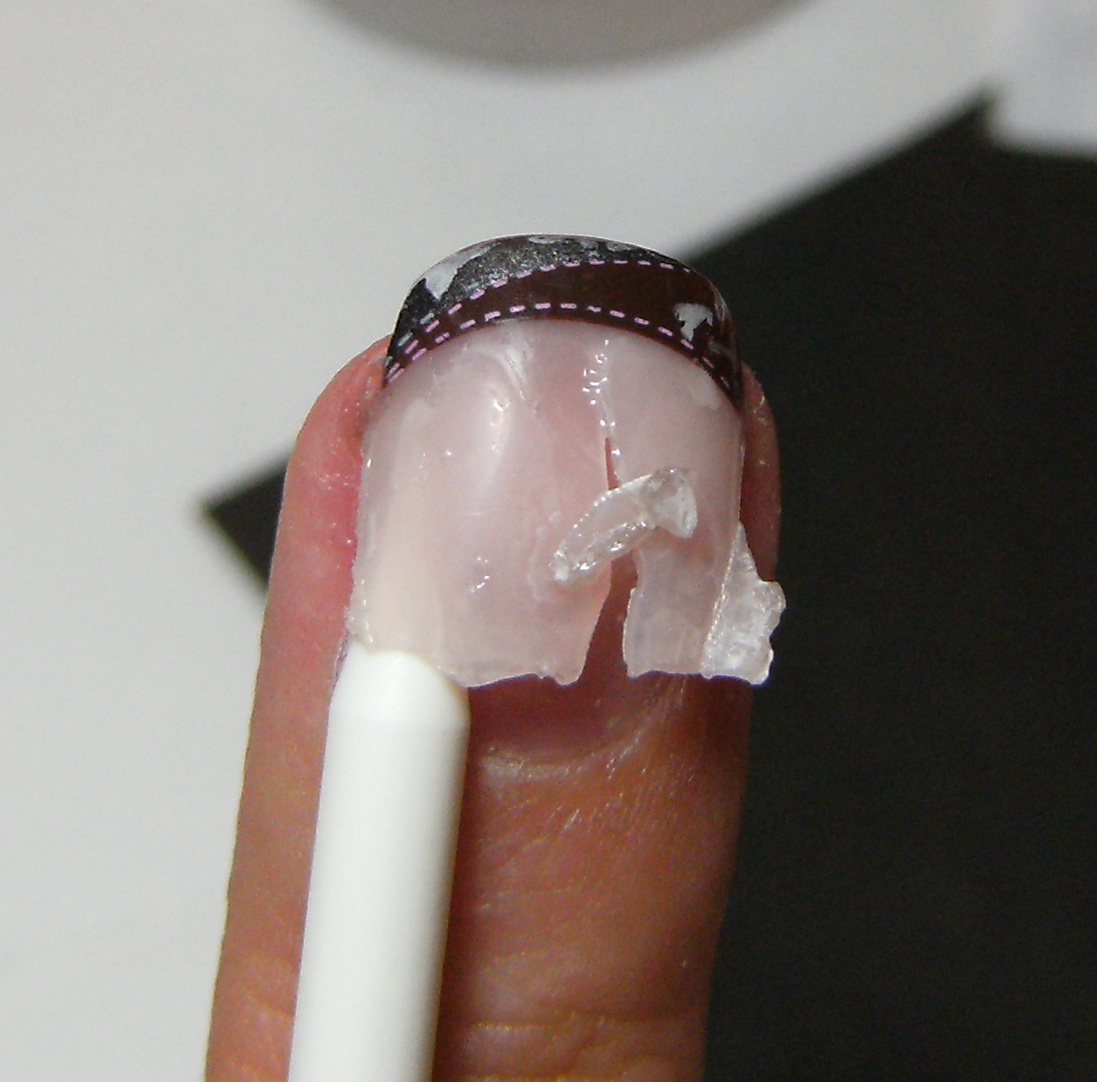
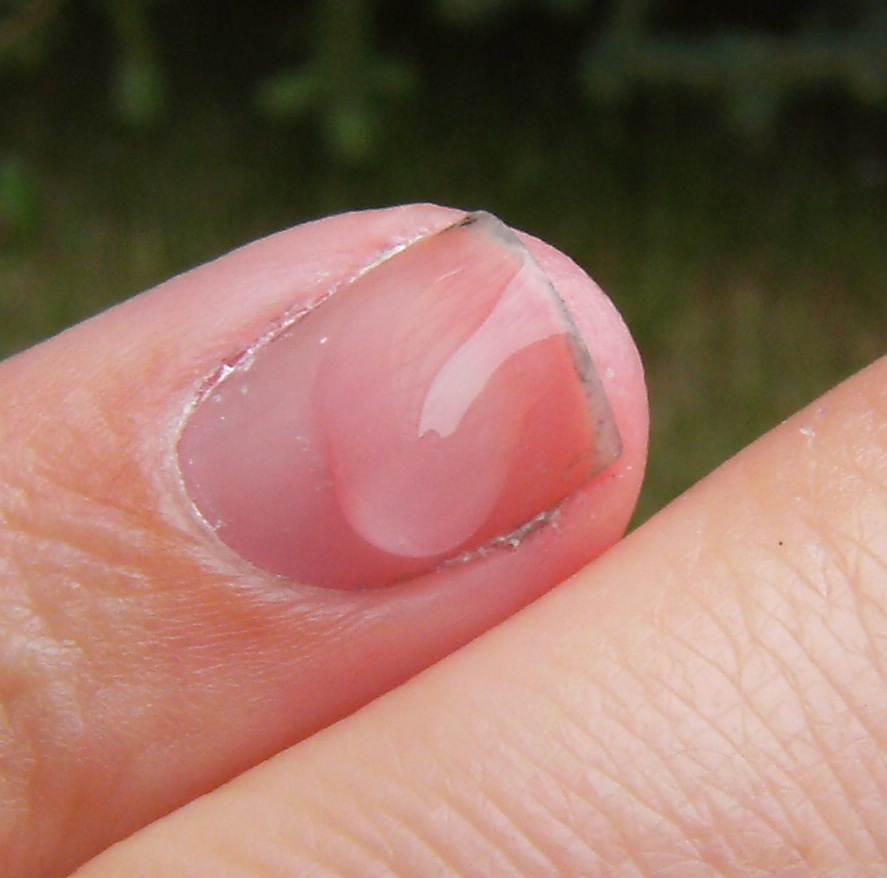
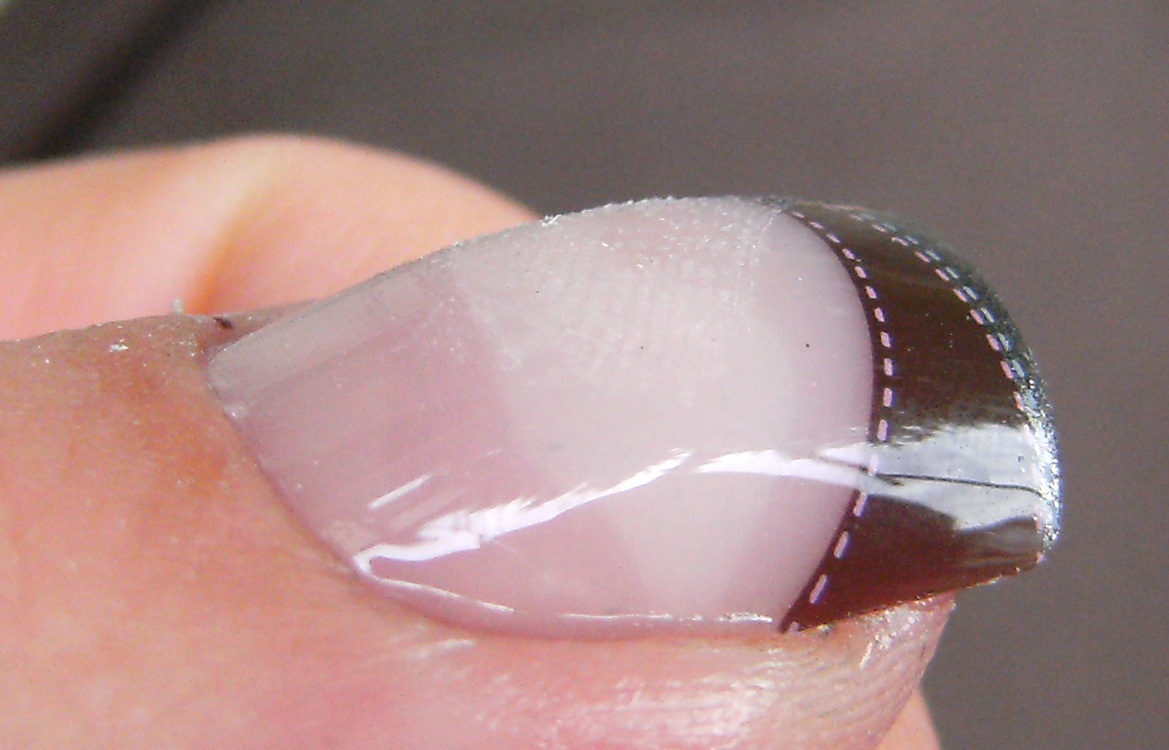
Here is a known problem that I often read about. This is my THUMB nail, and I have not shaped this false thumb nail properly. This is the second largest size available in Nailene nails, and usually when I shape these nails I take down the sides a little in order for them to adhere FULLY to my natural nail bed.

What happens in this situation is the nail adheres to the sides, the base, and the tips of the natural nail, but because there is no room for the false nail to fit properly on the natural nail =it 'tents' -for lack of a better word- leaving a very visible air bubble between the natural nail and the false nail.

I also used way too much glue, and have gotten glue all over the pads of my fingertips = leaving a fingerprint on the surface of the false nail.

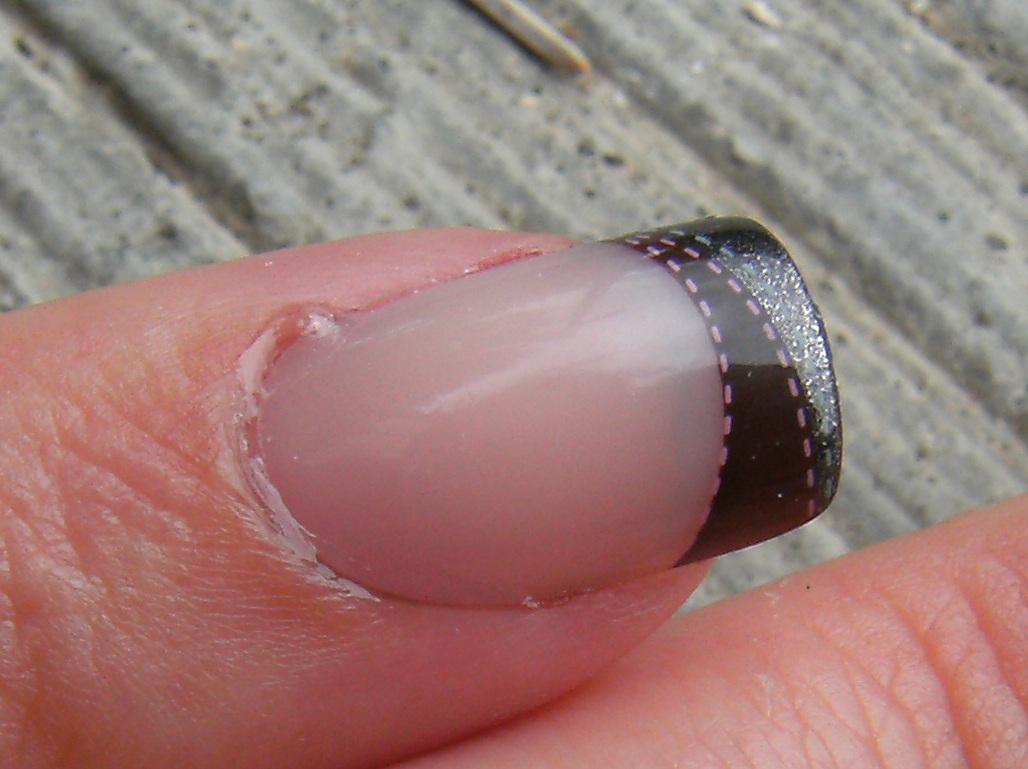
Below - the false nail placed over my natural nail

This is a little too much glue, which results in quite a mess - BUT - you CAN buff out mistakes like this using a fine sanding block or buffing block.

Below you can see the enormous bubble, as well as my fingerprint on the surface of my false nail. Along with alot of glue along the sides of my nails

I used a fine fine buffing block to buff out the fingerprint. When you have a bubble like this when wearing sheer or translucent french mani or funky french tip nails, there really is only 1 thing you can do

STICKERS!!!!!!!

So when applying false nails, take the time to shape them. During your 'dry fit' make sure there is a small space between the sides of your nail and the false nail. it will make a huge difference.


After all my nails are glued on, and I have gently buffed out any glue mistakes, I always use a small angles brush to swipe acetone underneath the tips of my nails where my free edge meets the false nail. This area may be coated in glue which is a good thing! That means there is a good adhesion between your natural nail and your false nail.


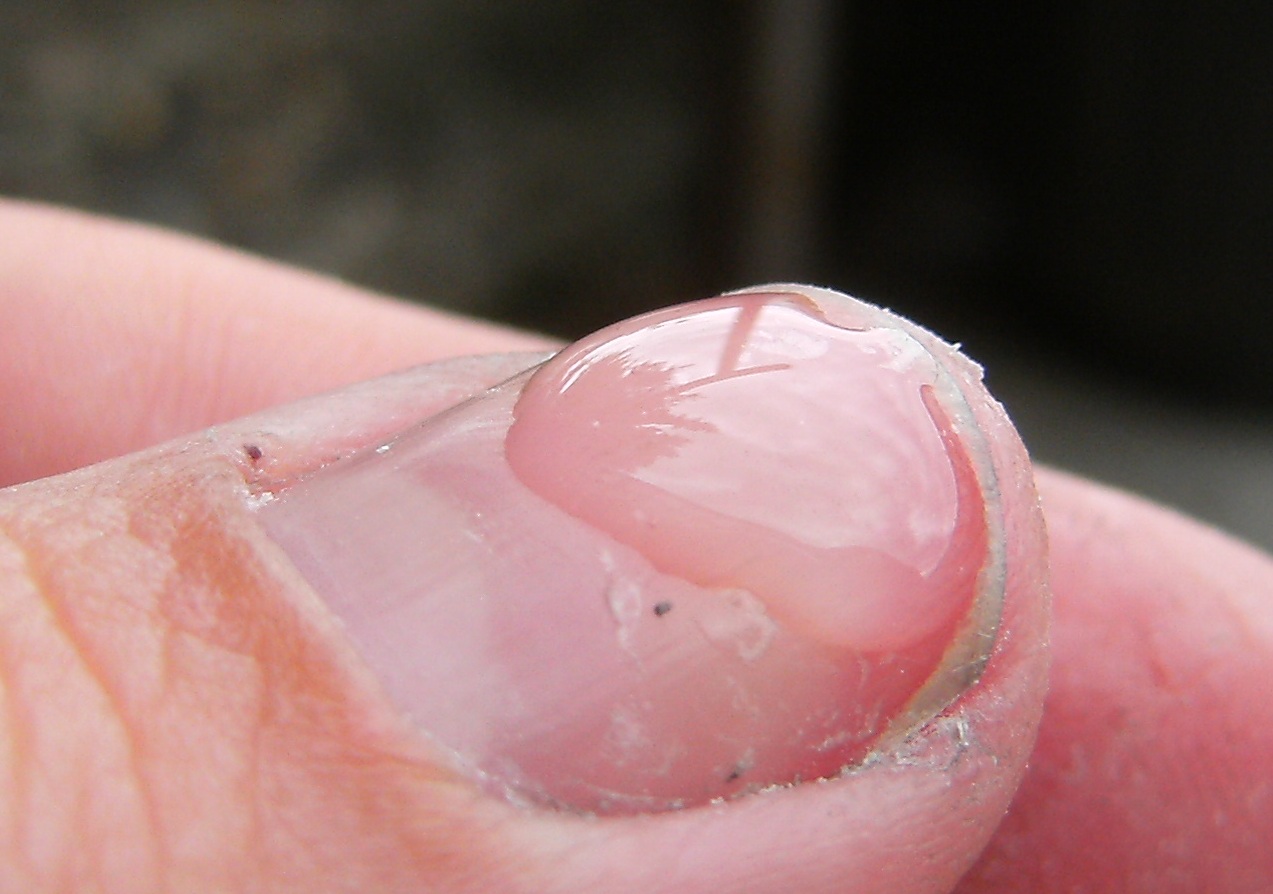
Below - MY THUMB where I have a lovely fingerprint due to using too much glue on my thumb.

The bubble makes it hard to see- but I used a very fine sanding block to buff out the fingerprint while retaining the high shine of these false nails..... It is possible to buff out any glue mistakes- just take time to do it slowly and use a fine sanding block.

This is before I wash my hands of False nail dust,  my SKIN will absorb enough water and moisturizer so that any wayward glue stuck to my SKIN anywhere will gently be sloughed off. = DON'T PICK at glue that may be stuck to your skin. This happens to me and I just leave it ♥♥♥ If you wash your hands and apply moisturizer it will eventually be washed off.


Tonight; Replacing a damaged false nail..... 
 
ugh this was a long *ss post!
 
I need to go play with my glitter now