Pages

Showing posts with label CONCEPT NAILS. Show all posts

Sunday, July 17, 2011

Plug Yourself Sunday and purple fantasy nails


❤ If you have a nail blog and would like to be on my blog roll, please leave a link in the comments ❤

whew - another busy week. I made it a whole 7 days without artificial nails..... and did not injure myself or even horrifically break any nails. I kept them painted for 6 out of those 7 days, and only used acetone 2 times for clean-ups.

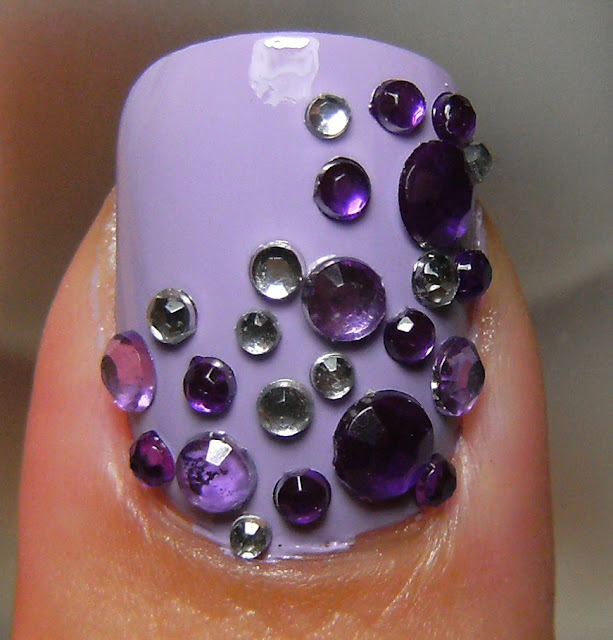
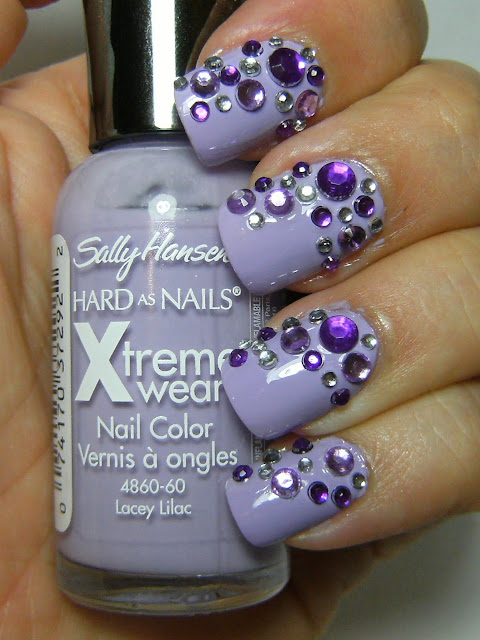
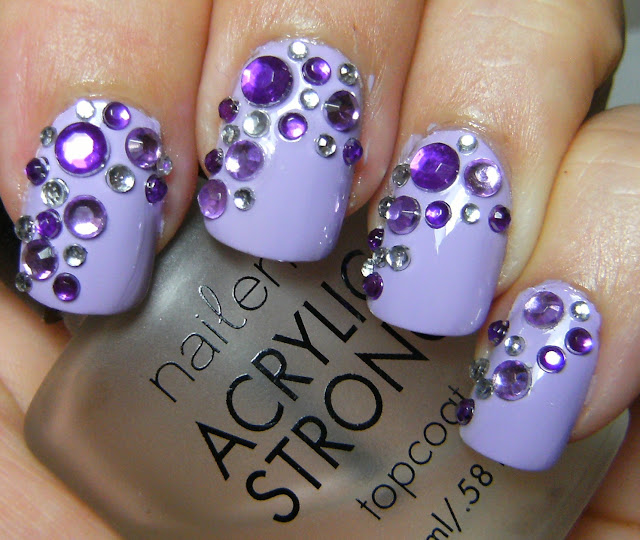
I missed my beautiful artificial nails, though, and was happy and relieved to glue these on tonight. My mani is Sally Hansen Lacey Lilac 2 coats, a coat of Nailene Top Coat ( which I thinned out, finally ) and plastic 'rhinestones' peeled off a sticker set that I found at my favirote dollar store in my town.  

These type of embellishments will fog over and look like bubbles if I add clear polish or top coat over them, which i still think looks cool= but for tonight, I set them into wet top coat. They have held on for a few hours, and it should be interesting to see how many last through the night, and through the day tomorrow. These can also be glued on with nail glue.

I waited for almost 15 minutes before I did my other hand and now when I add rhinestones to my manicures I try to keep them cloase to the BASE of my nails because they are less likely to snag on stuff, or pop off.

Sally Hansen Lacey Lilac - 2 coats with a coat of TC - last time I wore this I felt like it needed 3 or more coats, but today this is 2 coats......I left it upside down for a few minutes before I started painting and i think that maybe i did not shake it enough the time i wore wore.

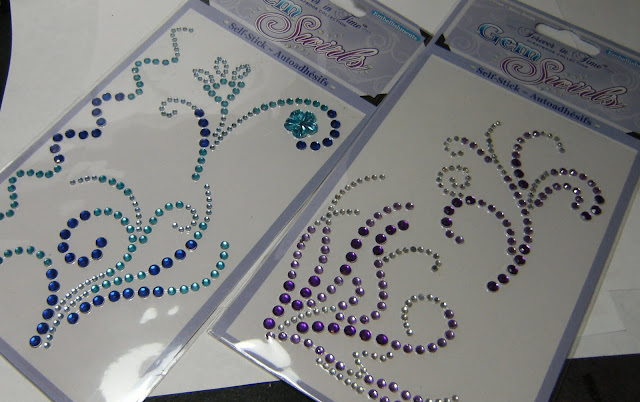
The stickers from my favirote dollar store in town ( Loony Twoones dollar store ) The small clear stones have a very pretty colour shift to them, but they are sharp - the 2 different sizes of clear stones on my nails are from the Dollar-rama, I bought those a year or so ago. These are supposed to be for scrap-booking or to stick on cell phones etc.
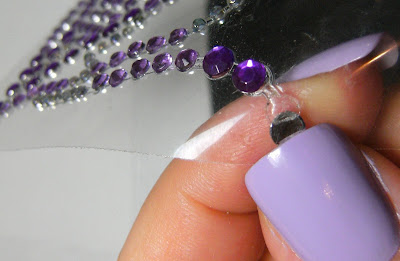
some of these types of stickers do not peel off from their sticky backing, but before I bought these I tested them in the store. here in this fuzzy pic ( sorry ) there is no gooey residue left on the silver backing of the 'rhinestone' ( which is plastic so its not really a rhinestone)

tada!  I squished some of these a little too much and the TC has some ridges in it....
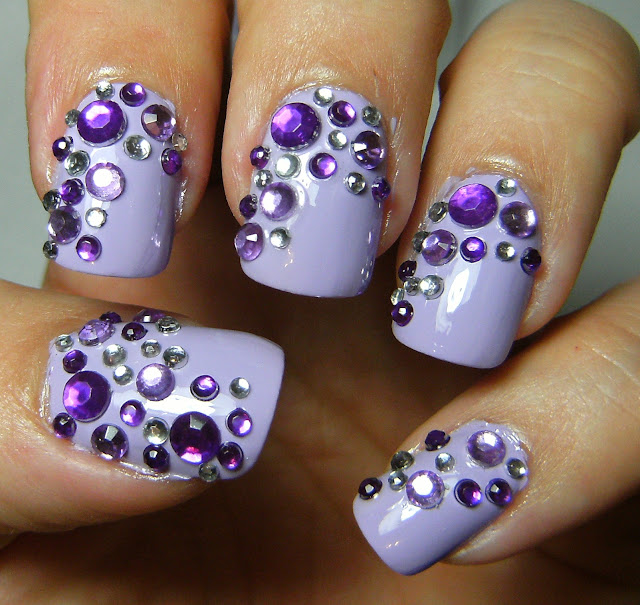


I was reluctant to add top coat over these - they will loose their facets, but also I have to pry them off with something sharp, and the month of July is all about loving your cuticles ( for me, anyway )

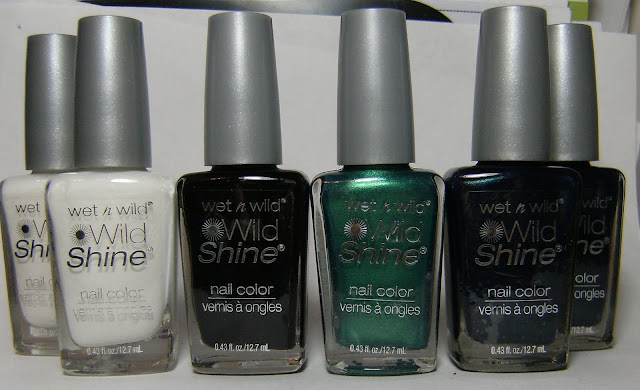
since these are $1 at walmart CANADA, i picked up a few for frankens. I meant to grab Sapphire Blue, but took Blue moon instead..... L-R White, Black, Caribbean frost and Blue Moon. of they are still a buck next time i hit up walmart I will snag some sapphire blue - for frankens.
❤


Friday, September 10, 2010

♥ LA Colors Static Electricity ♥


LA Colors Static Electricity - 3 coats with 1 coat of Nailene TC


WOW This is bright - I found this at the Dollar Tree in the USA, but  I think that you can buy these online somewhere as well. This really is a bright vibrant blue. The first coat was really sheer, but by the third it was opaque. I had to quickly glue my Middle nail back on and there is some gooey flake-ey glue around my cuticle, no time to fix it up!

Further in this post are a quick ELF glitter Skittles.........


Have a Great Weekend!


Flash

Sunshine


...... and some ELF bottle shots and a quick skittles


Twinkle & Golden Goddess


These were really gooey and goop-ey, I figured they would be. But Top Coat smoothed it all out. I do like the Twinkle polish, with the small iridescent glitter. I have 3 or 4 gold holographic hex glitter polish's already, still pretty though. here are some not so fabulous indoor photos.


2 Coats each, No Top Coat

With TC
♥


Friday, March 5, 2010

♥ Do You Like FishSticks? Friday Night concept Mani ♥

Friday Night Concept Nails 'Fish-Sticks'


............ All of those lonely nights, at the groce-errrrrrrr-eeeeeeeeeey store....... OK I'll stop

I used some hexagon glitter i had laying around, I applied little blobs of clear polish, working section by section, and created fish scales..... the bubbelz in the clear polish top coat i used sorta ruin the effect. I almost wish I left it without the thick top coat.

I started with the flattest false nails I had, I used 2 coats of my Franken 'Marri-anna's Trench' a rich deep blue,  then applied the hexagon glitter pieces, just dabbing on some clear polish and placing the hexagon glitter with each one overlapping the other.

When everything was dry, I applied a generous amount of Clear Top Coat, which was a mistake = I should have done several ( like 4-ish ) coats of T.C. to avoid the bubblez. BUT it still looks really cool. Unfortunately all my photos are indoors, but since these are removable becuase I used sticky tabs to adhere them to my nails, I will get some sunshine pic's eventually.


♥


Friday, December 18, 2009

♥ NP Challenge #4 ♥


I am doing a little 'nail polish challenge' just for fun,  to see how many looks I can come up with using only 2 nail polish colors, along with base coat & top coat. I plan on doing some easy nail art, and polish techniques which are simple and require very little 'tools', like french tip guides, mailing labels, sponging etc....


The colors I am using are Billie 'French White' & Wet n' Wild 'Sapphire Blue', along with a clear nail polish & Nailene Acrylic Strong Top Coat.
♥


I think for dots, like on my ring finger you really do need a dotting tool. While I  haven't had a desire to have dots on my nails, I thought I should give it a try. My thumb has soooo many bubbles! The polish was drying too fast while I was working with it, and so I had to keep adding clear nail polish to keep the polish's blend able. I did manage to create a milky smoke look on my ring finger, it's still a little to opaque, but it does look like wafting smoke.

I am not as happy with this nail art- I usually have a hard time with nail art on my dominant hand. But, practice makes perfect. These are concept nails, so I did not put alot of love into cleaning up, excess polish around my cuticles etc.
♥


 THUMB

 - This was supposed to be a 'day-to-night' look, but I started off with 2 coats of Billie 'French White' instead of applying two thick coats of polish to each side of my nail. That's why I think it turned out so.... so..... bubbly. Next time I will not use a base color, as I am pretty sure that is why this turned out like this.


♥


RING 
- 2 coats of  'Sapphire Blue', let dry
- apply a thick coat of clear polish , then immediately add dots to nail, followed my another dot to the inside
- using a slow drying clear polish would probably be best for this. Plus my dots are too big.
 
♥


 MIDDLE
- 2 coats of White Polish - let dry
- apply a cat fo clear polish
- Immediately apply random dots of blue polish and swirl with a toothpick

- I didn't want the colors to blend too much, so I made sure to not do too much mixing of the colors. This dried way, way too fast- so there are a few areas which were not swirled as much as they could be.


♥


 RING
- 2 coats of Blue
- A thick coat of clear polish
- apply small dots of white polish randomly over nail
- immediately swirl with a non-sharp object to avoid picking up too much of the 1st layer of color.

I ended up using an old brush to 'smoosh' the white & clear polish over the blue base. There is a few areas that I should have gone over and fixed up. I wanted to have a better fade of the white towards the tip of my nail - but this is only my first try - so I have some practicing to do. I am very happy with this and will likely try this again with other colors ( flames & more smoke like colors).


PINKY
- White polish swiped across tip of nail on the diagonal
- blue polish to fill in remaining area on the nail bed nail be
- Using a tooth pick, I dragged and pulled the colors into each other

Again, the polish dried too fast, and so I had a lot of 'polish strings' and gloppy-ness.... It's so wrong for me to write "My polish dried too fast". But in this instance, for these types of nail art, I will try to use slower drying polish. I had hoped that the diagonal would be more evident, too.


 ~ Okay; there not that bad ~


♥

Wednesday, December 16, 2009

♥ NP Challenge #3 ♥


I am doing a little 'nail polish challenge' to see how many looks I can come up with using only 2 nail polish colors, along with base coat & top coat. I plan on doing some easy nail art, and polish techniques which are simple and require very little 'tools, like french tip guides, mailing labels, sponging etc.... Just for fun....
The colors I am using are Billie 'French White' & Wet n' Wild 'Sapphire Blue', along with a clear nail polish & Nailene Acrylic Strong Top Coat.
♥


Most of these ideas came form MayParis youtube & Blog page. She has tonnes of great videos and she explains things thoroughly. I still need alot of practice - but these turned out better than I imagined they would. I saw these nail art videos months ago, but never got into the spirit of trying to replicate them. MayParis has done an amazing job on all her videos as well as her blog.


My biggest problem with all five of these designs, is that my polish dried way, way to fast! Before I added the color I added a thick coat of clear Sally Hansen polish's - thinking that it would delay the polish from drying too fast and make the polish a little more workable..... There is still some 'lumpy' areas on my nails, but these are concept nails and so I will be taking this off shortly.

So in the future I will do these things for sure;

- use slower drying polish ( the Billie polish I used is a bargain polish that dries super fast)
- use less polish for the 'smoke' effect and more clear polish
- Maybe apply a good thick top coat, and letting it dry before trying any of these 'toothpick swirl effects'

Smoke look I was trying to copy...swiped this photo from the website Worth 1000....


I have written how created these designs above the photos of the individual nails below. These were all super easy, and I will likely do these again in the future sometime. All my photos are indoors with fluroescent lighting. I have changed my backdrop to white, I think it makes my hands look less like the undead, and brightens up the polish as well as the bottles.


THUMB - Swirly Smoke effect French Tip
INDEX - Swirly Smoke effect French Tip
MIDDLE -  Full Nail Marble ----- Tutorial HERE
RING - Day To Night Mani  -----  Tutorial HERE
PINKY -  Vintage French ---------Tutorial HERE  =   Blog post HERE


I am looking forward to perfecting this 'smoke' technique, I think this will look really cool with a Grey polish, and then a sheer milky white for the 'smoke' effect. I think that a 'flames' look, with orange, yellow, and red will also look really cool and is on my list to try ( like 1 million other things ).


THUMB

- 2 coats of Billie French White
- 1 thick coat of Clear Nail Polish
-  apply 4 medium sized dots of blue polish and gently swirl with a toothpick, picking up just a little of the white, but being careful not to scratch up the white polish underneath too much.

I had hoped to have a more sheer blue, but this Wn'W polish ' Blue Sapphire' is very pigmented, so next time I try this, I will use alot more clear polish and just a few very, very small dots of the blue. I think this is a nice twist on the traditional french mani - but i need to figure out how to do this with less polish to prevent bubbles..
 
♥


INDEX -

- 2 coats of Wet n' Wild Sapphire Blue ( let dry )
- apply clear polish 3/4 of nail, starting from tip
- apply a few dots of white polish to 'french tip area, and gently swirl white polish with a toothpick.
- I used too much white as I was hoping to have a more sheer 'smoke-like' effect, but it's still pretty♥
 
♥


 MIDDLE

- Apply a clear polish to entire nail immediately followed by dots of color polish
- Swirl polish's around and into each other with  a toothpick.
- Let dry and apply Top Coat


 ~ Wow ~
 
♥

 Day to Night Mani

- Apply 1 thick coat  of different colors polish to each side of nail
- Immediately drag a toothpick horizontally in both directions across nail
- Apply Top Coat


♥


PINKY -

- Apply a thick coat of polish to 3/4 of nail, immediately followed by a thick coat of polish in contrasting color to nail tip area, 'sorta' overlapping the colors
- Using a toothpick, immediately swirl the polish's together, I did a circular swirl and some dragging to get the colors to blend.
 
♥


Tuesday, December 15, 2009

♥ NP Challenge #2 ♥


I am doing a little 'nail polish challenge' to see how many looks I can come up with using only 2 nail polish colors, along with base coat & top coat. I plan on doing some easy nail art, and polish techniques which are simple and require very little 'tools, like french tip guides, mailing labels, sponging etc.... Just for fun....

The colors I am using are Billie 'French White' & Wet n' Wild 'Sapphire Blue', along with a clear nail polish & Nailene Acrylic Strong Top Coat.

♥


Nail polish Challenge #2 entry..... My Right hand, which I am NOT GOOD at photographing... I cannot seem to keep my left hand still while holding the camera.  I have used sponging, and some zig-zag scissors, as well as a gentle 'S' curve for my thumb.

 I used a big blob of Top Coat over the areas where I applied the Wn'W 'Sapphire Blue'. This helped alot in preventing the polish's from smearing, as well as to prevent picking up color with the brush of my Top Coat. I overdid it on my ring finger, as there is a very noticeable ridge where the zig-zag design is.


I was patient this time and did let all the polish dry thoroughly, though I still messed up my pinky and middle finger somehow. Oh Well! These are concept nails, I am trying to not go out in public with these.....at the moment I am on my 5th one, and I still have a hard time with all my nails having very different patters/designs. The skittles mani - with different colors do not bother me as much.


For all my nails, I started with a base of 2 coats of Billie 'French White', then did the designs.

THUMB -  Gentle 'S' curve - 2 coats each polish
INDEX - Sponge @ the tip of my nail
MIDDLE - Sponge @ the base of my nail
RING -Vertical Zig-Zag - 2 coats of Wn'W Sapphire Blue
PINKY - Zig-Zag across the diagonal of my nail - 2 coats of Wn'W Sapphire Blue


I was sure to apply clear scotch tape around my nail for the sponging...=  less clean up! As well as using Avon Moisture Therapy hand cream to my cuticles and surrounding areas. All my photos are indoors under fluroescent Lighting


~ Pinky & Ring ~

 ~ Index ~

~ Thumb ~


 ~ Apply pattern stickers & taped up cuticle area for sponging ~


 ~ after 2 coats of Sapphire Blue ~


 ~ With Top Coat ~

♥


Sunday, December 13, 2009

♥ Nail Polish Challenge ♥


1 = BASE   2 coats of Billie 'French White' - a stark white creme
2 = Apply Nailene Perfect Tips & Toes Guides
3 = 2 coats of Wet n' Wild 'Sapphire Blue' 2 coats -  a shimmery deep Sapphire blue ( my top 5 )
4 = Let polish DRY before removing stickers ( 5 - 10 )
5 = Using a fine buffer, gently buff any raised areas, fix-up any mistakes or sparse areas & buff
6 = WAIT!!!!!!!!!!!!!!!
7 = Apply top coat, Nailene Acrylic Strong Top Coat

NOTE: I totally could have used another coat of T.C., but these are CONCEPT NAILS.... I am redoing these ASAP

I totally did not wait for my polish to dry after doing a few touch ups..... and I got some polish bleeding when I applied top coat.... These are concept nails, and so I do not plan to wear this many different patterns in public anyways, but Dang! I do like to do different things on each nail, but I do not think I could stand having all my nails such different random patterns for much longer than this.  My favirote is the curved swirl on my RING finger, for that I used Nailene Perfect Tips & Toes Guides... the toe guide, I actually like this curve much more then the regular curved french tip guides available. It ends up being a much deeper curve than the regular French Tip Guides available.


 ~ Deez-Nailz Polish Challenge = just for funz ~

One of my MINI goals for my Christmas time vacation is to do as many different looks with only 2 colors of polish.... just for fun = a polish challenge. I have already come up with 30 +plus different looks that I can do with just 2 colors of polish, with French tip guides, sponging, marbling, swirling, using craft scissors but only using 2 different colors of polish, as well as Top Coat & Base Coat and Clear.


 No glitter, or other embellishments, and using things that are readily available, around the house objects...... like a sponge ( for sponging ) supplies for marbling, craft scissors and nail tip guides..... For some simple easy nail art. The colors I picked are Billie 'French White' & Wet n' Wild 'Sapphire Blue'. So far I think that these colors were a good choice.

Because I will be sewing alot of my vacation, of course cooking, baking, and cleaning, I have cut my trophy wife nails down on my right hand -  This looks really funny, but it's practical for right now. I will definitely be posting my nail polish challenge looks on my right hand.... I really want to practice and perfect my dominant hand nail art.... practice makes perfect.

Anyhoo- here is the first 5 looks I have come up wit, all using Nailene Perfect Tips & Toes ( #66358 ), and Billie French White & Wn'W 'Sapphire Blue'. This is simple, easy, and not as messy as my other looks coming up ( ♥ ). Just apply the strips or curved french tip guides, and paint! As long as you nails are clean, dry and free of any moisturizer, these will work just fine. One thing that I often do not follow myself, is waiting for my polish to dry thoroughly, and so I often end up with the subtle bleeding of the polish with nail art like this (bad girl).

  Because there is a  severe frostbite warning over most of Canada { -40 C }, I will definitely not be posting any sunshine pics for a few more days..... so all my photos are indoors under fluorescent lighting


~ Nailene Perfect Tips & Toes Guides, Billie 'French White' & Wn'W 'Sapphire Blue' ~


~ Billie 'French White' & Wn'W 'Sapphire Blue' ~
 

 ~ Nailene Perfect Tips & Toes Guides~


~ My seldom seen RIGHT hand ( I cut my nails down for some crafty things I have to do )~


~ 2 coats of Billie 'French White' ~


~ Apply Nailene Perfect Tips and Toes Guides ~

~ Apply 2 coats of Wn'W Sapphire Blue' polish....  let dry~


~ Remove guides, buff any raised areas & fill in sparse areas if needed -~
 ~ Apply 2 coats of Top Coat. Sometimes i am able to maneuver my polish brush so that the actual brush bristles do not touch my nail like in this instance where there is a chance of the polish's bleeding, I managed to do a good job with this technique on my RING finger.... But I am used to just applying my Top Coat without having to worry about issues like this..... practice, practice, practice


~ THUMB ~


 ~ INDEX ~


 ~ MIDDLE  - It's true that horizontal stipes visually widen objects ~
 

 ~ RING ~ MY FAV ~
 

 ~ OINKY ~