I AM NO NAIL ARTIST!!!!!!!!
i wasn't serious with these designs,
although I am pretty sure I can whip up some pretty designs with this little dotting tool
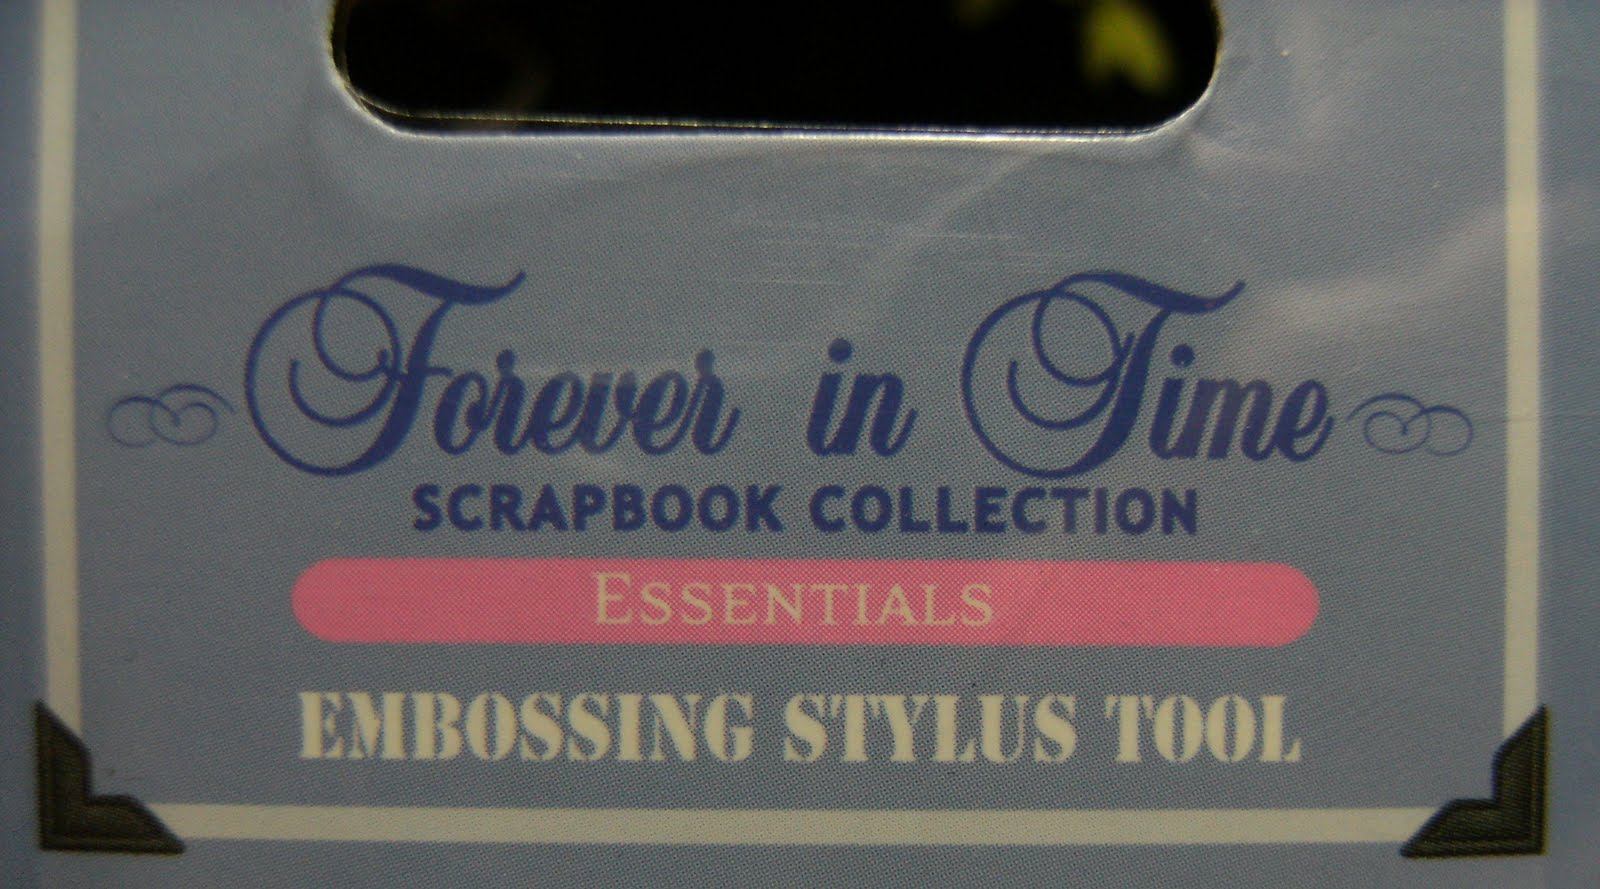
Thats why I stick to easy to do nail art, and try to embellish my nails with forgiving nail art.... like glitter, or my diagonal mani's using Nailene French Tip Guides and easy to use nail stickers etc..... but I really wanted to learn how to make polka dots or just dots across my nails.... those little dots can go a long way in nail designs.... Anyhoo- I picked up this scrap-booking tool at the .99 cent store in my town {the same store I buy alot of goodies at} and I actually had this in my craft room for like 7 months before I picked it up and tried to use it for my nails.
I tried this with a toothpick and other objects and it is not the same.....you really do need a dotting tool to make perfect pretty circles. I used a foil polish here but I would recommend using a polish that dries a bit slower and is alot more viscous ( runny) than a foil♥
Just after X-mas I had written how while visiting Sally's Beauty Supply, they had no dotting tools, or they were sold out or something to that effect, when all the while I had this sitting in my craft room! This worked out perfectly and I really do no think it will take me long to perfect my technique.
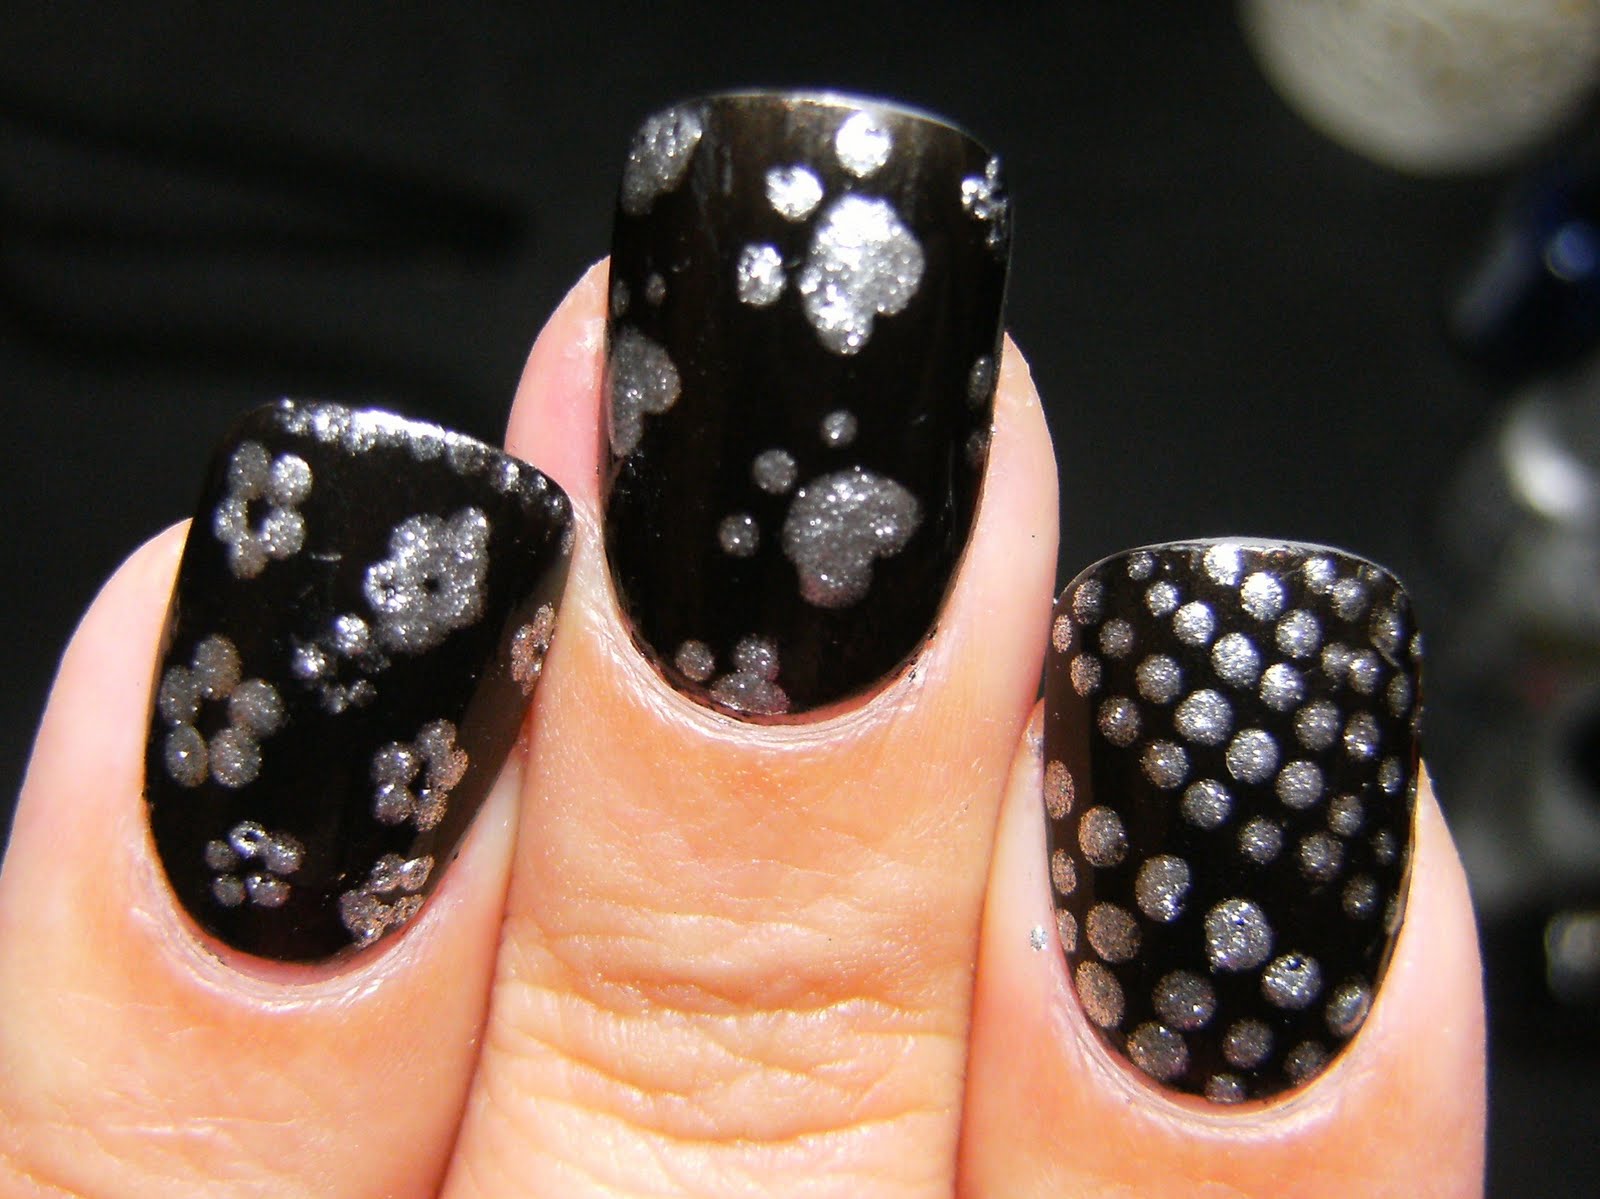
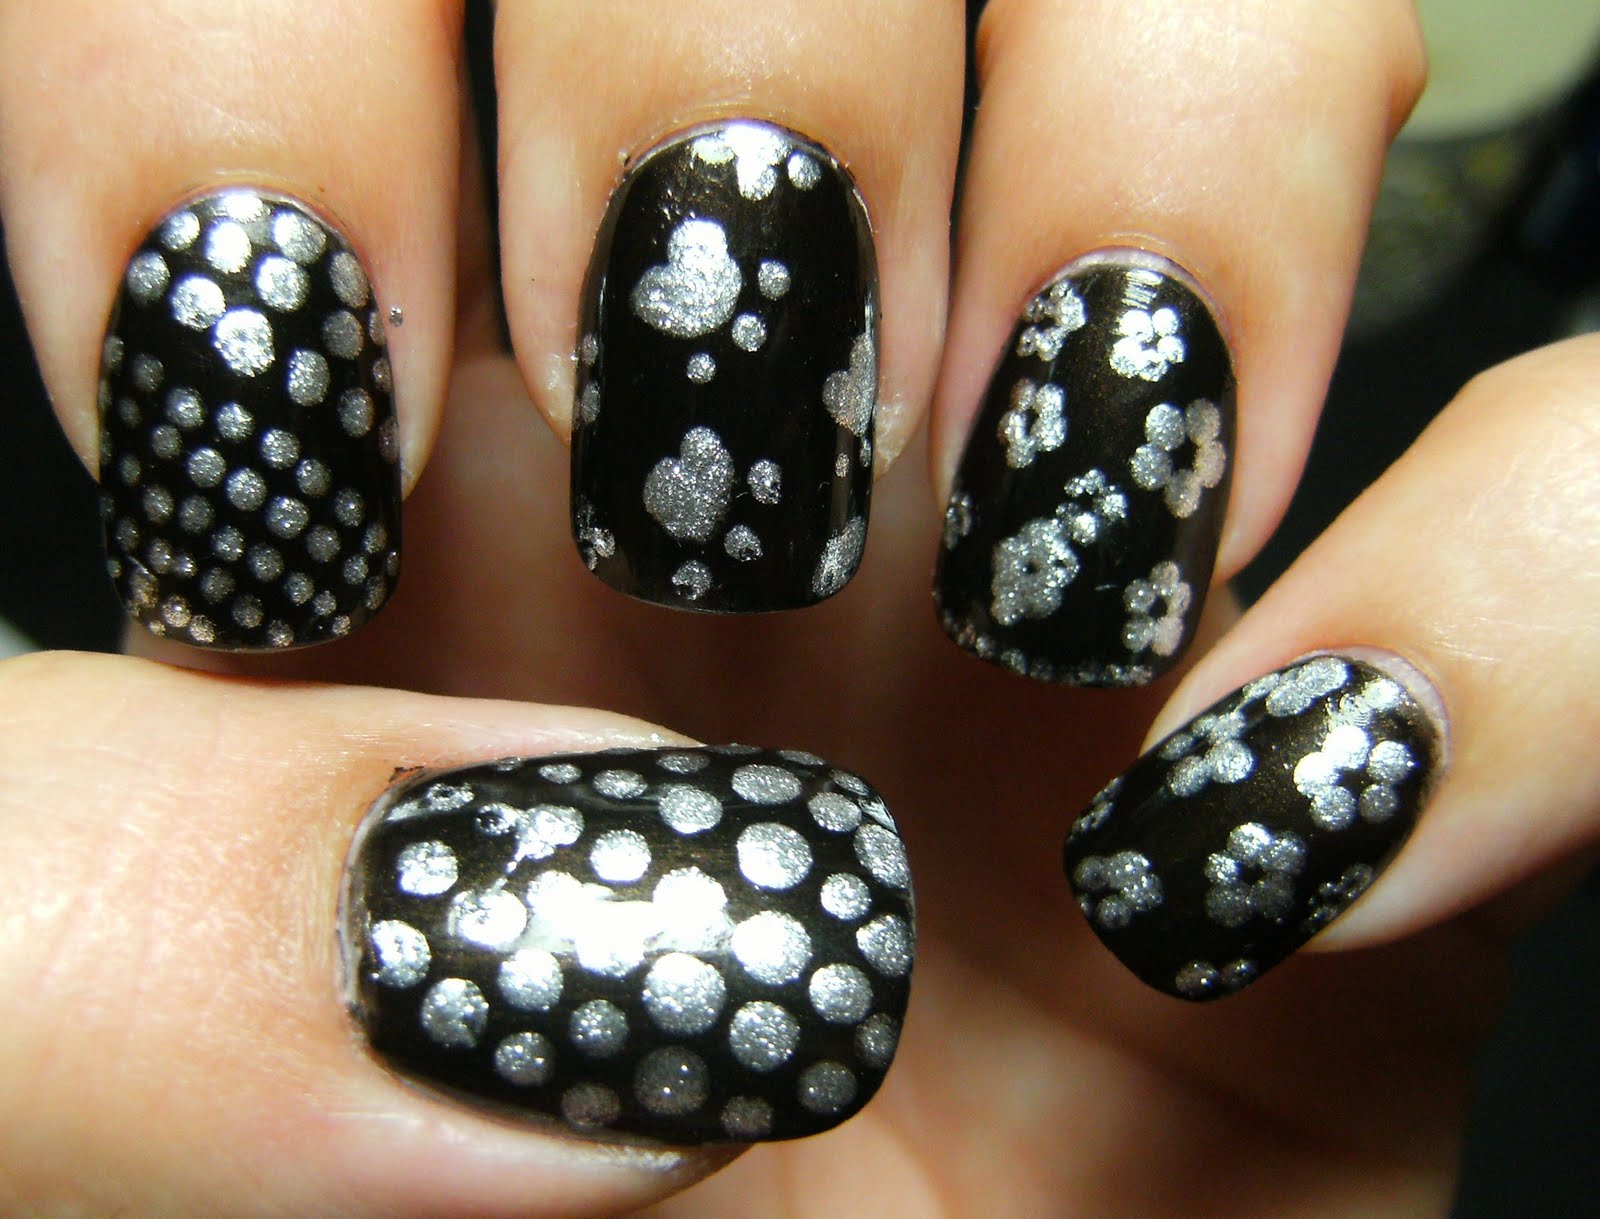
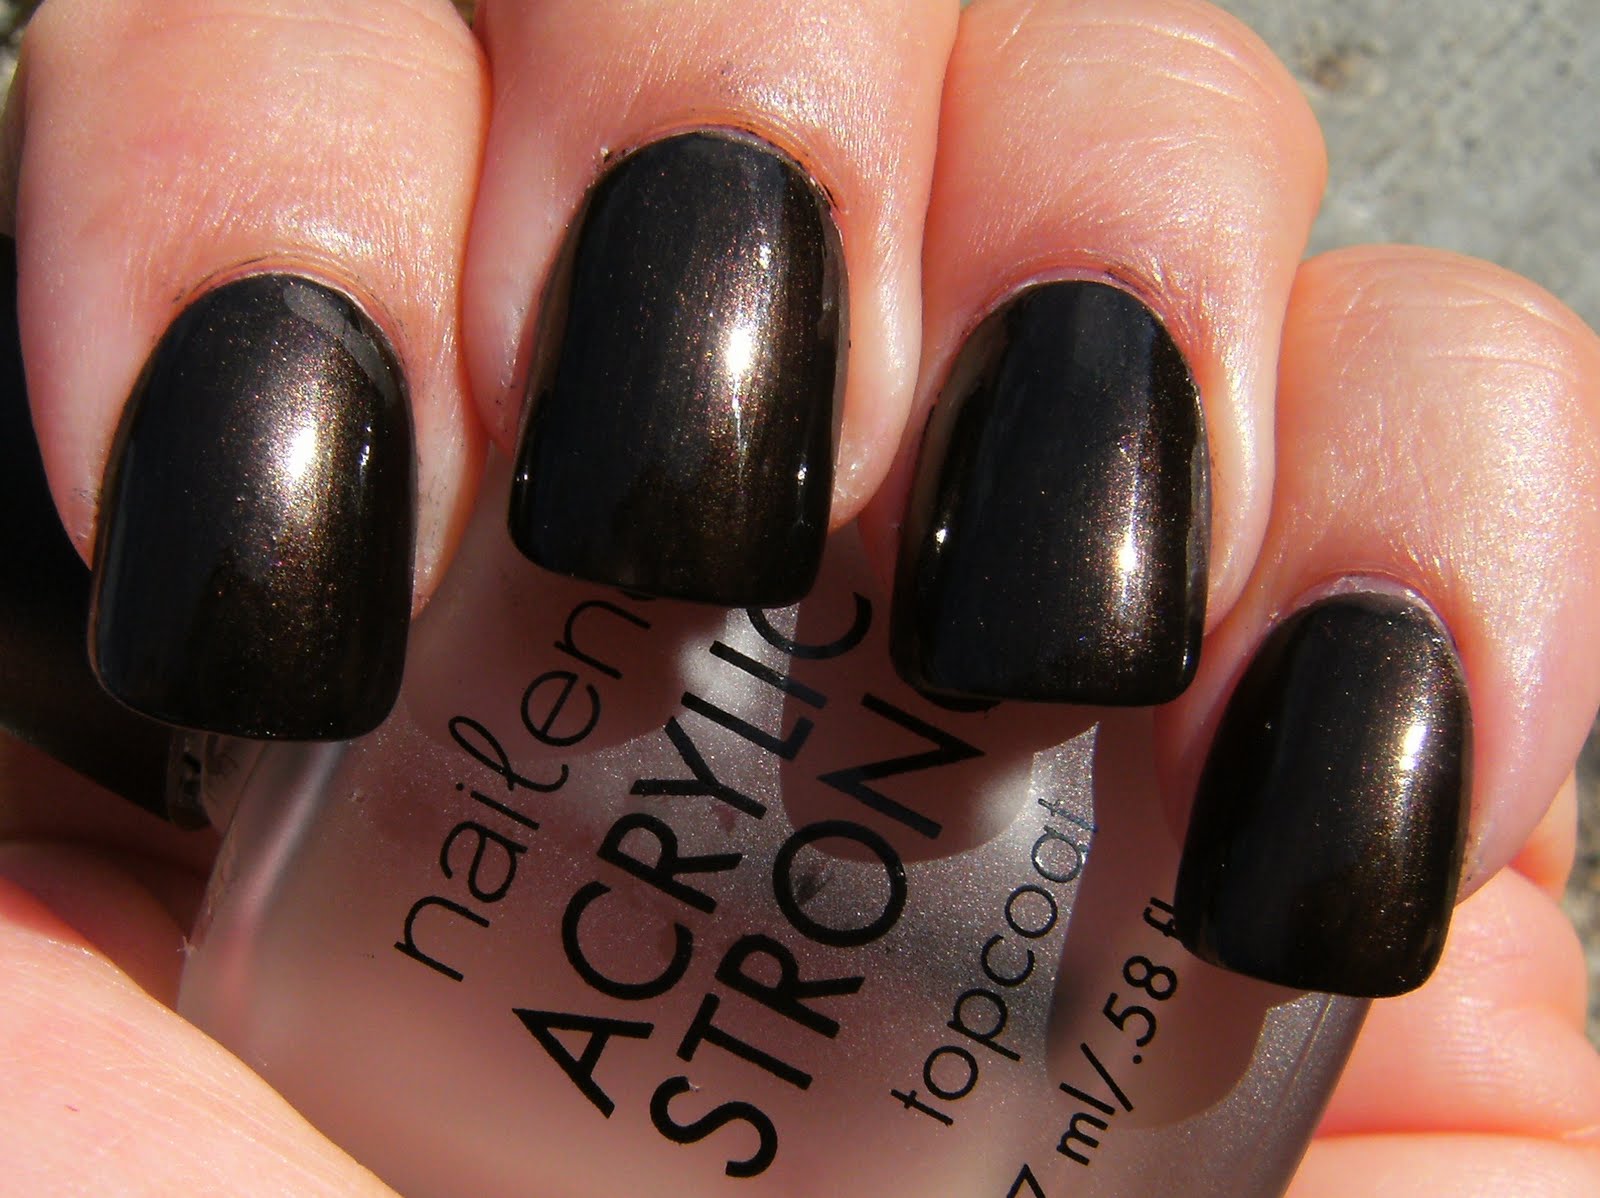
I am hoping that Konad or the Bundle Master people will come out with larger images for their plates, then I will likely start amassing a image plate collection. In the meantime I am happy with my nails stickers and using french nail tip guides to create pretty simple nail art, with this dotting tool I should be able to create some pretty designs . Above I made paw prints ( not great ones, but they do look like paw prints) and just random dots. The base polish is Sally Hansen 'Tuscan Pride' a gorgeous rich shimmery brown. I actually have a dupe for it in my collection already Sally Hansen 'Ominous' from the 2009 L.E. Halloween Collection.
I am very very entrenched in making jewelery right now. I have amassed quite an assortment of jewelery supplies, beads and other things, it is taking alot of time away from blogging and reading blogs - but I have written alot of information for Marianna who wrote in my comments section about the removal fo false nails and dealing with the glue aftermath♥
Anyhoo- here are a few photos of what I am up to, I hope to finish up all my little jewelery preojects by August 1st, 2010
. Though it looks like I spend a tonnes of $$$$ on chain and beads and such, I actually got alot of these thinsg super-duper cheap. Micheal's craft store is a funny store, they have clasps and bads and such for like $9.00, then they are on clearance for $1.50 like 2 months later- I friggen hate it when stores do that.
earrings I have made lately

My workshop

My workshop

Marianna; please keep reading for my info on false nail removal - I am working on a post right now with photos & more info♥♥♥
Here is a close-up of the dotting tool I bought at the $ store there is 2 sizes

another close up

dots paw-prints and flowers, really really easy to do

So, here is Sally Hansen NO CHIP 10 Day polish in Tuscan Pride. This is a deep shimmery brown. On my RING nail is Sally Hansen Ominous form the 2009 L.E. Halloween collection.
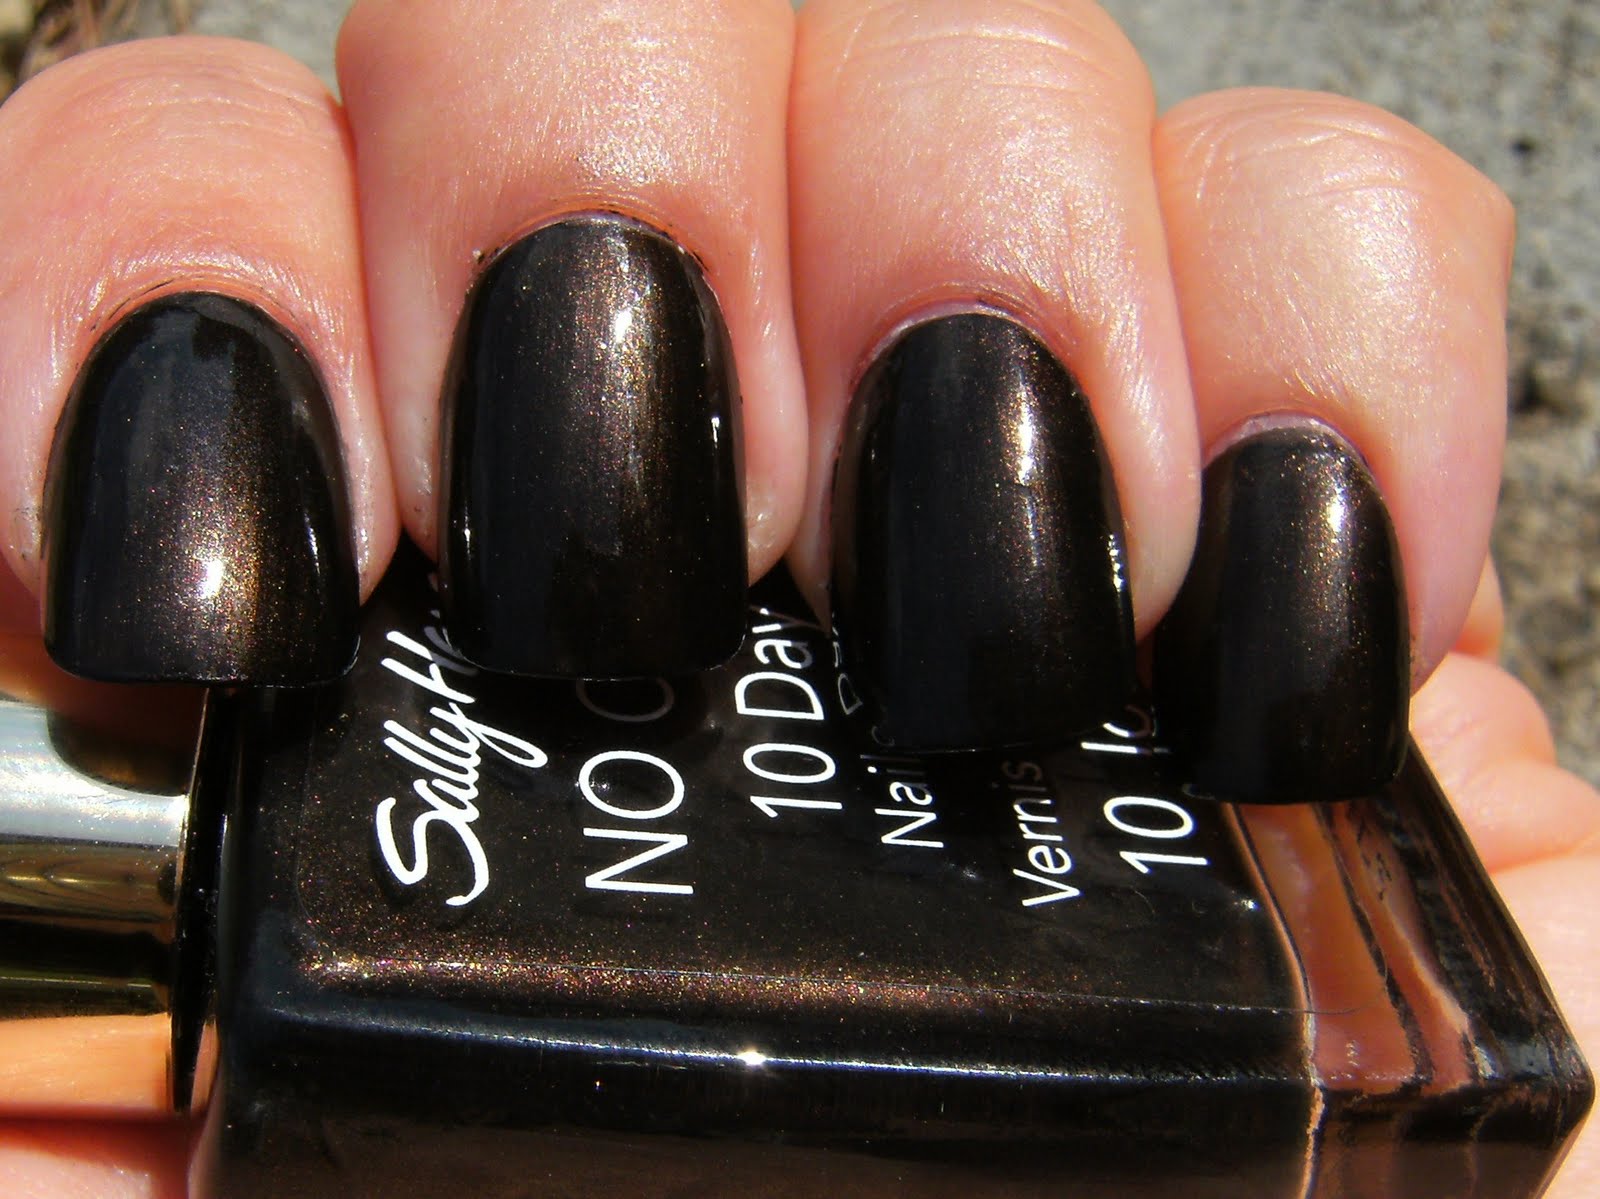
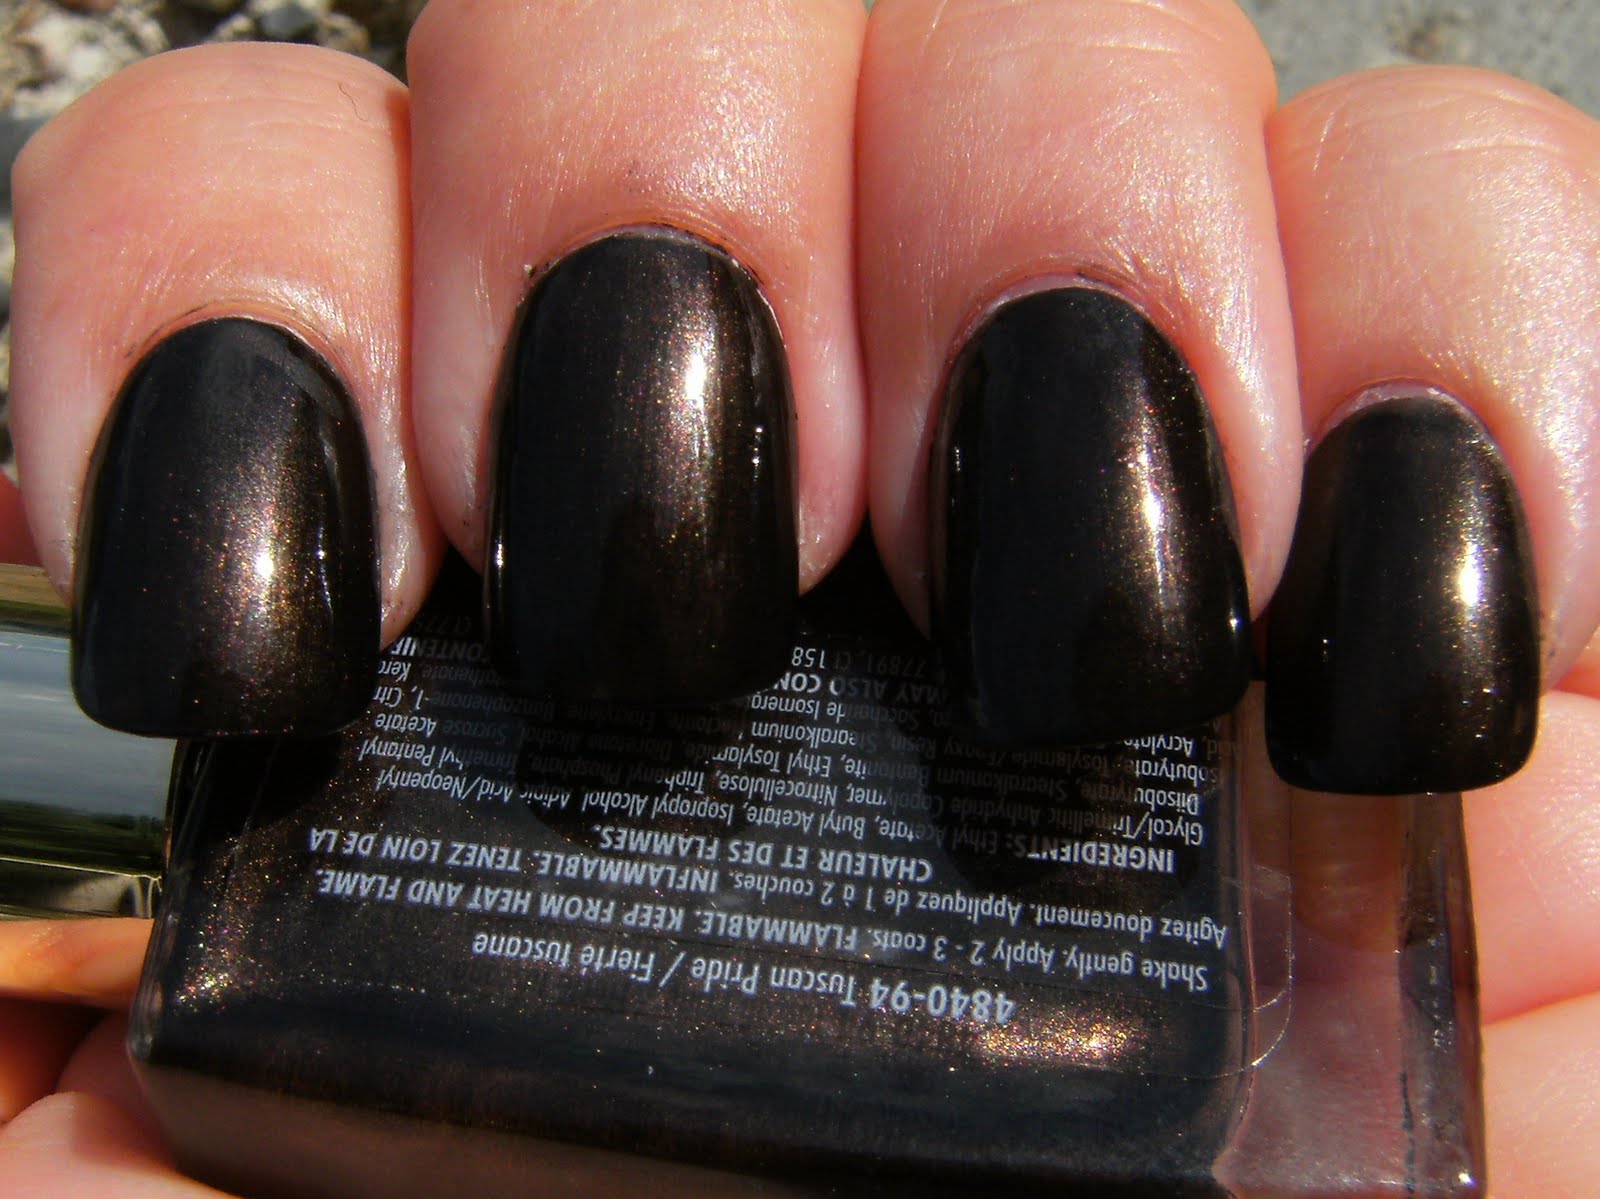
with Ominous from the Halloween 2009 L.E. collection on my RING nail

Shade with Flash

Shade

False Nail Removal
This is in response to Marianna who asked about glue removal, and glue residue form the removal of false nails.
Usually when I remove my nails, it is after I have been wearing them for 5 to 10-ish days... it varies depending on my activities and what type of crafty things I am doing during that time......
I generally soak my nails in warm water to remove them.... but before this I apply a good barrier cream, Vaseline or even just hand lotion to my cuticles and fingertips, I put some warm water in a small dish and soak my fingertips in it...
Your natural nails absorb water, thats why when you have a nice long shower or bath, your nail polish peels or chips very soon after ( if your wearing it on your natural nails ) = = becuase your natural nails absorb water and it swells the surface of your nail.
So; basically I will sit here in front of my computer with one hands fingertips in a bowl of warm water..... this causes my natural nails to absorb water and thus loosening the glue adhesion . I will Gently and slowly pry the false nail away from my natural nail..... taking my time to loosen it from my natural nail..... so I dip.... wait.... pry.... dip.... wait.... pry....
I am never in a rush during this process. ==== I DO NOT rip the nail off.... I do this accidentally at least once every 3 weeks and it does not feel good==== I really just take my time and try to slowly loosen the false nail from the glue as well as the glue from my natural nails.
This process can take anywhere from 3 seconds to 15 minutes.... I hope you have seen my post about the THINNESS of my nails, and despite being false nail user for many, many years none of my nails have turned black and fallen off! I am surprised that even though my nails are thin and I am certain to have lost small patches of layers of my natural nail that I still have nails..... So I am not sure what the fuss is about when people say false nails from the drugstore are bad or damaging to your natural nails.
3 years ago I ripped off a gel nail that I had done at the salon..... I was closing a filing cabinet and I am not exactly sure what happened but my right hands Ring, Middle and Index fingers bent back my fingers last digits and my Index finger nail ripped of half way down my nail bed. = THAT was hurting for days, and days. It ripped off in graduated layers and I could see the many layers of my nails on my finger and the remnant of the gel nails. = DANG that hurt!
You can do the acetone removal method - where you cut the false nails down as short as possible then soak your nails in a small glass bowl of acetone. I have done this and it works but I prefer soaking my nails in water.
There have been several occasions where after wearing false nails for a few days I have used a small angled brush to 'drip' acetone in between my natural nail and the false nail... this loosens the glue and helps with a quick removal. This method works well, I have done this recently when I had some crafty around the house projects to do and I needed my fingertips♥
Anytime you remove false nails, either deliberately or on purpose you will likely remove a layer or two in small patches of your natural nail, in small areas either by them popping off accidentally or by prying them off purposely. I know I have - quite a few times. But still my nails are healthy with no weird extreme lumps and bumps.
Finally, when all my false nails are off, I make sure my nails are completely dry. I wait 10 to 20 minutes for the water to evaporate from my natural nails, this way, any glue left over from soaking may
It's a good idea to wait 10 minutes after washing your hands to paint your nails as well. I often read of people having issues with their polish peeling to chipping. If is peeling off in a layer, and the size of the peel is substantial - it is becuase your natural nail has absorbed water or moisturizer, the polish cannot adhere to the surface of the nail.
When you apply a top coat to your polish it is a good idea to apply polish to the very edge of your nail, as well as the UNDERSIDE of your nail - this will prevent any water/ moisturizer, or whatever else from being absorbed my your natural nails. THIS is what often causes peeling or chipping of your manicure.
This does not take long and I am ready to apply another set of false nails. I have been doing things this way for literally YEARS with no problems. I have used many different brands of false nails and glue. If my nails pop off or fall off they usually POP off due to some crafty project or shopping..... moving hangers around on the rack usually does it..... I inspect them immediately for any possible reason they may have popped off.
It is all practice. I WISH I could make awesome videos like some of the other nail polish vloggers and blogger's becuase it would be way, waaaaaaaay easier for my to -show- how I do it rather than explain it in writing. That is something I am working on and hope to perfect,,,,,, soon
Anyhoo - I hope this helps a little; I know there are a few videos on YOUTUBE about applying drugstore false nails but there really is not much in the way of removal of false nails. I will do up a blog post about removal and false nail issues in the near future.
♥
8 comments:
Oh, a dotting tools with different ends! Thats genius, I hate how my dotting tool is so small. I got it from Sallys and thats the only one they had. I like your designs!
Your nail art is so cute!!
I think the paw prints turned our great! I knew what they were right away.
Love the polka dots!
Do you have any suggestions for taking nail polish off of fake nails? I use non-acetone remover but it still sometimes removes part of the french white tip on the fake nails! :-/
cute dotted nails! you did a great job
Not a nail artist, pish posh! Those look adorable!
http://thegirl-with-thenails.blogspot.com
OMG OMG ,you're such a sweetie :D
Thx a lot , it really helped (:
thanks :D
Haha, I couldn't tell what the paw prints were at first until you said.
Post a Comment