Pages

Showing posts with label Polish Finish = Neon. Show all posts

Sunday, April 6, 2014

Neon circle nail art with Kozmic Colours


 This circle nail art has been on my mind since I first saw a photo of it on a blog a loooooooong time ago. I have tried to do this circle nail art by dipping a straw in nail polish then trying to apply it to my nails; but it never worked out. Instead of trying it the same way again I created this look by making my own nail art stickers!


Does anyone know whose nails these are? I have done all sorts of googling and nothing comes up. So if anyone recalls whose hand this is please leave a comment so I can link back to the blog post ~ TIA!


Anyhoo-this photo is a few years old so my memory is fuzzy - but they said they dipped a straw in NP to achieve this look.  I have tried it three times and it always looked terrible - especially on my non-hand-model-hand ~ but I love how this looks so I kept trying.


To do it the D.I.Y. nail sticker way; I applied a coat of clear polish on a zip-lock bag ( any kind of clear storage bag should work --- but I recommend a thicker zip lock freezer bag). When the clear base dried, I dipped plastic drinking straws into different coloured polish's and randomly added these multi-coloured circles.  When the coloured polish circles were dry I applied another thick coat of clear polish over them.

I waited overnight to try and apply these DIY nail stickers to my nails. The base polish is 2 coats of Wet n Wild White --- I cut the nail stickers to fit then gently affixed the DIY nail stickers to my nails. I applied a thick coat of Pro-FX Top Coat. I ended up with some bubbles and weird grey marks on my nails but I am still very happy with how this turned out.

This took way, waaaaaaaaaaaaaay longer then just dipping a straw in polish and applying directly to my nails, but whenever I have tried it that way, it never looks good. So even though this is time consuming and needs perfecting, I like it way better than the alternative.
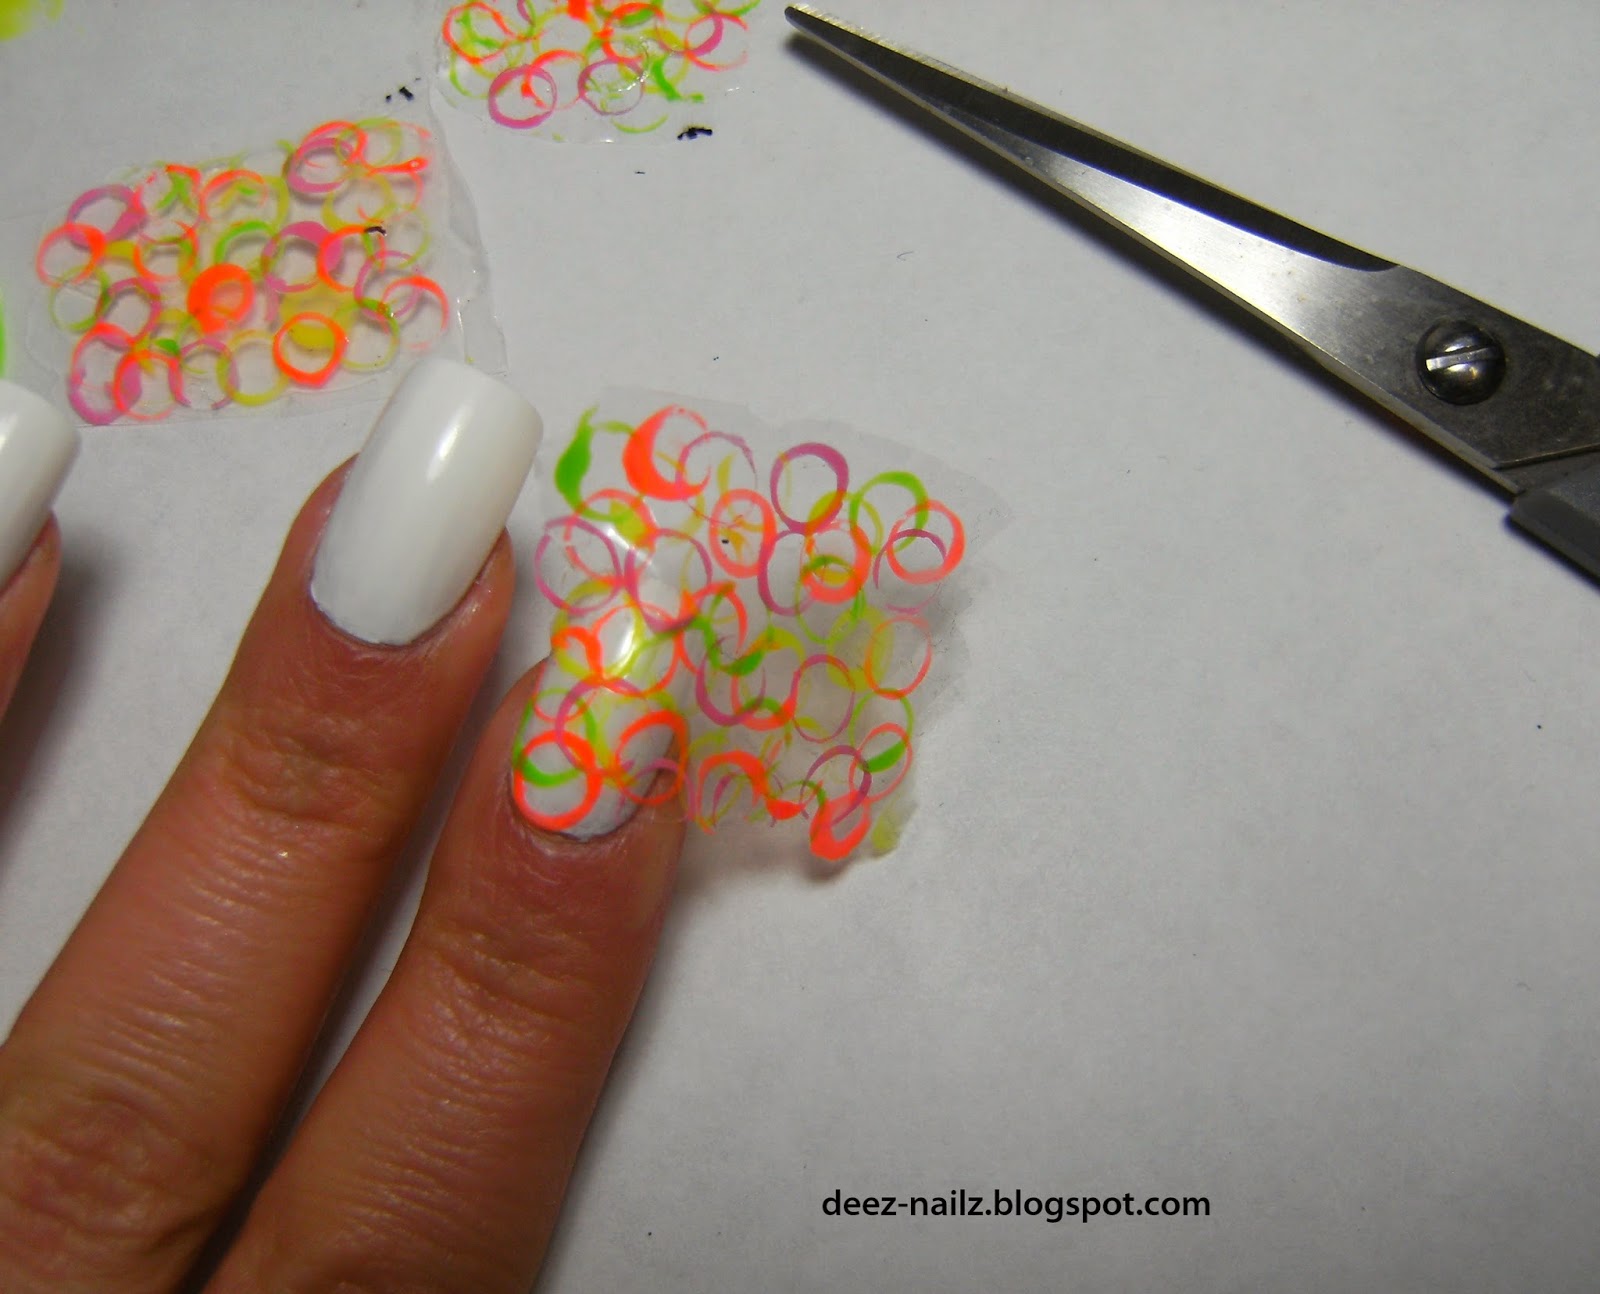


the orange neon polish is throwing my camera off 

 I thought this would be enough for all 10 nails, but it wasn't! These are long trophy wife nails....

stuff I used


 ........not bad for my first try, a couple of things I will do different is make sure I don't cut the sheet too small, like on my thumb nail, and sit still, I banged my nails up trying to do the nails my other hand. I have no idea where or what those dark marks on my middle nail are. I think this is a neat look and I will be trying it again but with a different colour scheme.
o

Monday, July 2, 2012

Summer dots


This was my mani before the Sally Hansen Mint Sprint staining fiasco yesterday. I started with a base of Billie French White, then dotted on 4 different bright flourescent polish's with a dotting tool and slapped on a coat of TC ( when my dots were sorta dry ).

I visited the big city this weekend ( Weinerpeg Manitoba ) and spotted these at the Dollar Tree on St James ( next door to Hooters, lol ). These are super duper bright polish's - they dry fast but these specific ones are on the sheer side, so your looking at 3 or more coats to get to the bottle shade...... but for $1.25 CAD I AM NOT COMPLAINING.


stuff I used, Billie Cosmetics Elesctric yellow, Electric Pink, White, Electric Coral and Electric Blue


o


Monday, October 26, 2009

♥ Toxic Waste Mani ♥


 ~ Toxic Waste Mani ~


Base = Billie 'French White'
Toxic waste base color = Billie 'Green Meadows'
Black Background = Sally Hansen 'Raven'


So; I did not end up adding glitter to this mani, yet. ~ I did this the exact same way as the other 'dripping' mani's below.  I started with a base of pure white, added two coats or this ridiculous bright green for the base color, and then affixed 'dripping' stickers to my nails, and then painted on two thick coats of Sally Hansen - 'Raven' I was heavy handed with the black polish , and you can see how my 'drips' are not uniform. I also took off the 'sticker's a little too soon. I buffed out any raised areas and then sealed it up with China Glaze Fast Forward.


When I did this mani, before I put the stickers on and added the black, I walked into a dark room and I could totally see the light reflecting off this Billie polish 'Green Meadows' (link ).....  This green layered over stark white its friggen bright! This has given me countless ideas for future nail art... simple nail art.


~ Fluorescent Lighting ~

 ~ Flash ~

~ Flash ~

~ Flash ~

~ Fluorescent Lighting ~

~ Fluorescent Lighting ~

~ Fluorescent Lighting ~

~ Flash ~
 ~ Fluorescent Lighting ~

Thursday, October 22, 2009

♥ Billie 'Electric Purple' & Billie 'Electric Pink'♥


 ~ Billie 'Electric Pink' 3 coats ~&
~ 2 coats of Billie 'Electric Purple' =Diagonal Mani ~
{ & 2 coats of  Billie Brand Shiny T.C }.


This was a mani from summertime; Billie - 'Electric Pink', that I decided to jazz it up by adding Billie Electric Purple.....I love, love , love these intense colors together... and it was a perfect cloudy day to take photos of colors like this. It totally wasn't necessary to post this, but I am experimenting with the new improved features of blogger.... making photos extra-extra large, adding a JUMP feature { and highlighting stuff too♥ } and all the neat things the new blog editor has= ... practice makes perfect, and hopefully I can improve my blog with practice!


All my photos are under gloomy stormy skies,  This was; base-coat, 3 coats of Billie 'Electric Pink', then I chopped up mailing labels and applied in a diagonal across tip of my nail, and applied 2 coats of Billie 'Electric Purple', added 2 coats of Billie Top Coat... Viola = a jazzy diagonal mani.

~ Cloudy Skies -no flash ~


~ Cloudy Skies -no flash ~


~ Cloudy Skies -no flash ~


~ Cloudy Skies -FLASH ~


~ Cloudy Skies -no flash ~


♥ Bille Purple Comparisons ♥


Here is a quick comparison of 3 polish By Billie Cosmetics. These are polish's I pick up at my favorite discount store in town.

( Linked to previous Mani's)
Purple Haze 23-2
Electric Purple 25-5
Purple Rain 23-6

♥

~ Left - Purple Rain ~ Right - Purple Haze ~

3 coats each, in the sun & shade. While all three are very similar they are somewhat different. Noticeably Purple Haze is a matte finish, very sheer and requires almost 5 coats to be opaque, but these dry quite fast so its not a hassle to do 5 coats. Electric Purple has a subtle blurple iridescence, and Purple rain very subtle white/silvery shimmer,

~Clockwise from top - Electric Purple, Purple Rain & Purple Haze ( matte )~


~ Below = Shade ~
~ 3 coats each no top coat ~
~Purple Haze, Electric Purple & Purple Rain~

~ Below = Sun ~
~ 3 coats each no top coat ~
~Purple Haze, Electric Purple & Purple Rain~

Friday, September 4, 2009

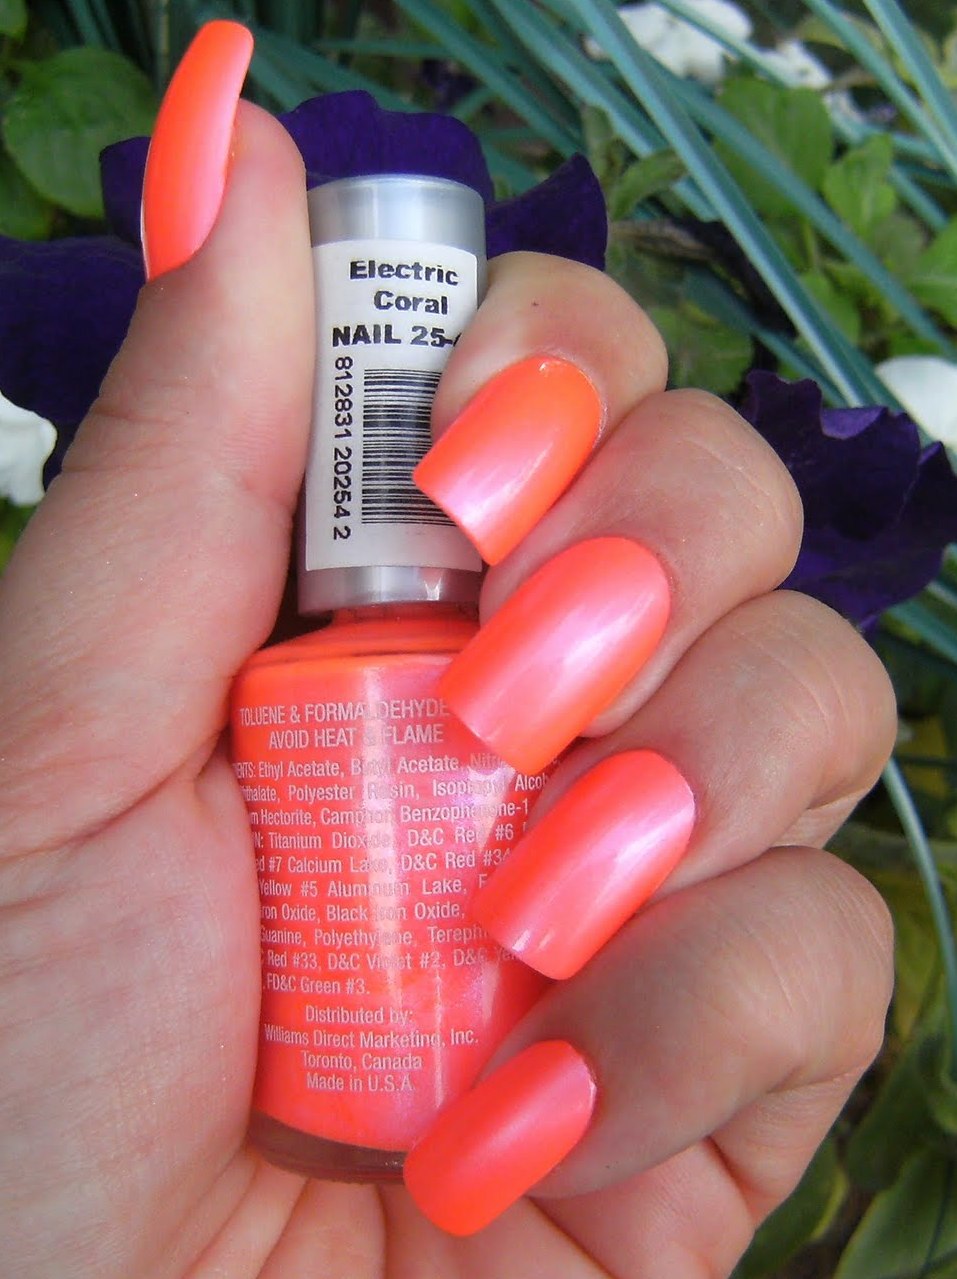
♥ Billie 'Electric Coral' ♥


~ Above - Outdoors - Sun ~


Frigg-Digitty - this was tough one to photograph....The best photos are the three below with my hand raised to the ceiling.... Dang orange is a tough one to capture. Any-hoo, this is Billie Cosmetics Electric Coral, from the Electric Shimmer line.... These "Billie" polish's are available at Dollar Giant in Canada, and a few shops in the U.S.A. HERE is a post I did a while back about where these can be found, and bottle photos of the rest of the Electric Shimmers form Billie Cosmetics. Also when I visit Dollar shops and discount shops, I ask which companies they get their merchandise from so i can look the companies up on the internet and see what sort of products they offer. It is shocking to know that these distributors don't always seek out stores and people to sell / wholesale their products to.


Here is the rest of the photos.... I am embarking on a major posting marathon this evening (woo-hoo Friday Night!!!!) I am a little overwhelmed of the things aI have ready to post and want to post So I am parking my bunz in front of the computer and blogging away!

~ Below - Indoors ~

~ Below - Indoors ~


~ Below - Indoors ~


Monday, August 24, 2009

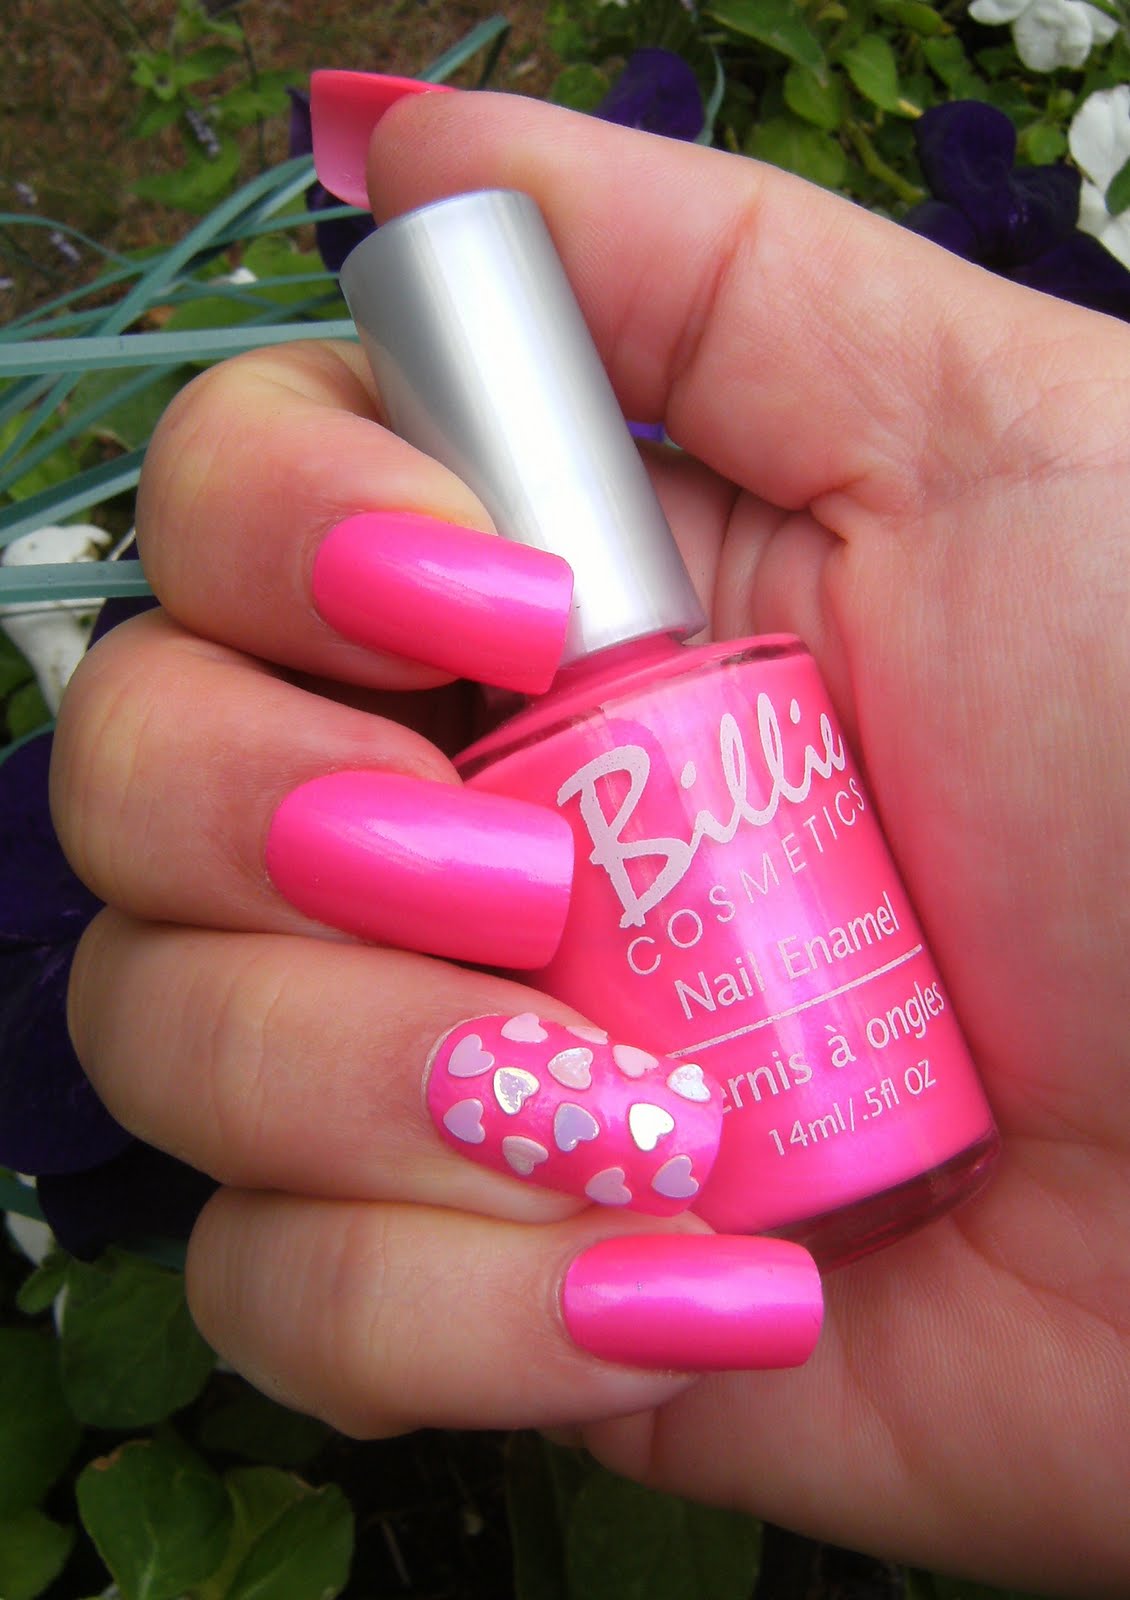
♥Billie - 25-6 'Electric Fuchsia'♥

~ Billie 'Electric Fuchsia' 3 coats & 2 coats of Billie T.C. ~


I will say that this line-up of Billie polish's are a copy-cat of Color Club Electro-Candy. It is a neon with a -very- subtle blurple shimmer that is very nice. They are all very pretty but need 3 to 4 coats for opaqueness.....I think that they would look best over a coat of white but would still need 3 to 4 coats. They dry super fast so that is not a problem for me, even though I -hate- polish's that need that many coats I will make an exception for these insanely bright colors.

As with all extremely bright colors this polish was very hard to capture in most lighting. I feel I have done a good job with the florescent lighting photo's, though. I have used those hearts that I purchased recently for some nail art= a trial to see how well they hold up. So far none of them have snagged on anything, and they are sticking on pretty good. I used nail glue to glue them in place, then used 2 coats of clear nail polish over them. Hopefully you can see the thickness of the hearts in these photo's, they are pretty thick ~ but I have yet to find nail art pieces that are thinner than this..... I just stuck them on my RIGHT hand ring finger in a random pattern, on my LEFT hand I tried to do a little more of a pattern. These are more translucent hearts with alot of flash to them.


When I am looking at nail supple sites for these types of things, they never say how thick the object is..... these types of hearts for example. It seems like this is the standard thickness for nail art pieces, and what I have seen in the stores it seems to be the same.. also some of the nail art hearts & stars or whatever are too large and do not bend. So if they are sitting on a curved part of your nail, they poke off your nail bed. OH WELL... These problems are why KONAD was invented ♥

~ Florescent Lighting ~


~ Florescent Lighting ~


~ Florescent Lighting ~


~ Florescent Lighting ~


~ Outside - Shade ~


~ Outside - Shade ~
♥


♥ Billie Electric Shimmers = Swatch's ♥

~ Above - In the Shade with Flash ~
~ Below - Shade ~


All Swatches, Left to Right =
  • 25-1 Electric Blue,
  • 25-2 Electric Pink,
  • 25-6 Electric Fuchsia,
  • 25-4 Electric Coral,
  • 25-5 Electric Purple
  • 09-5 - Feeling Blue


These polish's are somewhat translucent and need 3 to 4 coats for good opacity however they dry fast and are $ .99 cents in my town so I aint gonna complain. They dry to a satin/matte finish and need a good coat ( or 2 ) of a shiny Top Coat. I suppose that this is the 'new' line of Billie Polish's for summer? There really is little information about these polish's, sadly. But I am very happy to model them. They are available at Dollar Giant store's and various other discount stores in Canada.
~ ♥ ~