
indoors

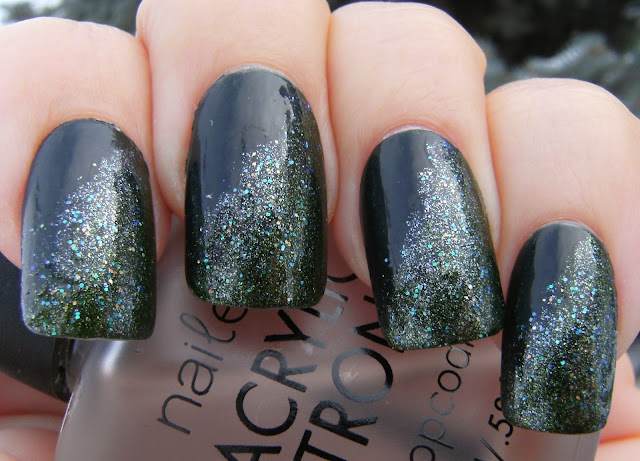
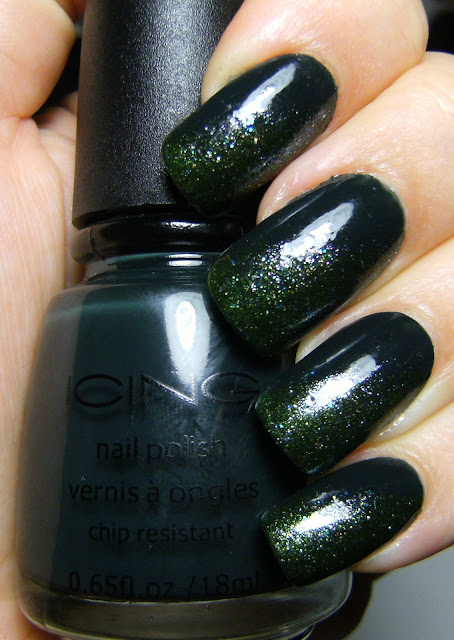
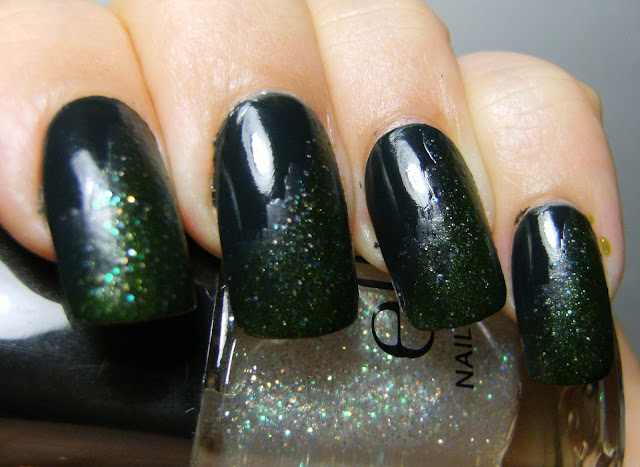
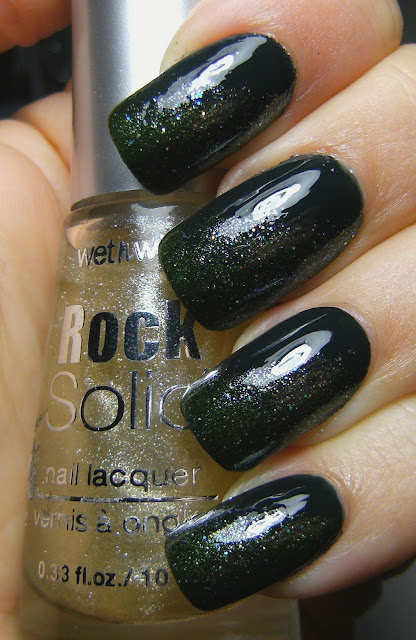
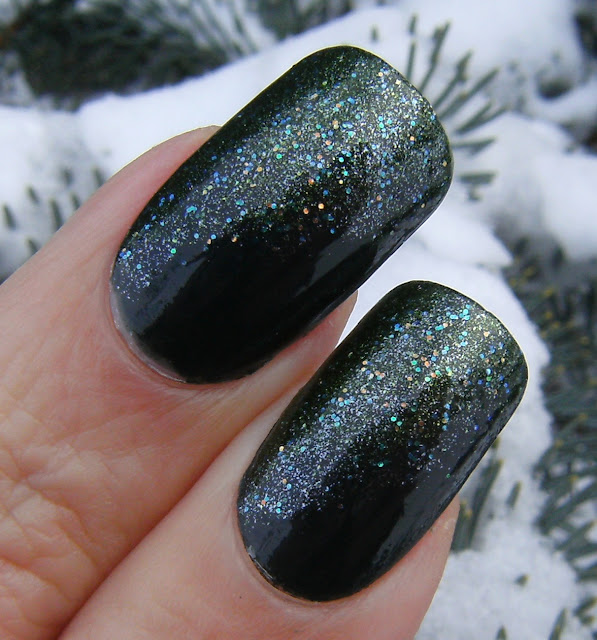
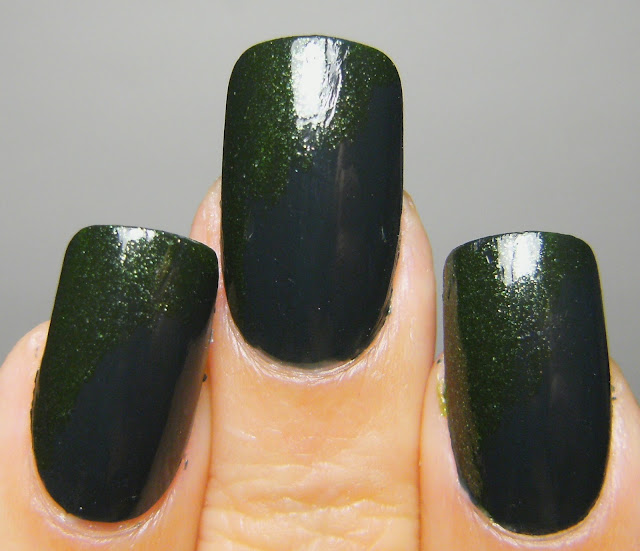
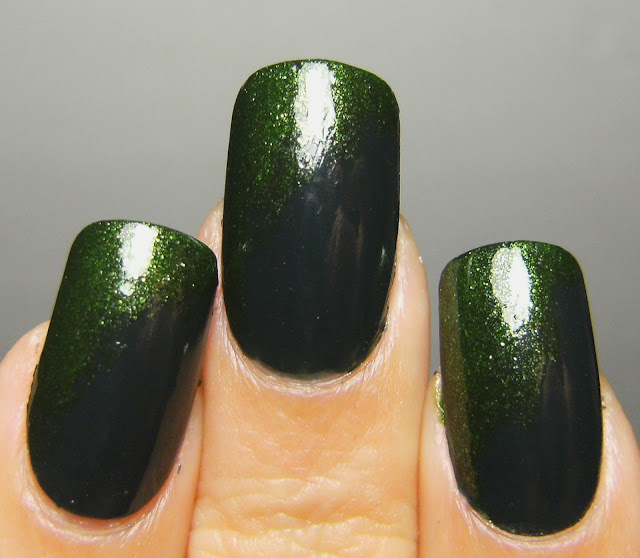
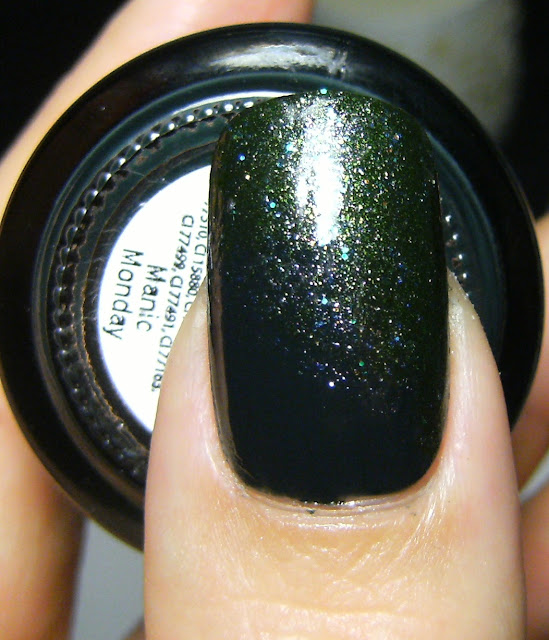
2 coats of Icing By Claire's Manic Monday a dark green
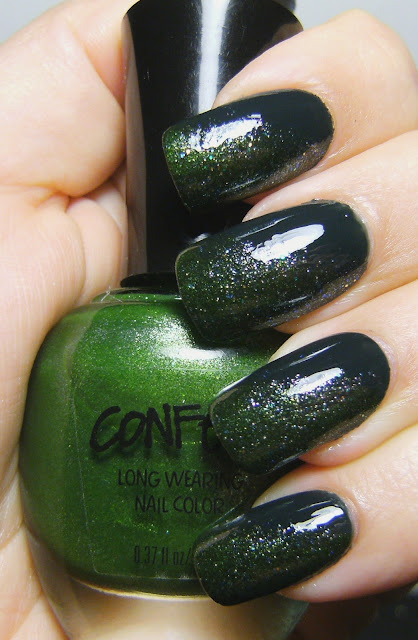
2 coats of Confetti My Favorite Martian diagonally graduating away from the tips.
1 layer of sponging with Confetti My Favorite Martian
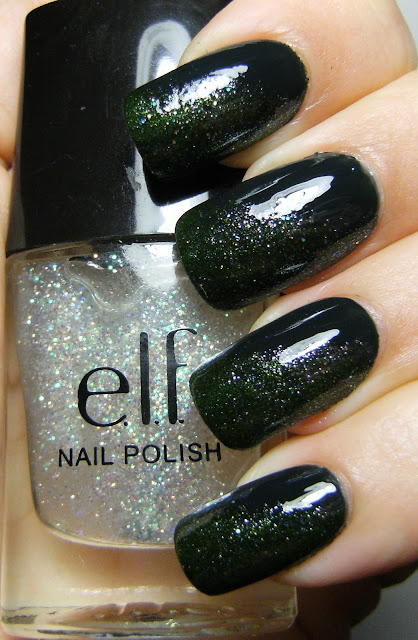
1 coat of ELF Twinkle, a sparse iridescent glitter covering the sponged area
1 coat of Wet n' Wild Rock Solid Sparkling Diamonds, applied over sponged area.
before TC, This ELF polish "Twinkle" dries matte.
A Quickie on Sponging; there are several great videos on you-tube on sponging, my new technique is to apply polish to the area I wish to sponge, getting alot of coverage by applying polish normally then when it's dry to go over the whole area with a sponge blending the sponged area with the base colour. This cuts down on the actual sponging, so I really only have to sponge a small area and go over the area I painted to get a slightly textured look.
These two polish shades are not the best colours to do a short tutorial with, but after the mammoth amount of snow my town received, I need to remind myself of the beautiful greenery that is all covered up. I will be doing a few more sponged looks this week, but today I needed GREEN!
so here is my first 'coat' of confetti my favirote martian, I didn't want to have a straight line, so I haphazardly applied the polish (from base to tip) in a curve, This is a dense glass fleck polish, so I wasn't worried about coverage.
I went over the area again, trying to create a jagged not-so-perfect look
I then got out my sponge an applied a drop of the confetti my favirote martian and followed the outline I created in my first two steps. There is some texture visible. I like this and think it adds to the appeal of a sponge mani look.
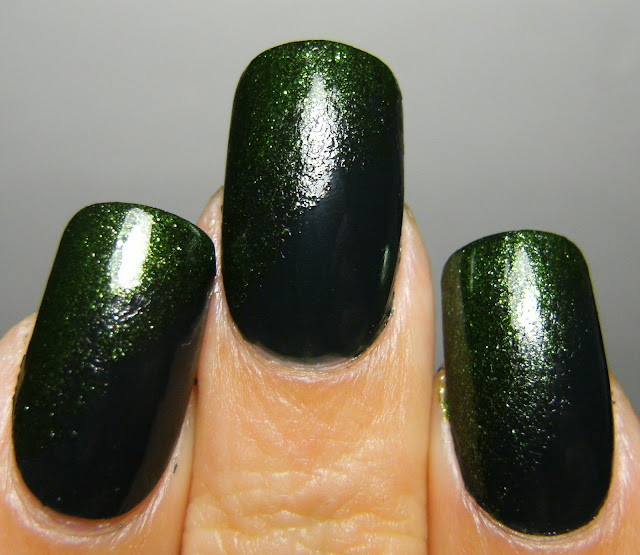
In this photo, I have added the ELF iridescent glitter polish, a coat of WnW Rock Solid Sparkling Diamonds and a coat of Nailene Top Coat.

HERE is a few interesting tid bits in addition to my post yesterday;
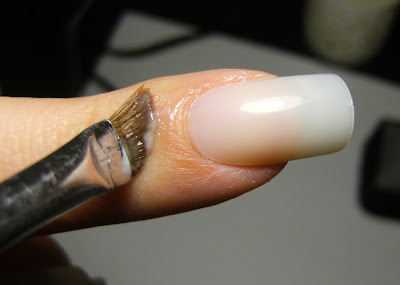
apply any lotion around cuticles using a small brush.
and 25 min after applying polish. I forgot to take a before photo but I really blobbed this polish on my finger♥
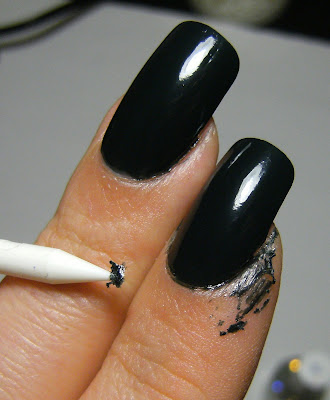
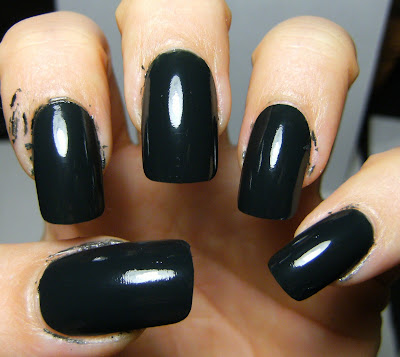
Here is a before of my full mani, It was actually hard for me to do a messy job! I paint my nails so much that I really don't make a lot of mistakes, or, mistakes that need major correcting.
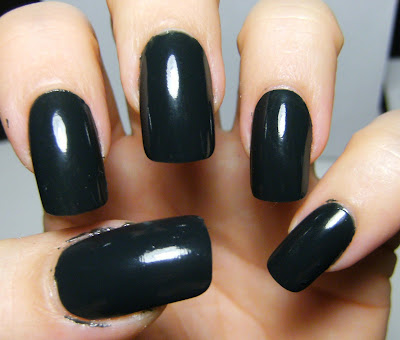
and after picking away at the polish mistakes and washing my hands..... I still had a few bits of polish to remove with acetone, but this method definitely cuts down on the use of acetone.
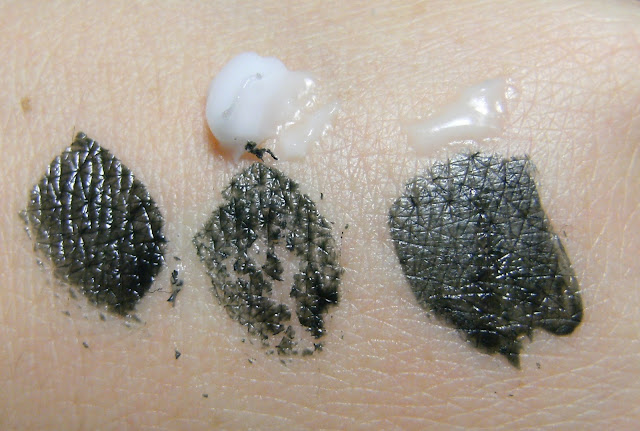
Here is another experiment I did with lotion to show the effect that using a moisturizer around your cuticle can have.
L - R; no lotion - Lotion applied before polish - lotion applied after polish

no lotion - Lotion applied before polish - lotion applied after polish
no lotion - Lotion applied before polish - lotion applied after polish
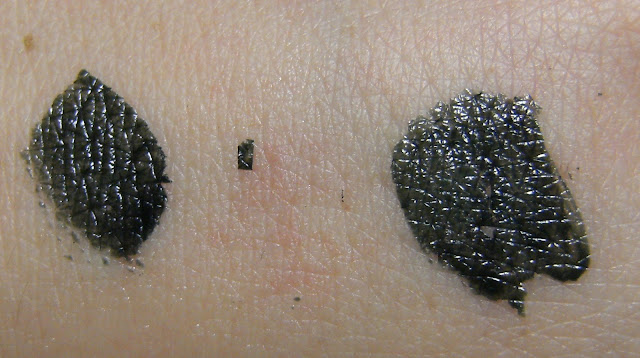
this is the back of my hand; Plain polish stuck to my skin through 2 hand washings, whereas the polish blob in the middle that I applied over moisturizer I was able to pick off and was gone completely after 1 wand washing. The polish on the far right that I applied moisturizer on top of stayed put.
This means that there was enough moisture in the sample in the middle for polish to NOT ADHERE to my skin. applying a moisturizer, or Vaseline or diaper creme( lol ~ but it works awesome ) to your cuticles will prevent you from using excessive means to remove any polish mistakes.
And after that science lesson, here is a few more photos of my current mani.....

Icing by Claire's Manic Monday my base colour = shouldn't this be blue, and not green?
♥
8 comments:
wow.. how long does it take you to do these types of manis?
Very smart!
I'll try that tonite :)
i love your tips! will do that on my next mani! thanks for sharing =)
Your experiment with the lotion was very good. I never even thought of that.
And I love this sponge look. It looks like half of a Christmas tree is there. Very cute!
Love the lotion idea--thanks for posting, I'm going to try this next time I do my nails.
Your manicure looks sooo nice!
Super shiny. Shiny with extra shine. Great tutorial.
♥ Kaitlyn - these sponge manis are fast. I lay down a base, add a coat or two of the complimentary colour and and when it's dry I start sponging.... I like to do this type of look and have a fast good system!
♥ Jennifer - Thanks - try the lotion trick, I would love feedback
♥ rosey - Thanks - its easy to do!
♥ Kimberly - Thank you, I never thought of applying lotion in this method before either... I am sorry I waited so long!
♥ Jennifer Leigh - Thanks - please do try it, it doesnt get every polish mistake but it helps alot with the acetone clan up, or just washing your hands after,
♥ jaljen - Thanks Jaljen - The dark green base was a very shiny polish on it;s own.....
Love this look. It looks like ice all over the trees. Will definitely try that lotion trick. Looks like an answer to a prayer.
Post a Comment